
How To Crochet Seamless Hats
By Molly Ferriter – 12 Comments| I’ve been meaning to talk to you about something for quite some time. It’s embarrassing, I know. But, it needs to be said. You have visible seams on your hats! Don’t worry, I won’t tell anyone; I have a quick fix that will change your winter hats forever! Everyone drop your hooks! Repeat after me…”I… will… not… make… hats… with… visible… seams… ever… again.” | 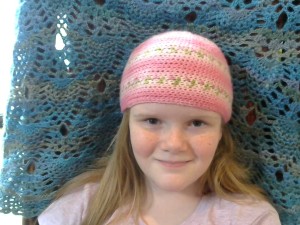
|
Whether crocheted in half double crochet, single crochet, or double crochet, many winter hat patterns end up with a visible “seam” in the back of the hat where one round ends and the next begins. The picture below to the left shows a few hats with visible seams.
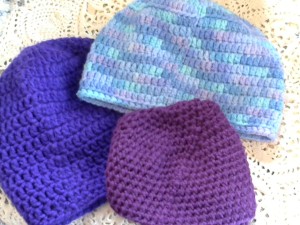
Gasp! The Dreaded Seam!
Well? Tell me what it is!
Okay. Most hats are crocheted in the round, with the patterns following one of two ways to change rows. The first way is to stop at the end of a row, slip stitch in to the first stitch, make 1 to 3 chains (depending on which stitch you are using), then proceed with the row. This results in a visible seam in the hat.
To avoid the visible seams in hats, you must change rows in a different way. When you get to the end of the row do not slip stitch into the first stitch. Instead, you should crochet right into the first stitch, crocheting whatever stitch is called for in the pattern. In other words, work the first stitch in the row right into the first stitch in the previous row. This technique is sometimes referred to as crocheting spiral. Changing rows in this way will eliminate any seams in your hats. As a matter of fact, many hat patterns are written in this way.
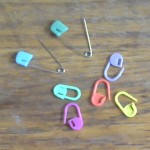
Stitch Markers
When changing the rounds in this way, it is hard to tell where one round ends and another begins. What ever do we do? We must use a stitch marker Place a stitch marker on the first stitch of each round (or the last stitch, whatever you prefer as long as you do it the same way every time). When you reach the end of a row, remove the stitch marker, crochet right into that first stitch that you marked and proceed. Place the marker in the new first stitch of the row. Remember, you can use stitch markers, baby pins, bobby pins, whatever you have handy.
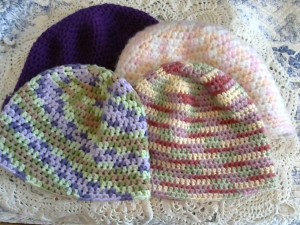
Look, Ma! No seams!
Alright, Crochetspotters! Get busy! This winter is supposed to be one of the coldest in recent years so go make some hats… without seams. Need an easy hat pattern? Check out the hat section. Do you have any tips for crocheting winter hats? Share them below!

It’s so exciting to see you in print Molly! I’m so proud of you! I love that you have pictures of your girls in your creations too! You are inspiring me to get back into crocheting! <3
I didn’t know you crocheted, Dora! Yay! Get busy! Pick up those hooks!
I do like the spiral method for hats till you get to the very last row. what can you do to avoid that uneven look once you sl st to join the last stitiches?
When I get to the last stitch, I complete the last stitch, then slip stitch into one or even two stitches, then pull tight. I make sure to tuck the end in really well. The end result is a barely noticeable little bump. On my husband’s hats I don’t even notice any bump at all. Also, if the little bump (which is incredibly less noticeable than the “seam”) is bothersome, you can do the slip stitch described above, then do one row in hdc, dc, or sc, slipping into the last stitch like normal, and this will hide any bump.
Hey, that works. Did the sc and like the finished look so much better. Thanks!
Great!
I do have a seam on my hats but it is a straight one. I simply complete the row with a slip stitch and then turn my crochet and go back in the direction from which I came. This gives a seam but it is a straight seam. I will try the spiral method on my next hat but what about the question asked about ending without an uneven bulge when you use the spiral method?
Try the seam and you won’t want to go back to the seam. Now that I do the spiral I never want to have a hat with a seam.
I’ll copy the response to the above question here.
“When I get to the last stitch, I complete the last stitch, then slip stitch into one or even two stitches, then pull tight. I make sure to tuck the end in really well. The end result is a barely noticeable little bump. On my husband’s hats I don’t even notice any bump at all. Also, if the little bump (which is incredibly less noticeable than the “seam”) is bothersome, you can do the slip stitch described above, then do one row in hdc, dc, or sc, slipping into the last stitch like normal, and this will hide any bump.”
Thanks for the question, Mary. Let me know how it goes with the spiral method. Good luck!
thanks so much for the great idea. i’ll give it a try
Hi, Beverly! I will never go back to the other method now that I make mine spiral. It doesn’t have a seam, but also, its easier to just keep going around and not having to slip into stitch, chain 2, then proceed every row. With a beanie, I do my increases then just keep going around until I get the length I want.
How would I change colors?
On the row right before the color change, slip into what would have been the last stitch, do the chain 2 or 3 (depending on what stich- dc, hdc, sc) and proceed with the spiral. So, in other words, do the spiral, except on the row right before the color change, then do the other method of slip stitch/ make chains. This should eliminate any uneven color rows. Please let me know how that goes.