
How to Wrap a Bracelet in Crochet
By Amy Yarbrough – 13 Comments| Hello everyone! This is Amy, Crochet Spot’s newest. Since March I have had many exciting opportunities to share with you my creations and today I am going to try my hand at a photo tutorial. Make sure and tell me what you think. Your feedback means a lot to me!
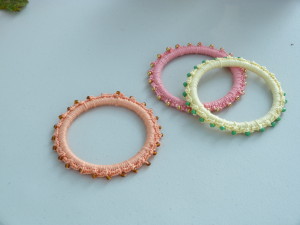
This is the photo tutorial for my original Beaded Bangles Crochet Pattern. |
 |
Finding Treasure
Most of us have a tendency to keep things we think we might eventually need and some are just more thoughtful about this than others. Sometimes they get termed a pack-rat, but who’s to know what might come in handy?
This is a subject that is often the point of discussion in my home. But despite our relative opinions, we can all benefit by taking a closer look at what we have to consider their possibilities, right? The internet is full of ideas on how to “do-it-yourself†and more often than not they consist of using everyday things, stuff around the house that might seem a nuisance or just plain drab.
Today I’d like to give you an idea of how I view even the most unlikely things as craft-potential. Here’s a little background: My father is an automotive mechanic, and growing up, he would bring home little things like steely balls. We had quite a collection and I am sure if you looked around today you would still find a few. Now you might ask, how does automotives have anything to do with crocheting? Though Dad has stopped bringing us steely balls, he brought me something a little more useful. Exhaust rings. Okay, so you may not know what I am talking about. Basically, they’re hard metal rings from a Chevy truck. Anyhow, he handed me a few, slightly greasy and roughed up, and said I might be able to do something with them. Could I? Let’s think. Hmm…
I gave them a good scrubbing and realized they were a nice size for a bracelet. My first attempt at using them was with ribbon, but I wasn’t satisfied with the outcome. So I left them in my craft supply container for a while.
Until a few weeks ago.
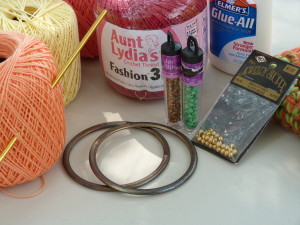
Having only recently found the joy of crocheting with thread, I drew a beautiful skein of Aunt Lydia’s Fashion crochet thread size 3, and grabbed a hook. Here’s what I did:
Let’s Begin!
What you will need:
About 12 yards crochet thread
25 or more seed beads
A bracelet or something that fits like one
Crochet hook, any size will do but I used size F (3.75mm)
Time to Wrap!
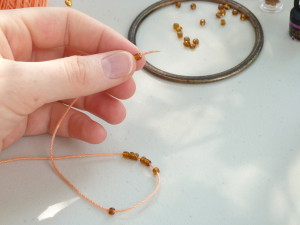
The first thing to do is string all the beads onto the yarn. Depending upon the size of your beads, you may have some difficulty. I simply dabbed a bit of glue onto the end and rubbed it in. It should dry in seconds.
Mouse over pictures for a left-handed view.

Start with a slip knot on the hook.
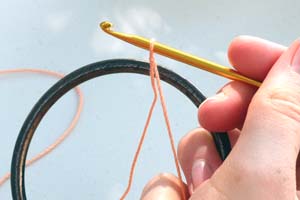
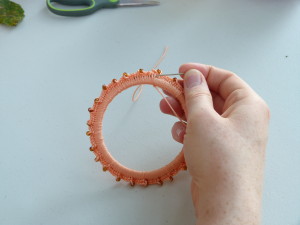
Bring the slip knot through the middle of the ring and hold it in front.
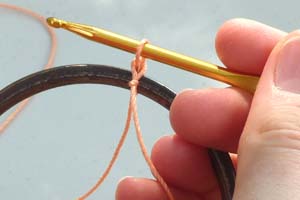
Chain 1 by drawing up a loop from behind and pulling it through the slip knot.
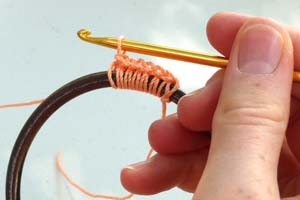
Single crochet 6 stitches around the ring.
Pull a bead up to the last sc made and chain one over it. Push the bead up through the stitch.
Single crochet 6 more stitches.
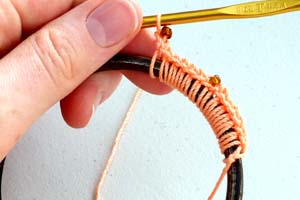
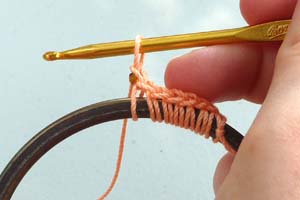
Pull a bead close to the last single crochet and chain 1 over it, pushing the bead up through the stitch. Continue this pattern: * 6 sc, draw up bead, ch 1 *.
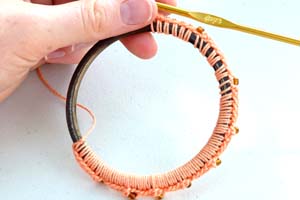
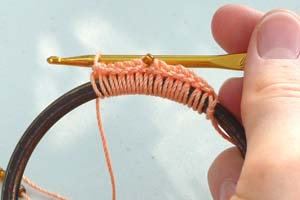
After so many repetitions, slide the stitches closer together. Remember, you will want the finished band to be really full of stitches and tight. If not the stitches will slip around and so will the beads.
By the time you are down to your last five or six beads the going will be tough. You will have to work the already made stitches closer together in order to fit the rest of the stitches on it. But don’t worry, the finished product is worth it.
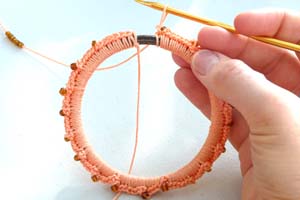
When you have added all the beads on the thread, slip stitch into the first sc made.
Finish off. Weave in thread. You might want to use a smaller needle than a yarn needle. (See next picture for an example). I worked below each stitch around.
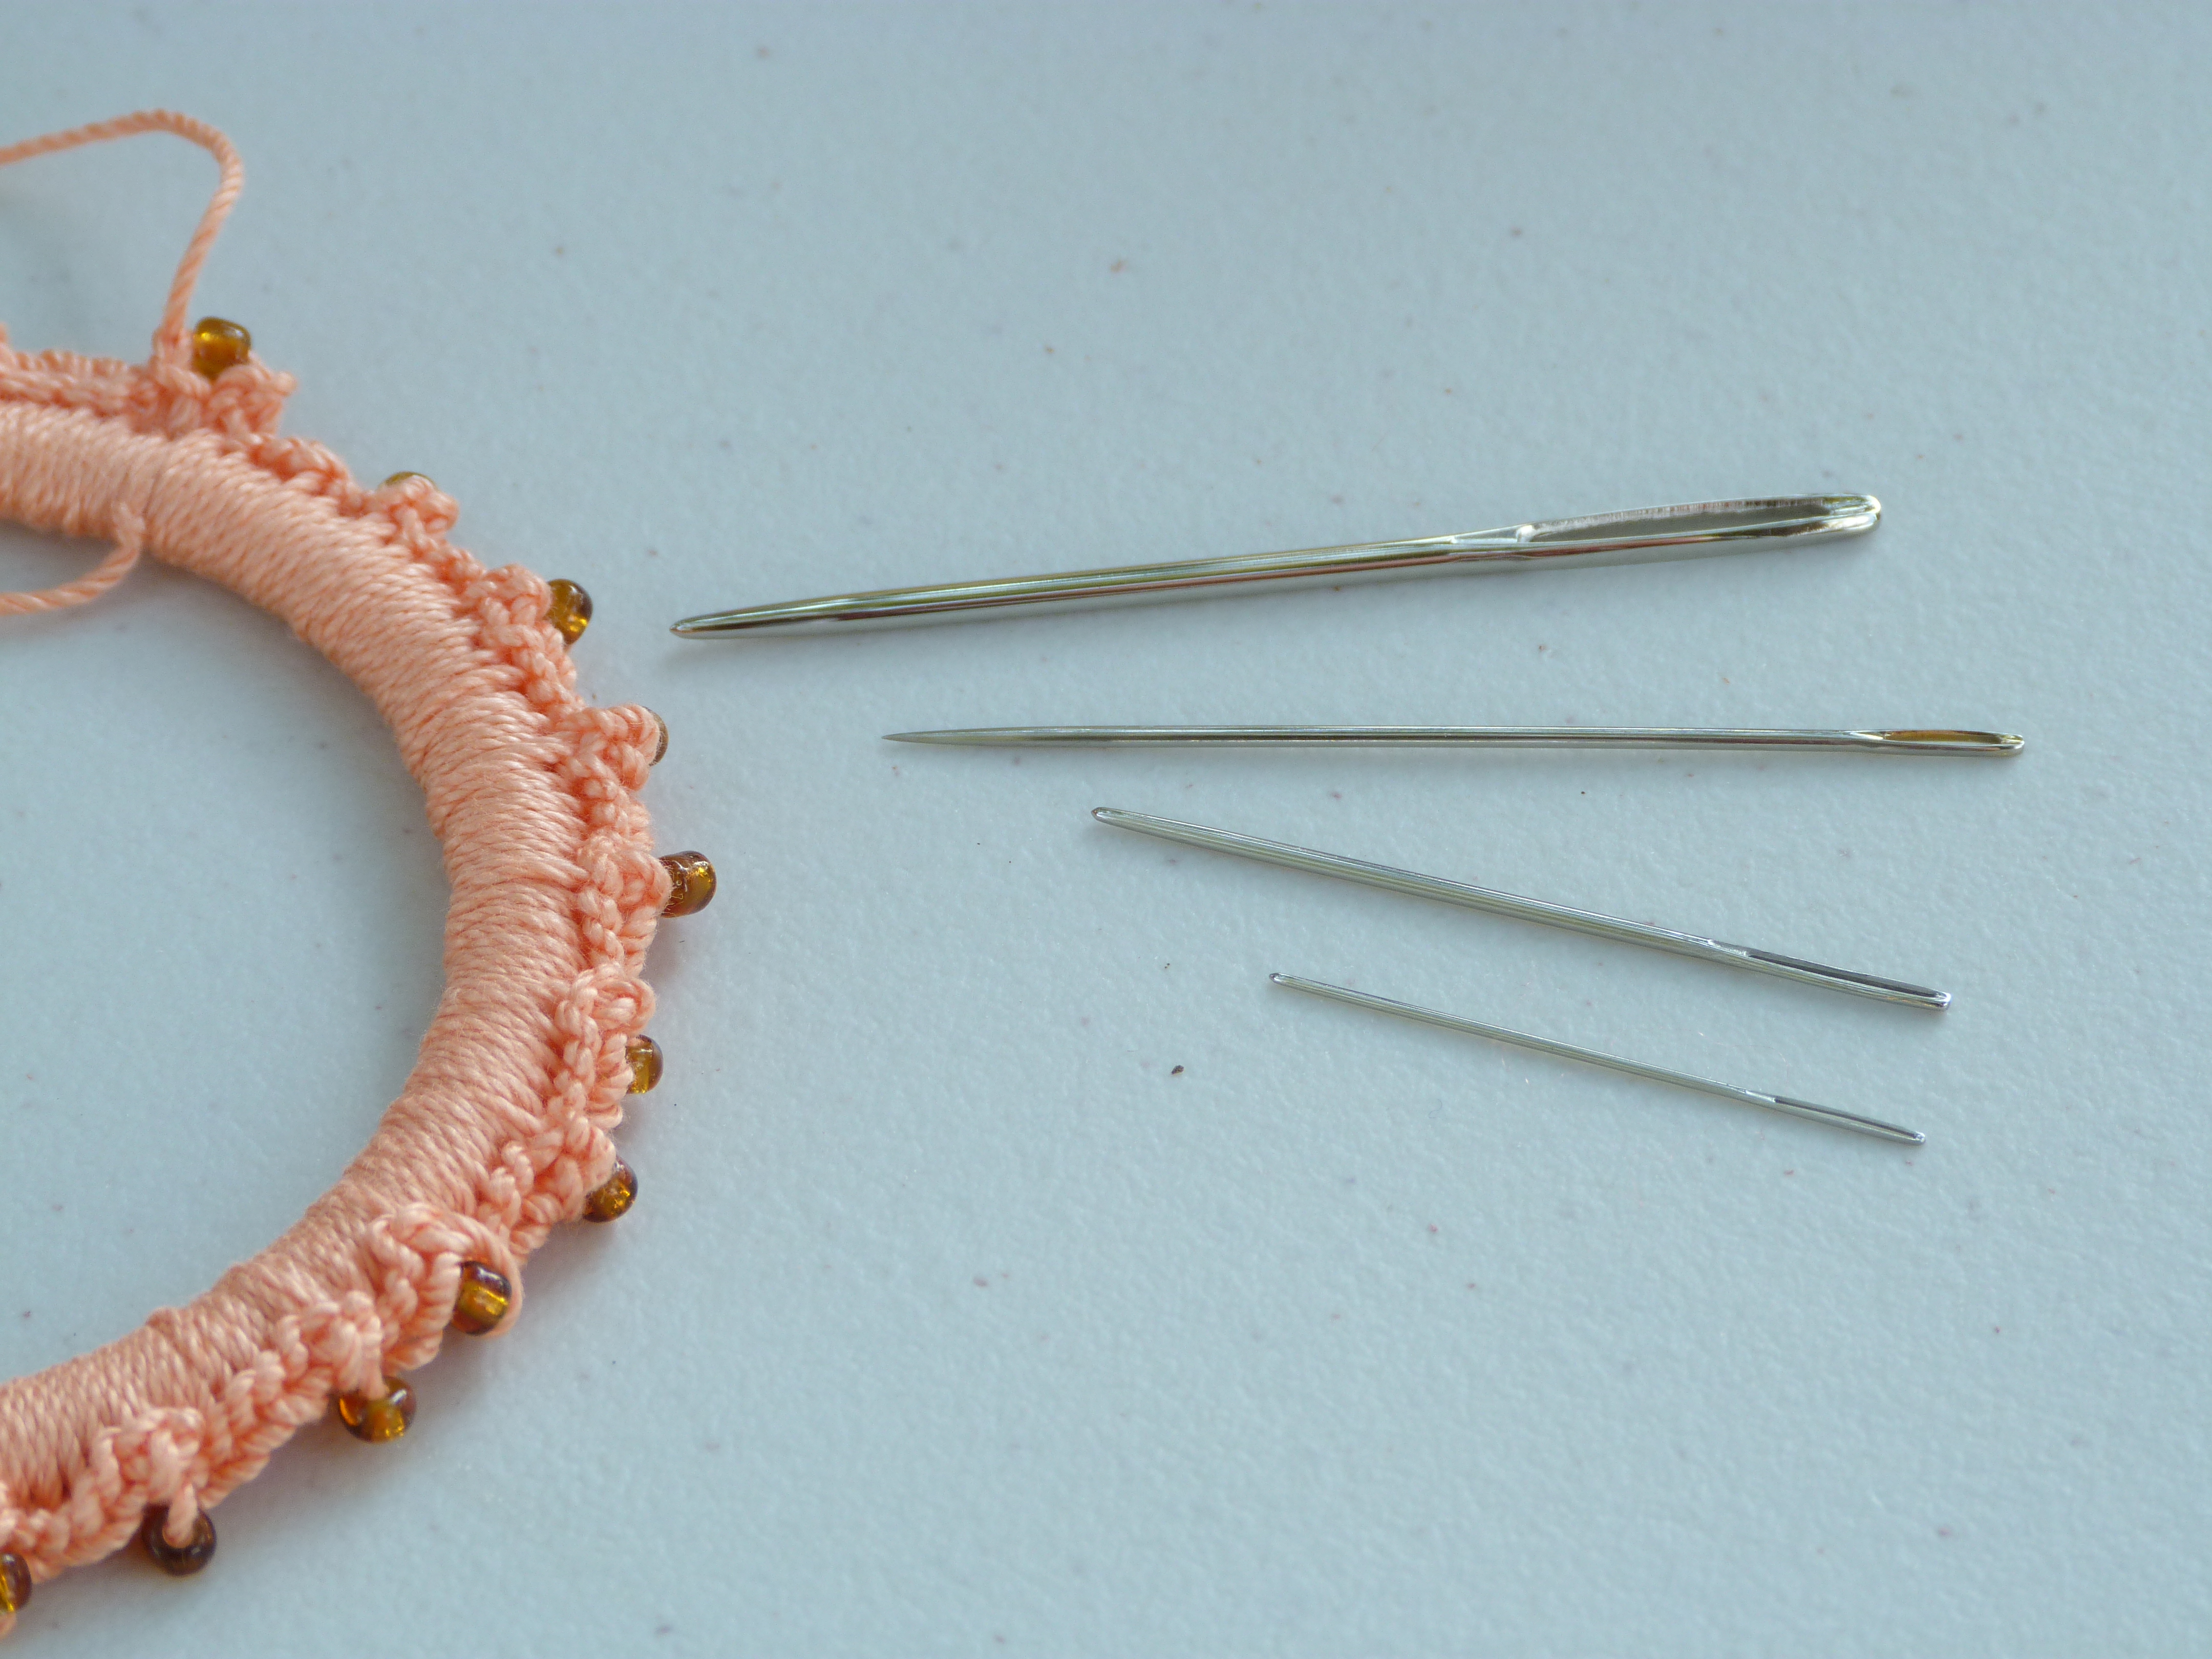
The first needle is a yarn needle, the second is an embroidery needle, and the next two are different sized cross-stitch needles. I used the larger cross-stitch needle.
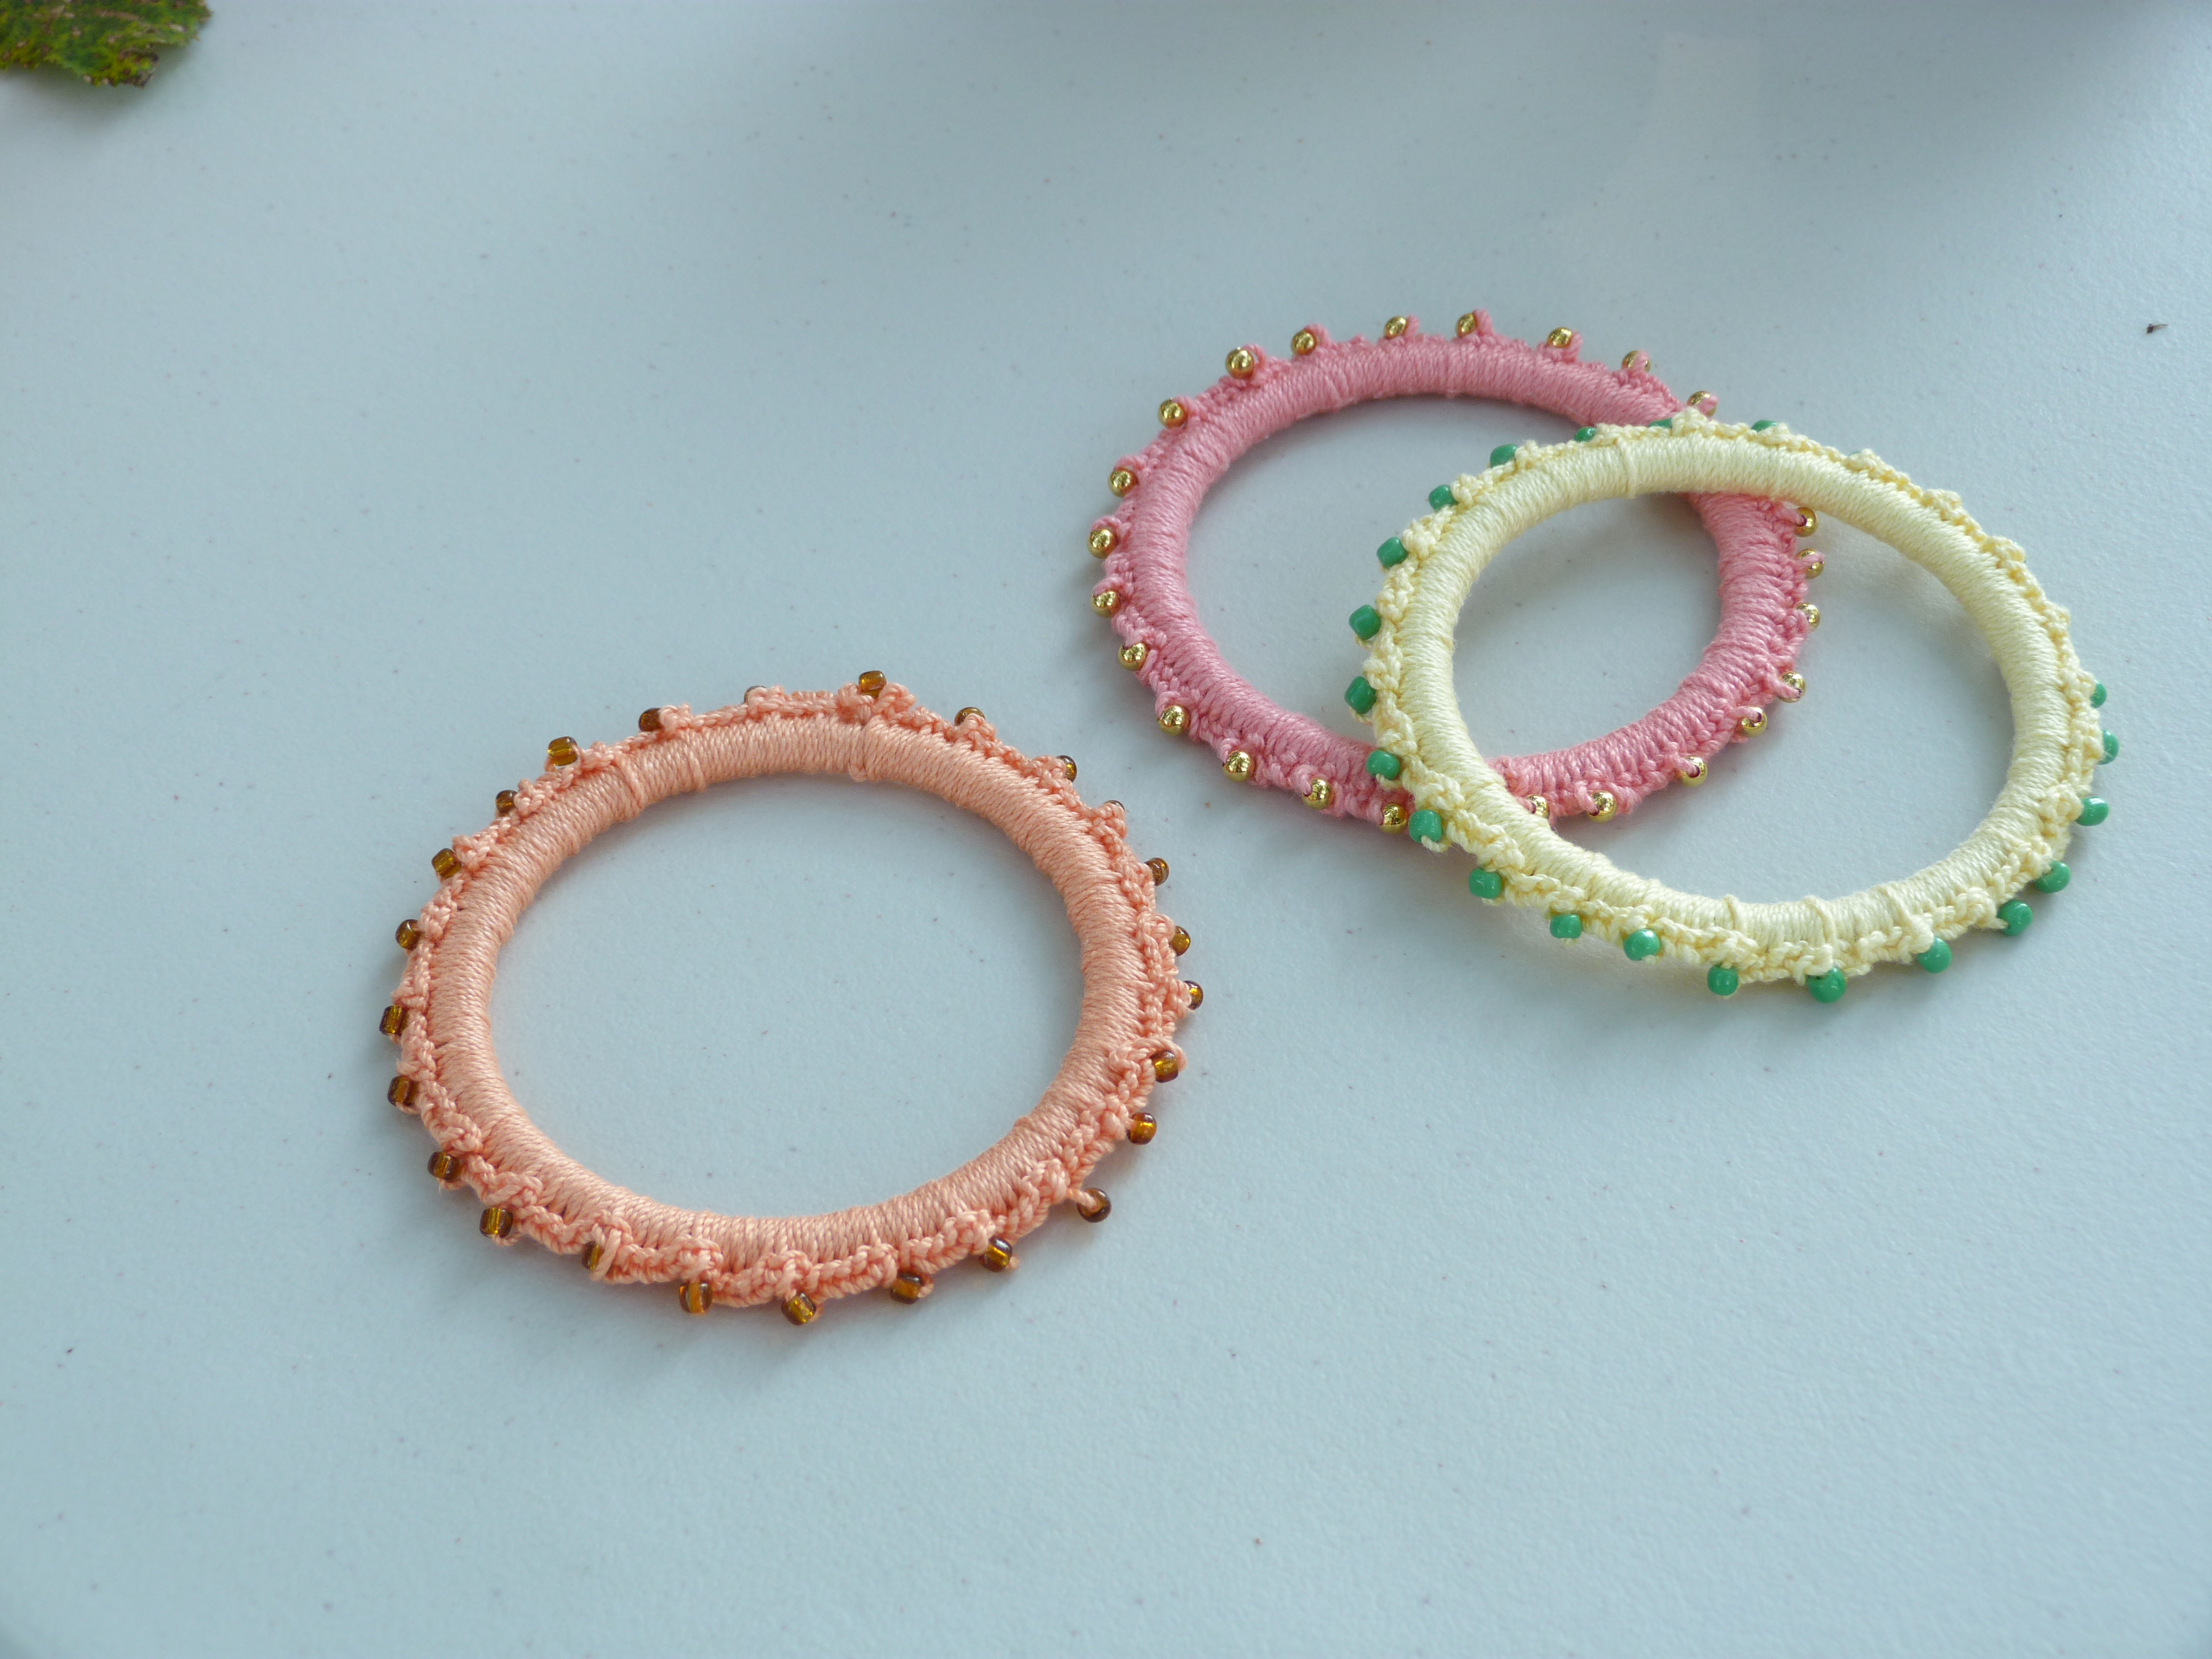
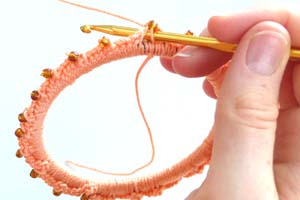
And voilà ! Done. A beaded bangle just for you or someone you love. Be creative, play with color, try different size beads and hooks.
This is a great idea for redecorating old bracelets that no longer suit your style. It’s a simple matter of wrapping them with crochet!
Beads
You can use more beads to make tighter wrapped bracelet, or if you like, space the beads out more.
Thread or Yarn
Be inventive. Try your favorite yarn instead of thread and see how you like it. Just remember, seed beads will be a little harder to work with.
Hook Size
I used a specific hook because it suited my style, but you can use just about any size you wish. One tip though, a really small hook will be harder to work with while a really large hook will give you large stitches on top.
If you would like a concise pattern without all the photos see Crochet Pattern: Beaded Bangles.
I hope you have enjoyed this tutorial. I know I have enjoyed working on it. If you run into any problems just leave me comment down below and I will get back to you as soon as possible.
Until next time, keep crocheting!
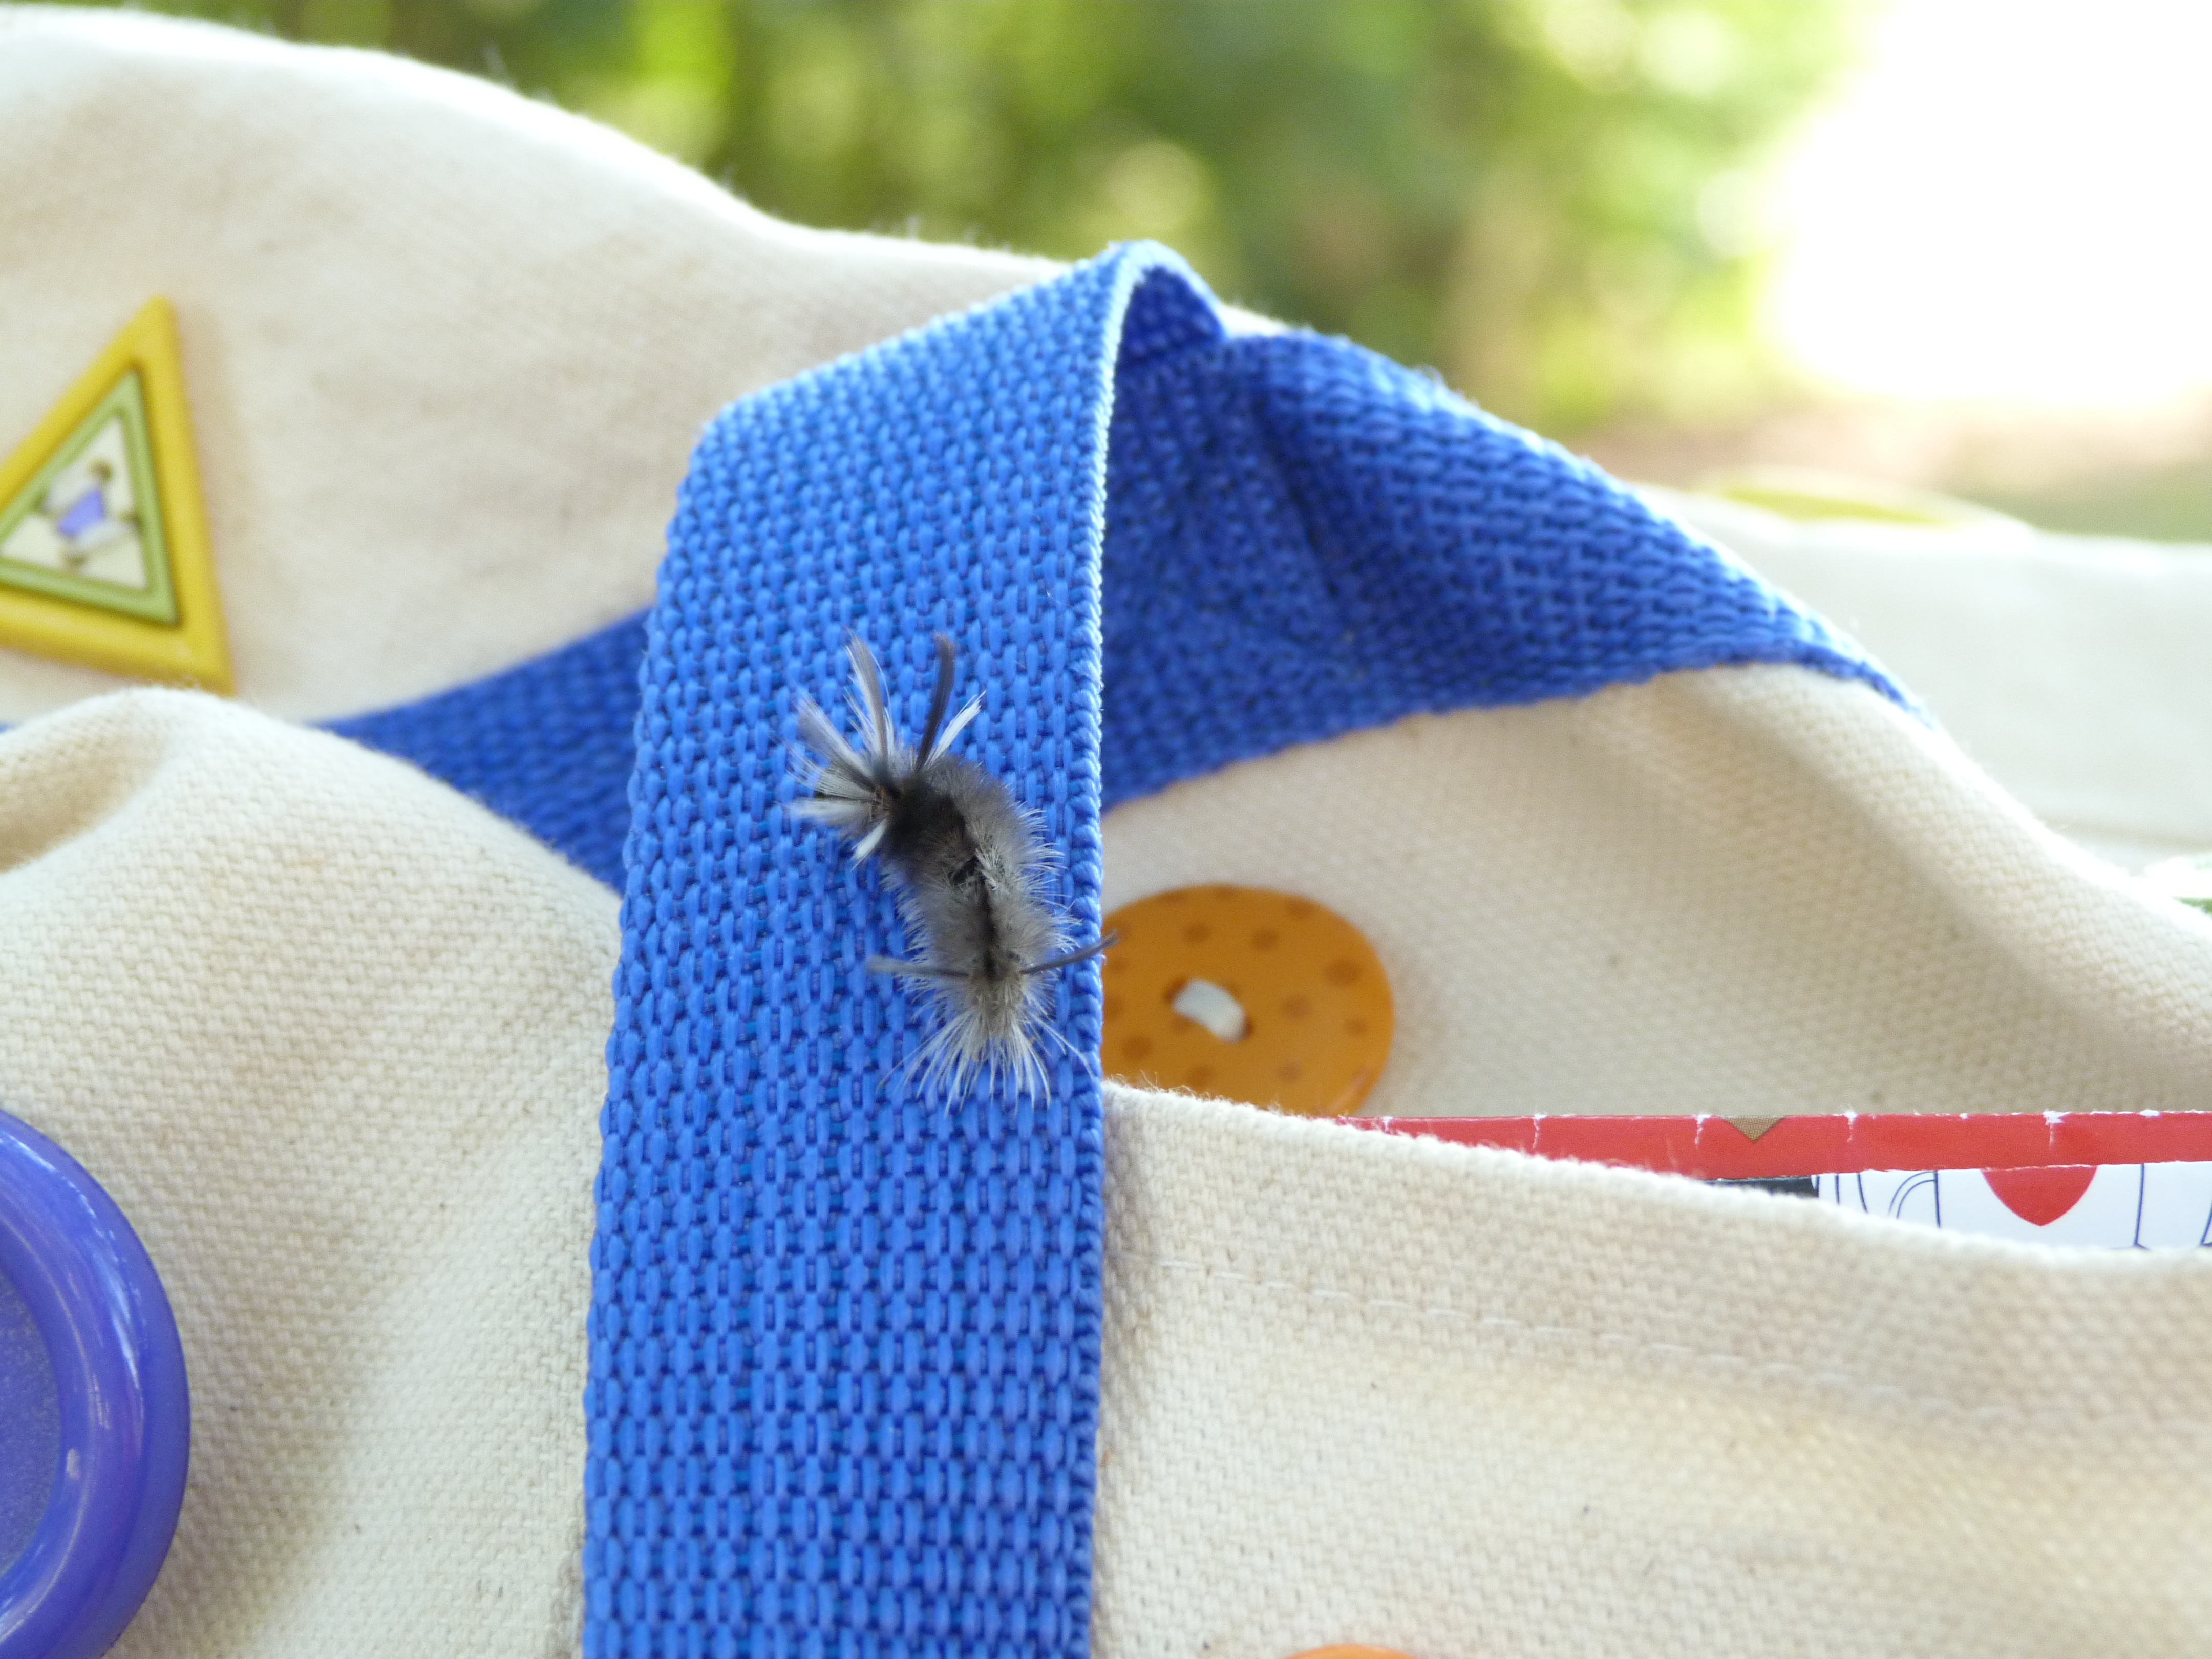
P.S. While working on this project I made a little friend. Maybe he likes color too!

Great tutorial, Amy!!!
Thanks Cami!
Can this be made for children or should it just be for grownups?
I like this idea and this was a great tutorial!
Children still at the age of chewing might swallow a bead, but any older and it should be fine.
wow, this looks stunning and your tutorial is wonderful. I’m planning on grabbing some old bangles in the next hour and following it:-) Thank you for the inspiration
Inspirational and easy to DIY…That’s what I say when I read such nice tips and tutorials. I liked colors you’ve chosen. And it’s easy way to make your weekend at home (because I’m ill now) pleasant and do something useful. Amy, can I make a necklace following the same tips? I’d like to try some.
Hello Maria,
I’m happy you like my work.
Sure you can try it on a necklace, as long as the necklace is firm. I’m not sure how it would work otherwise. It’s simply single crocheting over something. You will most likely have to account for the larger circumference and add more beads, or add the beads at larger intervals. But the theory is sound. Have fun!
Amy
Lovely, thank you. I also enjoyed seeing your little friend at the end 😀
Love this and your tutorial! I am thinking of possibly making earrings using smaller rings and then attaching them together with those jewelry jump rings. However not sure if I will be able too using smaller circumference rings, what do you think?
Hi Becki,
I think it would be a great idea! The theory behind the technique will work fine, but the number of stitches will depend upon the ring circumference, as well as the amount of beads. It might take a little experimenting. Tell me how it works out! I adore crocheting earrings.
Amy
Thank you for your simple pattern .It’s very great. 😉
Thanks for sharing! You can also do this over used glowsticks, which is a great way to recycle them 🙂
oops, I mean glowstick bracelets 🙂