
Free Crochet Pattern: Dinosaur Pencil Case
By Claire Golden – 5 Comments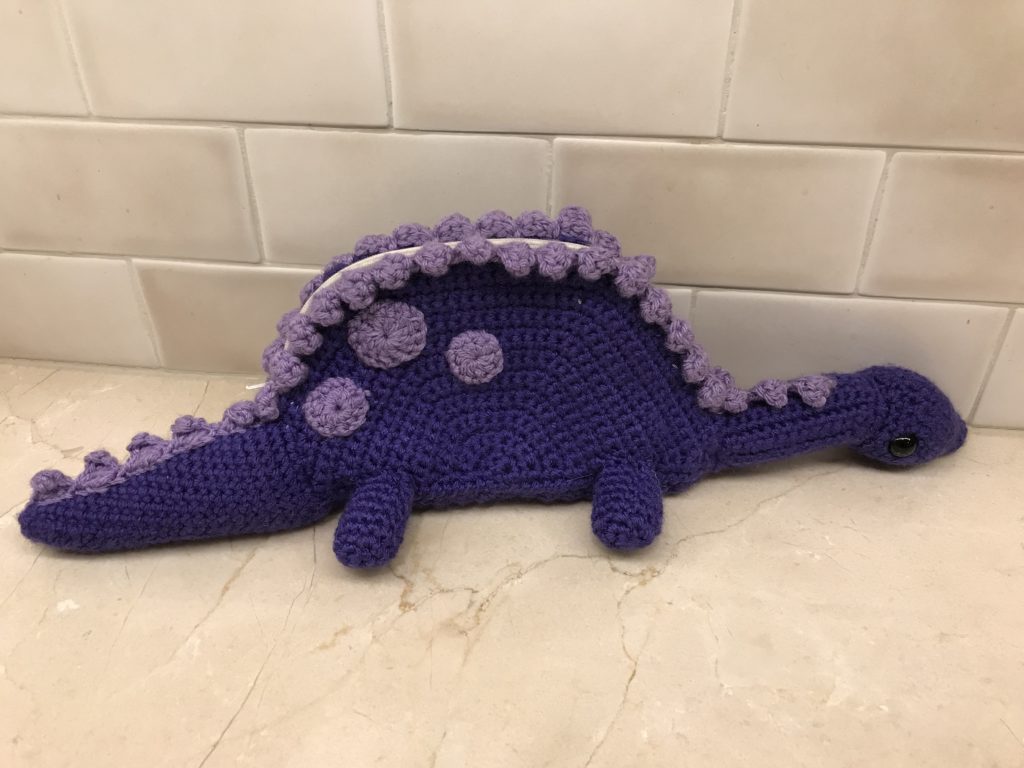
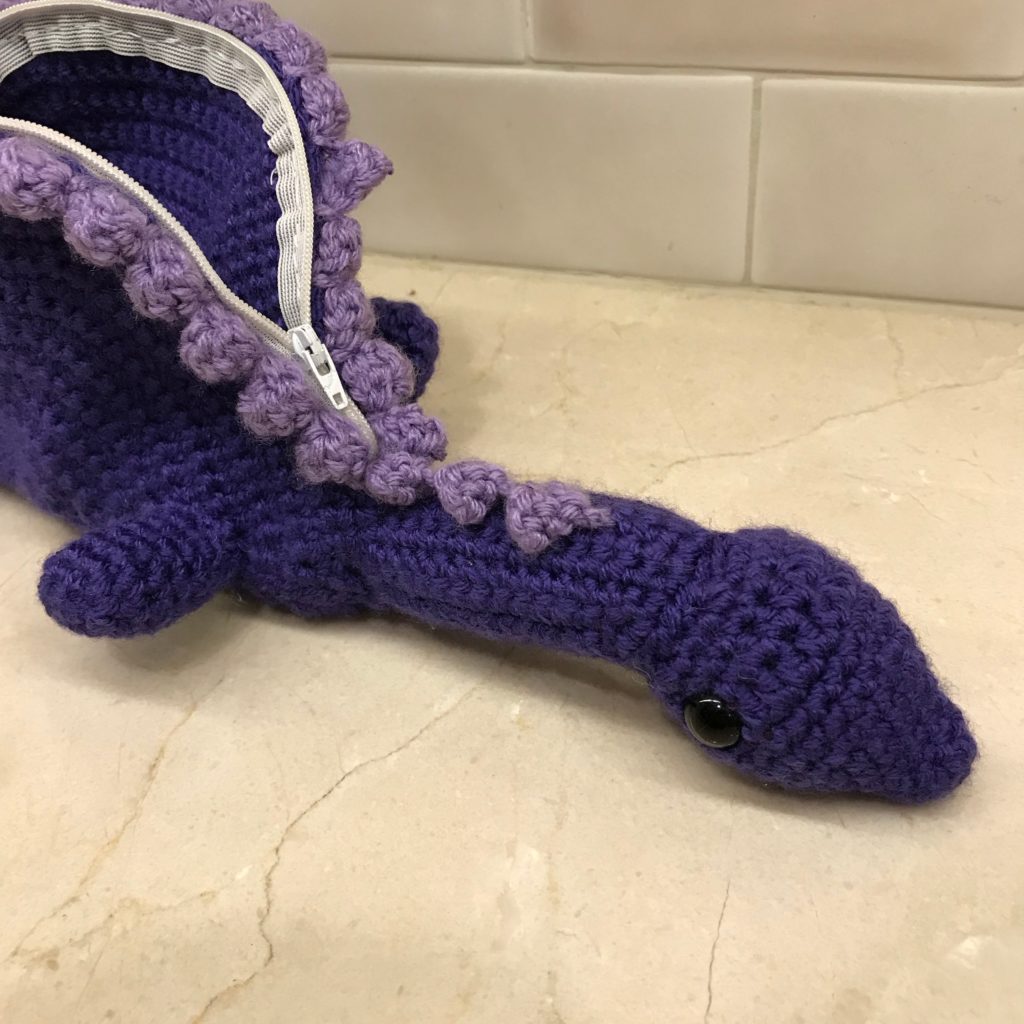
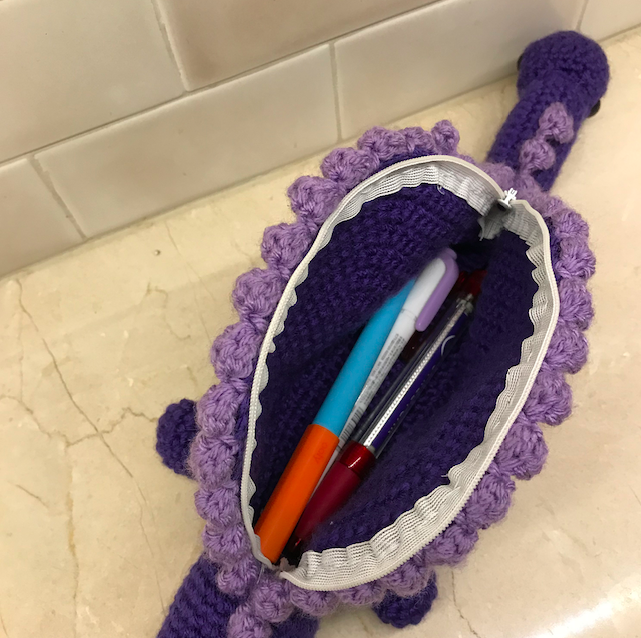
It’s back to school season, and cute pencil cases have been catching my eye all over the place. I spotted a plush dinosaur pencil case that I thought was the cutest thing in the world, and I wanted to make my own version. This spotted purple dinosaur is the result. It fits a large amount of pencils, erasers, and anything else you could need. It’s my first time incorporating a zipper into a crochet pattern, and I’m so happy with the result. I love combining plushies with practical items. This pencil case would be a perfect gift for a kid who just started school…or for grown-ups who never grew up. After all, I’m a college student who still uses plush pencil cases!
| Skill Level: |  |
Finished Size: 16″ (40 cm) long, 4.5″ (11.5 cm) tall
| Materials: Medium Weight Yarn (approximately 150 yards in main color and 10 yards in contrasting color) Crochet Hook G (4.00 mm) Zipper approximately 12″ (30 cm) long 2 plastic safety eyes (10 mm in diameter) |
Gauge:
Rows 1 – 6 of Side pattern (semicircle shape) measure 2.25″ (6 cm) at longest point
Special Stitches:
2dc cluster: (yarn over, insert hook into indicated stitch, yarn over, pull up a loop, yarn over, pull through 2 loops) 2 times: 3 loops on hook. Yarn over, pull through all 3 loops.
Need help understanding the abbreviations and symbols? Check out the crochet abbreviation chart.
Crochet Pattern: Dinosaur Pencil Case
Base
Row 1: ch 2, 2 sc in second chain from hook: 2 sc
Row 2-7: ch 1, turn, 2 sc in first sc, sc in each sc across
Note: There will be 8 sc at the end of Row 7.
Row 8-9: ch 1, turn, sc in each sc across: 8 sc
Row 10-11: Repeat Row 2
Row 12-36: ch 1, turn, sc in each sc: 10 sc
Row 37-40: ch 1, turn, sc2tog, sc in each sc across until 2 sc remain, sc2tog
Note: There will be 2 sc at the end of Row 40.
Border: ch 1, turn, sc in next 2 sc, then make 40 sc along the side (1 in the end of each row). Make 3 sc in the beginning point (this forms the back/tail section). Make 40 sc up the other side. Sl st in first sc to join: 45 sc
Finish off.
Side (make 2)
These are 2 semicircles.
Row 1: ch 2, 3 sc in second chain from hook: 3 sc
Row 2: ch 1, turn, 2 sc in each sc across: 6 sc
Row 3: ch 1, turn, (2 sc in next sc, sc in next sc) 3 times: 9 sc
Row 4: ch 1, turn, (2 sc in next sc, sc in next 2 sc) 3 times: 12 sc
Row 5: ch 1, turn, (2 sc in next sc, sc in next 3 sc) 3 times: 15 sc
Row 6: ch 1, turn, (2 sc in next sc, sc in next 4 sc) 3 times: 18 sc
Row 7: ch 1, turn, (2 sc in next sc, sc in next 5 sc) 3 times: 21 sc
Row 8: ch 1, turn, (2 sc in next sc, sc in next 6 sc) 3 times: 24 sc
Row 9: ch 1, turn, (2 sc in next sc, sc in next 7 sc) 3 times: 27 sc
Row 10: ch 1, turn, (2 sc in next sc, sc in next 8 sc) 3 times: 30 sc
Row 11: ch 1, turn, (2 sc in next sc, sc in next 9 sc) 3 times: 33 sc
Row 12: ch 1, turn, (2 sc in next sc, sc in next 10 sc) 3 times: 36 sc
Row 13: ch 1, turn, (2 sc in next sc, sc in next 11 sc) 3 times: 39 sc
Row 14: ch 1, turn, (2 sc in next sc, sc in next 12 sc) 3 times: 42 sc
Row 15: ch 1, turn, (2 sc in next sc, sc in next 13 sc) 3 times: 45 sc
Row 16: ch 1, turn, (2 sc in next sc, sc in next 14 sc) 3 times: 48 sc
Row 17: ch 1, turn, (2 sc in next sc, sc in next 15 sc) 3 times: 51 sc
Row 18: ch 1, turn, (2 sc in next sc, sc in next 16 sc) 3 times: 54 sc
Row 19: ch 1, turn, (2 sc in next sc, sc in next 17 sc) 3 times: 57 sc
Row 20: ch 1, turn, (2 sc in next sc, sc in next 18 sc) 3 times: 60 sc
Border: ch 1, working across the bottom, sc in the end of each row and in the initial ch-2: 41 sc total
Finish off, leaving 24-inch (60 cm) tail for sewing.
Sew sides to base, starting at the tail section. The sides will touch in the back and have several stitches between them at the front.
Head
Round 1: make a magic ring, ch 1, 6 sc in ring: 6 sc
Round 2: (sc in next sc, 2 sc in next sc) 3 times: 9 sc
Round 3: sc in each sc around: 9 sc
Round 4: (sc in next 2 sc, 2 sc in next sc) 3 times: 12 sc
Round 5: (sc in next 3 sc, 2 sc in next sc) 3 times: 15 sc
Round 6: (sc in next 4 sc, 2 sc in next sc) 3 times: 18 sc
Round 7: (sc in next 2 sc, 2 sc in next sc) 4 times, sc in next 5 sc, 2 sc in last sc: 22 sc
Round 8: sc in each sc around: 22 sc
Round 9: hdc in next 16 sc, sc in last 6 sc: 22 sts
Round 10: sc in next 4 hdc, hdc in next 8 hdc, sc in next 10 stitches: 22 sts
Round 11: *sc in next 2 sc, sc2tog* 4 times, sc in next 6 sc: 18 sc
Round 12: sc in each sc around: 18 sc
Attach safety eyes. The 8 hdc form the top of the head, and I placed the eyes directly beneath these.
Round 13: (sc in next 4 sc, sc2tog) around: 15 sc
Round 14: sc in each sc around: 15 sc
Finish off.
Neck
Row 1: ch 11, sc in second chain from hook and in each ch across: 10 sc
Row 2: ch 1, turn, sc in each sc across: 10 sc
Row 3: ch 1, turn, 2 sc in first sc, sc in remaining sc across: 11 sc
Row 4: ch 1, turn, sc in each sc until 1 sc remains, 2 sc in last sc: 12 sc
Row 5: ch 1, turn, 2 sc in first sc, sc in remaining sc across: 13 sc
Row 6: ch 1, turn, sc in each sc until 1 sc remains, 2 sc in last sc: 14 sc
Row 7-10: ch 1, turn, sc in each sc across: 14 sc
Row 11: ch 1, turn, sc2tog, sc in remaining sc across: 13 sc
Row 12: ch 1, turn, sc in each sc across until 2 sc remain, sc2tog: 12 sc
Row 13: ch 1, turn, sc2tog, sc in remaining sc across: 11 sc
Row 14: ch 1, turn, sc in each sc across until 2 sc remain, sc2tog: 10 sc
Row 15-16: ch 1, turn, sc in each sc across: 10 sc
Border: ch 1, rotate to work along row end, sc in each row end: 16 sc
Finish off, leaving long tail for sewing. Sew end of Row 16 to starting chain to form a tube with one curved end. The curved end will be sewn to the head.
Stuff the neck, then sew it to the sides (semicircles). There are several unused stitches from the Base to which you will sew the neck. You’ll also need to use 4 stitches from each semicircle, which will meet at the top of the neck. There is still a hole at the back of the neck, though, so next we’ll make a circle to close that up.
Circle for Back of Neck
Round 1: make a magic ring, ch 1, 6 sc in ring: 6 sc
Round 2: 2 sc in each sc around: 12 sc
Round 3: (sc in next 2 sc, 3 sc in next sc) 3 times, leave remaining stitches unworked. Sl st to next sc and finish off, leaving long tail for sewing. Sew to opening at back of neck.
Tail
Round 1: make a magic ring, ch 1, 6 sc in ring: 6 sc
Round 2: sc in each sc around: 6 sc
Round 3: (sc in next sc, 2 sc in next sc) around: 9 sc
Round 4-5: sc in each sc around: 9 sc
Round 6: (sc in next 2 sc, 2 sc in next sc) around: 12 sc
Round 7-8: sc in each sc around: 12 sc
Round 9: (sc in next 3 sc, 2 sc in next sc) around: 15 sc
Round 10-11: sc in each sc around: 15 sc
Round 12: (sc in next 4 sc, 2 sc in next sc) around: 18 sc
Round 13-14: sc in each sc around: 18 sc
Round 15: (sc in next 5 sc, 2 sc in next sc) around: 21 sc
Round 16-17: sc in each sc around: 12 sc
Round 18: (sc in next 6 sc, 2 sc in next sc) around: 24 sc
Round 19-20: sc in each sc around: 24 sc
Round 21: (sc in next 7 sc, 2 sc in next sc) around: 27 sc
Round 22-23: sc in each sc around: 27 sc
Round 24: (sc in next 8 sc, 2 sc in next sc) around: 30 sc
Round 25: sc in each sc around: 30 sc
Finish off, leaving long tail for sewing. Stuff tail lightly, leaving top 5 rows unstuffed. Overlap tail slightly with tail end of base. It will occupy about 5-7 stitches of the semicircles. Sew tail to base.
Legs (make 4)
Round 1: make a magic ring, ch 1, 6 sc in ring: 6 sc
Round 2: 2 sc in each sc around: 12 sc
Round 3-6: sc in each sc around: 12 sc
Round 7: *sc in next 4 sc, sc2tog* 2 times: 10 sc
Round 8: sc in each sc around: 10 sc
Sl st in next sc, finish off, leaving long tail for sewing. Lightly stuff legs, then sew to dinosaur along the seam between Base and Semicircles.
Spikes
The spikes use the contrasting color. They are worked along both sides of the semicircles. Start with the right side of the dinosaur if you’re right-handed, left side if you’re left-handed. This ensures the RS of the spikes faces out.
First side
The spikes start with making 3 spikes that aren’t attached to anything. These will later be sewn to the dinosaur’s neck.
Ch 4, sc in second chain from hook, hdc in next ch, 2dc cluster in last ch.
(Ch 5, sc in second chain from hook, hdc in next ch, 2dc cluster in next ch, leave last chain unworked.)
Repeat between parentheses 1 more time.
Now we’re going to work spikes along the last row of the semicircle. Skip 6 stitches on the side semicircle (see above note on which side to begin with) and sl st into 7th stitch.
*Ch 4, sc in second chain from hook, hdc in next ch, 2dc cluster in last ch, skip 2 sc of semicircle, sl st into next sc* Repeat until you reach the end of the semicircle: 14 spikes total.
Last, we’re going to make five spikes that aren’t attached to anything that will later be sewn to the dinosaur’s tail. (Ch 5, sc in second chain from hook, hdc in next ch, 2dc cluster in next ch, leave last chain unworked.) Repeat 4 more times. Finish off, leaving long tail for sewing. Sew loose ends of spikes to head and tail.
Second side
Join yarn to unworked semicircle, *ch 4, sc in second chain from hook, hdc in next ch, 2dc cluster in last ch, skip 2 sc of semicircle, sl st in next sc, repeat from * until end of semicircle is reached: 14 spikes total. Finish off.
Spots
Large Spot (make 1)
Round 1: with contrasting color, make a magic ring, ch 2, 12 dc in ring, invisible join to first dc: 12 dc
Finish off, leaving a long end for sewing. Sew spot to side of dinosaur.
Small Spot (make 2)
Round 1: with contrasting color, make a magic ring, ch 1, 10 hdc in ring, invisible join to first hdc: 10 hdc
Finish off, leaving a long end for sewing. Sew spot to side of dinosaur.
Lastly, sew zipper to semicircles.
Need help while crocheting? Feel free to leave a comment below and I’ll help you out!

I love this! I especially love the spots.
Hi, I really love your pattern and I will do it for this school year,but, I have a doubt if I use a yarn more light or thin (English isn’t my first language so, sorry if I don’t use the right terms), like, something for a crochet 1 or something like that, how much will it changed in size? If you know would it be really helpful for me, thanks n.n
Hi Gaby! If you use smaller yarn and a smaller crochet hook, the pencil case will be smaller. If you only have really thin yarn, you can hold several strands together to make it thicker. Make sure to check your gauge so the pencil case will turn out the right size – there are tutorials here on Crochet Spot for all of this. Hope this helps! (Your English is great, by the way.)
I ended up just doing 6 more rows in the semicircle, and it’s ending up great, but I have another doubt, in the second semicircle you start doing the spikes in the first stitch? And, in which stitch do you start sewing the zipper? You been really helpful, thanks n.n
Hi! You’re one of my favorite persons. I have dinosaur clothes, notebooks, erasers, plushies, stickers… But not yet a pencil case! Thank you so much for this pattern! I’m an adult.