
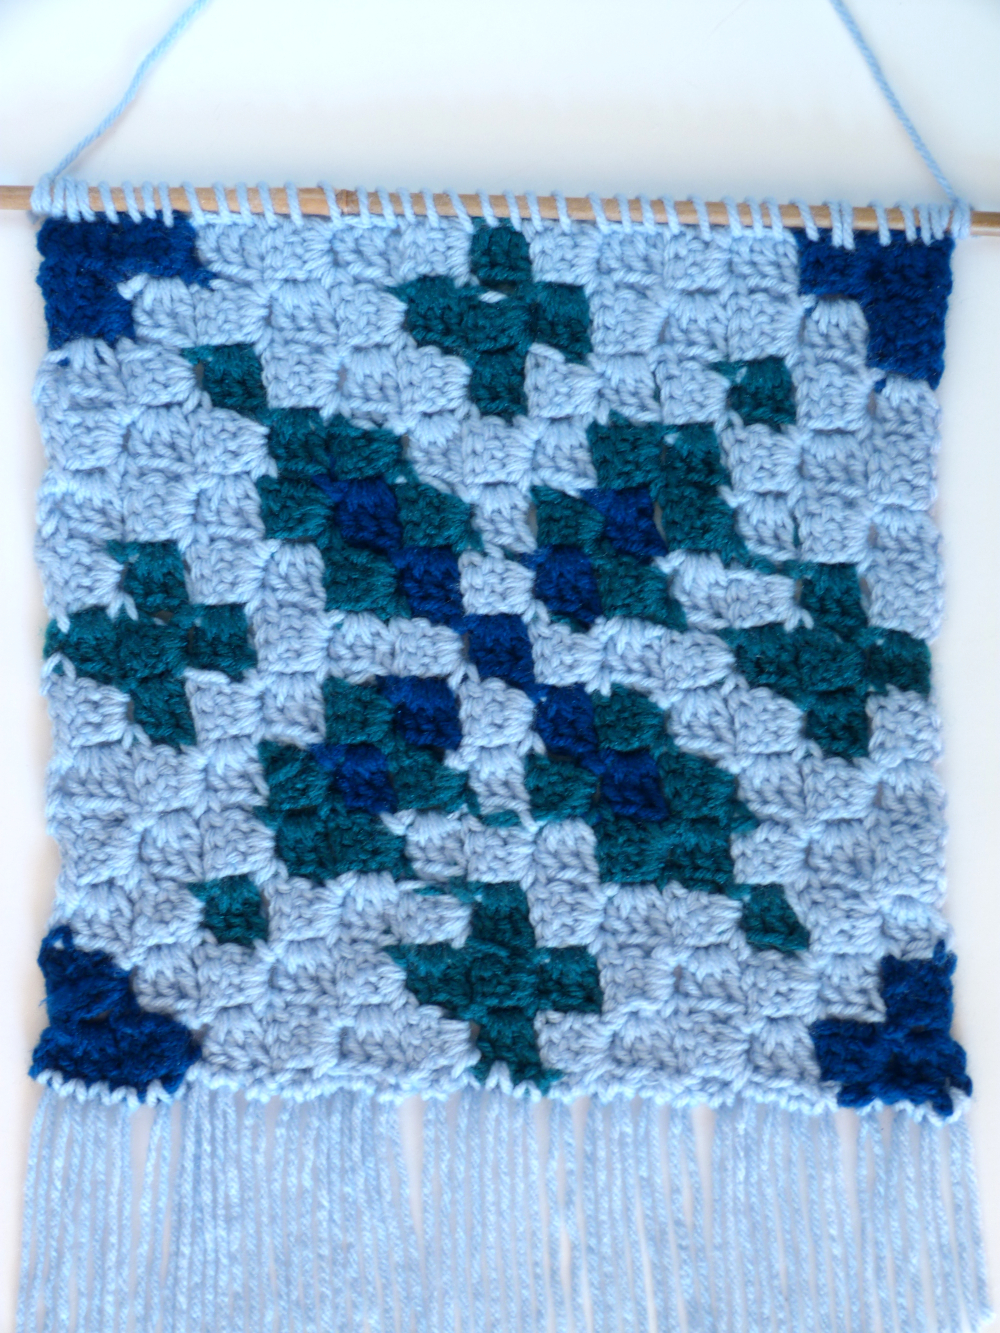
Free Crochet Pattern: Winter Snowflake C2C Wall Hanging
By Amy Yarbrough – Be the first to comment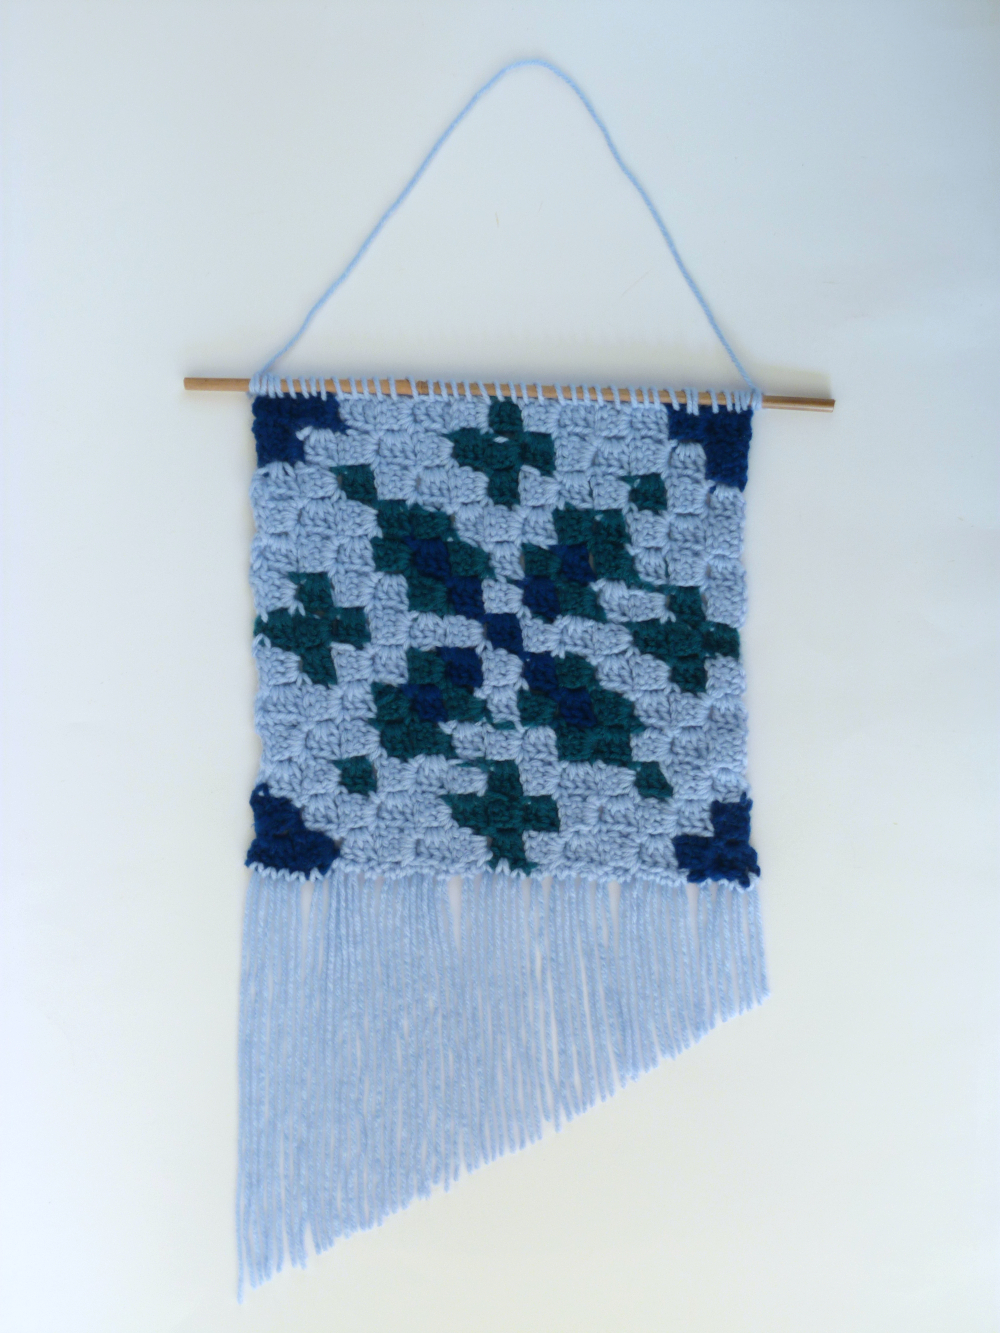
How do you feel about those long winter days ahead? Whether you like them or are in dread of them, I propose this will be a wall hanging for everyone! Here’s my reasoning: For the lover of winter, this is the perfect way to enjoy it better. However, for the one who dreads it, this is the perfect project to add some color to the dreary days!
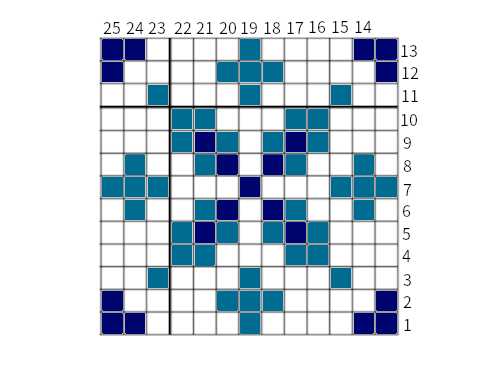
Corner to corner crochet is a lot of fun. I love the variety of designs you can make simply by working blocks of color. This project features 3 colors, a tad more involved then 2 color C2C crochet but don’t let that scare you. Follow the graph and don’t forget to check out the links on how to C2C Block Stitch.
If you’ve crocheted corner to corner before you will know that it often presents a lot of ends to weave in later. You can minimize this by following a few suggestions of mine and searching the internet for advice from other, well-experienced C2C crocheters.
I hope you enjoy this project! Don’t forget to let me know what you think of it in the comments below.
| Skill Level: |
Finished Size: about 10†(25.4cm) square after blocking
| Materials: Medium weight yarn in 3 colors Crochet hook H (5.00 mm) 12†dowel, or piece of wood or bamboo Yarn needle Hot glue Ruler |
Gauge:
A block of 4 squares = 2†square
For a test swatch, work the C2C Block Stitch pattern, making a square of 4 blocks total.
Need help understanding the abbreviations and symbols? Check out the crochet abbreviation chart.
Crochet Pattern: Winter Snowflake C2C Wall Hanging
To crochet the tapestry, follow the usual method of C2C crochet, using the graph below. See here for instructions on how to work the C2C Block Stitch.
Managing Yarn and Ends in C2C Crochet
Making C2C fabric is wonderful fun but keeping up with the ends can be a little hectic. Many crocheters have wonderful tips on how they do this, and some include videos! I would suggest in the very least to lay your yarn out in front of you and, when beginning a new row, rearrange them. Also, try to crochet across your yarn as much as possible, though be careful to look at it from both sides to ensure it doesn’t show. But just so you know, you will have many ends to weave in.
Block your square so that it measures 10 inches square. (See here for how to block your crochet projects). Now you are ready to finish the tapestry!
Attaching the Dowel
Lay the dowel against the top of the tapestry. With a yarn needle and the lightest color yarn, make a stitch at the very corner and knot, making sure the knot is on the back side. Begin whipstitching around the dowel, through the top stitches of the tapestry. Once you’ve reached the end of the row make another knot to finish off. To hang your tapestry, cut about 18 inches of yarn and tie to the dowel on both ends of the tapestry, once again keeping knots at the back. Apply small amounts of hot glue to all four knots and, once glue has dried, trim ends.
Fringe
For the fringe, cut around 32, 18†strands of yarn. Attach to the bottom of the tapestry, using more or less as you find need. Once completed, pat the fringe down as even and flat as you can on a flat, firm surface, safe for cutting on. You can trim your fringe in whatever design you like. To give it a nice slant like mine, lay a ruler across it until you get the angle you like then slowly trim along edge, being careful not to move the ruler or the fringe. Try not to be too picky, the fringe will mix a little once the piece is hung.
And that’s how you make the Winter Snowflake C2C Wall Hanging!
Do you have any question or comments? Let me know below!
