How to Add an Adjustable Ring to a Project
By Candace – 10 CommentsThe adjustable ring is a great method for starting crocheting in the round, but what about using it in the middle of projects or at the end? This tutorial shows you how to make an adjustable ring that you can use to create keyholes or other features within a project or add a finishing touch to your project.
First, get to a point in your project where you would like to put the adjustable ring.
After completing a stitch, draw up the loop.
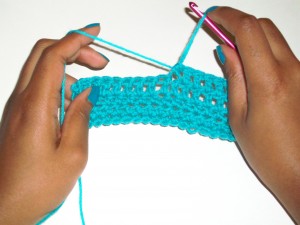
Wrap your yarn 2 more times behind this loop.
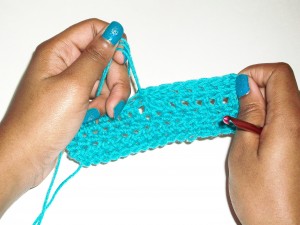
Insert your hook into the ring next to your last stitch and grab onto the working yarn.
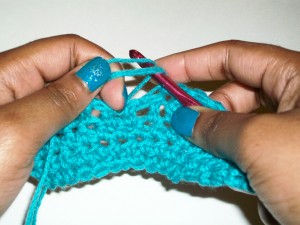
Pull up a loop.
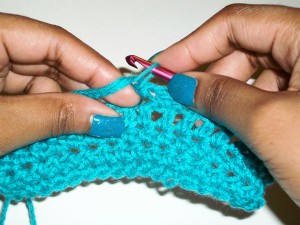
Chain as many stitches as you need to start working in the ring (Ch 1 for a sc, 2 for a hdc, etc.) and crochet into the loop as you would with an ordinary adjustable ring.
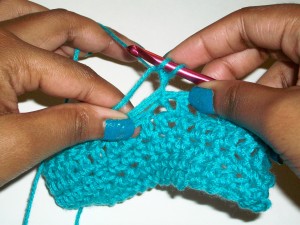
When you have the desired number of stitches, pull on the rear loop to close your ring. If your loops have gotten confused in the process of crocheting, test both loops until one draws closed.

Finish off or continue crocheting. To finish off the loop, cut it and weave in the ends.
Need help? Leave a comment, and I’ll help you out.


Your nails match your yarn! 🙂 Good pics 😀
I don’t know about anyone else but this was totally confusing
to me.
I’m with Wanda. Also, I don’t know what you would use this for in the middle of a project
I’m glad I’m not the only one, though I did try again and think (only think mind you) that
I finally got what she was doing. A vid would be great and also a pic of the finished ring
once she finished it.
I found the tutorial very helpful! However, I agree with Wanda about a picture of the finished ring would be helpful, and also maybe a picture of example of how it may be used as a keyhole or with in other projects, like the one Candace may have been working on for this tutorial. It helps to cement the reason for learning the technique and provides ideas for incorporating it in a project. I am still learning and always appreciate anyone who is willing to share ideas and techniques. Crochet is such a versatile hand craft/art form! The possibilities are endless! Thank you Candace for your time and effort!
It’s really not much different from doing a regular adjustable ring. If you know that technique and follow along while keeping that in mind, it should work out.
Confused me too, and I’ve been an advanced crocheter for ages.
I tried this and wasn’t sure if I “wrapped my yarn two times behind this loop” correctly as the directions were a bit vague and I couldn’t tell exactly was going on in the picture…….ended up with a length of yarn when I tightened the loop that I didn’t know what to do with. After you make the ring, what then? What sort of things can you do with this within your work? I’m fascinated by this. Thanks for posting.
I actually have no specific designs in the works for this technique. I simply wondered if it could be done, figured out it could, and shared it. It’s only an idea. I suppose in addition to keyholes, you can use them for loops to hang things like potholders from or simply add holes and circled to your work.
To address Emily’s question, you’re supposed to cut the loop and weave in the ends, which you can do immediately or after you’re done with whatever it is you’re making.
I have used this method for my pot holder hangers for years. I haven’t tried closing it since I need the hole for hanging. I don’t think it is possible. This is the way I do it. —- crochet the item until the last row ( it should end at one corner ). Keep your needle in the last loop, wrap the working yarn 4 or 5 times around your finger then gently remove it from finger and sc all around it. Leave a 6 in tail for sewing, cut, pull thru and attach to st next to the last st on the pot holder. I attach for about 3 sts and weave in ends for about 3 inches. It takes practice.