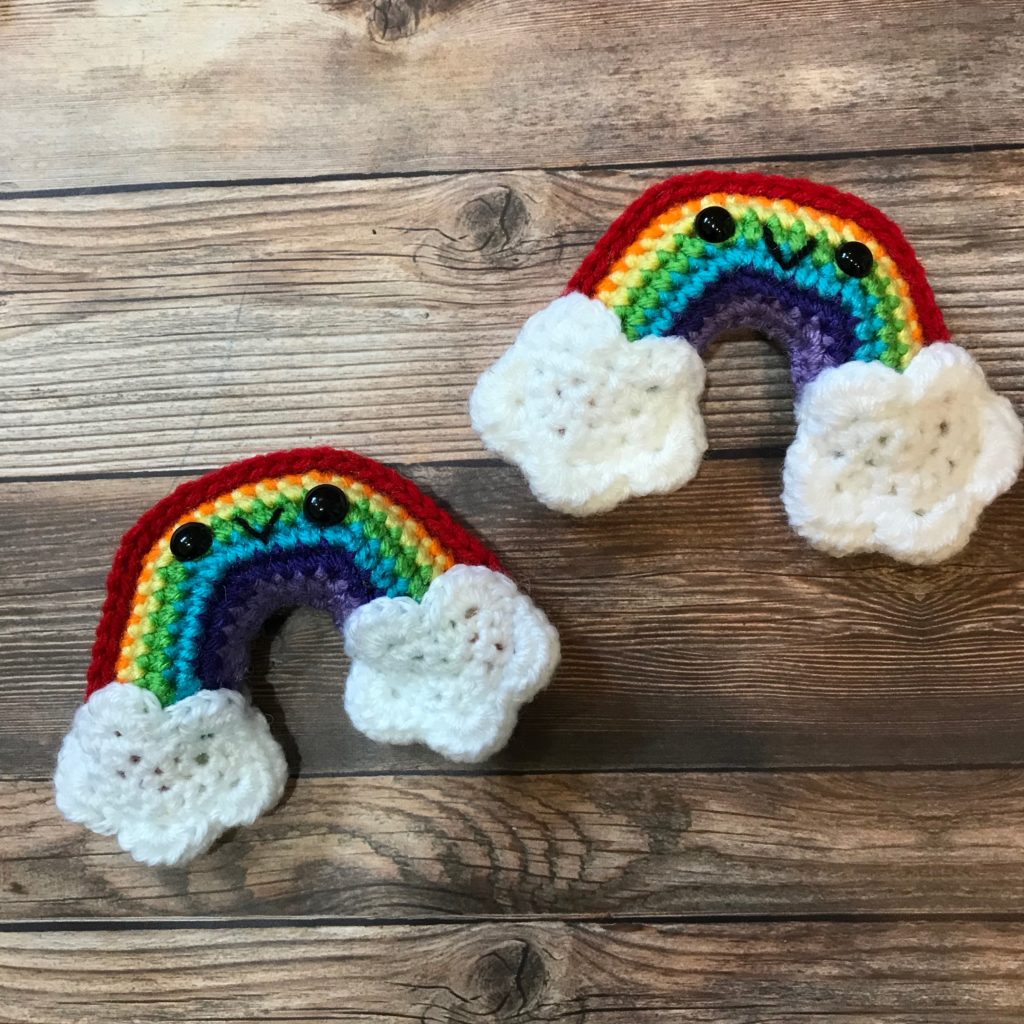
Free Crochet Pattern: Amigurumi Rainbow
By Claire Golden – 2 Comments
The good thing about the rainy springtime season is that it increases your chances of spotting a rainbow! I’ve always loved seeing them and imagining what’s at the end of a rainbow…a pot of gold, an entrance to fairyland, or maybe even a bucket full of yarn. I was inspired to crochet this bright, smiling amigurumi version so it’s easy to experience the magic of a rainbow anytime. It would look super cute hanging from a mobile or decorating a shelf.
| Skill Level: |  |
Finished Size: 4″ (10 cm) wide, 4″ (10 cm) tall
| Materials: Medium Weight Yarn (see color sequence below – approximately 3 yards per color and 10 yards for clouds) Small amount of black embroidery floss Crochet Hook G (4.00 mm) Safety eyes (around 7 mm) Polyfill stuffing Yarn needle |
Color Sequence:
I chose a traditional rainbow color sequence with white clouds, but feel free to mix it up.
Round 1: purple
Round 2: indigo
Round 3: blue
Round 4: green
Round 5: yellow
Round 6: orange
Round 7: red
Gauge:
1 cloud measures approximately 2″ (5 cm) across from bump to bump.
Need help understanding the abbreviations and symbols? Check out the crochet abbreviation chart.
Crochet Pattern: Amigurumi Rainbow
Round 1: ch 20, sl st in first ch made to form a ring ch 1, *2 sc in next ch, (sc in next 2 ch, 2 sc in next ch) 3 times * repeat from * one more time, sl st in first sc, finish off: 28 sc
Round 2: join new color to second sc of Round 1, ch 1, 2 sc in same sc, (sc in next 3 sc, 2 sc in next sc) 3 times, sc in next sc, 2 sc in next sc, (sc in next 3 sc, 2 sc in next sc) 3 times, sc in last sc, sl st to first sc, finish off: 36 sc
Round 3: join new color to second sc of Round 2, ch 1, 2 sc in same sc, (sc in next 4 sc, 2 sc in next sc) 3 times, sc in next 2 sc, 2 sc in next sc, (sc in next 4 sc, 2 sc in next sc) 3 times, sc in last 2 sc, sl st to first sc, finish off: 44 sc
Round 4: join new color to second sc of Round 3, ch 1, 2 sc in same sc, (sc in next 5 sc, 2 sc in next sc) 3 times, sc in next 3 sc, 2 sc in next sc, (sc in next 5 sc, 2 sc in next sc) 3 times, sc in last 3 sc, sl st to first sc, finish off: 52 sc
Round 5: join new color to third sc of Round 4 (this helps counteract the spiral), ch 1, 2 sc in same sc, (sc in next 6 sc, 2 sc in next sc) 3 times, sc in next 4 sc, 2 sc in next sc, (sc in next 6 sc, 2 sc in next sc) 3 times, sc in last 4 sc, sl st to first sc, finish off: 60 sc
Round 6: join new color to second sc of Round 5, ch 1, 2 sc in same sc, (sc in next 7 sc, 2 sc in next sc) 3 times, sc in next 5 sc, 2 sc in next sc. (sc in next 7 sc, 2 sc in next sc) 3 times, sc in last 5 sc, sl st to first sc, finish off: 68 sc
Row 7 (RS): Mark third sc from end of round. Fold the rainbow in half, making sure the marked sc is at the right corner (left if you’re left-handed). Insert your crochet hook through both layers of the rainbow, starting right next to the marked sc (but don’t stitch through the marked stitch). Pull up a loop, ch 1, and sc in the same stitch. Sc across the top of the rainbow through both layers. When you reach the other end, make 2 sc into the last stitch and finish off.
Attach safety eyes and embroider mouth onto front of rainbow. Whipstitch bottom opening closed, adding stuffing as you go.
Cloud (make 4)
Row 1: make a magic ring, ch 1, 3 sc in ring: 3 sc
Row 2: ch 1, turn, 2 sc in each sc across: 6 sc
Row 3: ch 1, turn, (2 sc in next sc, sc in next sc) 3 times: 9 sc
Row 4: ch 1, turn, (2 sc in next sc, sc in next 2 sc) 3 times, make 2 more sc in last sc, turn to work across row ends, 6 sc evenly across bottom, sl st in first sc: 20 sc
Round 5 (WS): ch 1, turn, (skip next sc, 5 hdc in next sc, skip next sc, sl st in next sc) around: 5 cloud bumps
Fasten off, leaving long tail for sewing.
Assembly
The last two cloud bumps of Round 5 form the top of the cloud. Hold two clouds together and sew the other 3 cloud bumps together, leaving a gap at the top to slide the cloud onto one end of the rainbow. Sew cloud in place, then repeat with other end of rainbow. You can also use hot glue if the rainbow isn’t for a little kid.
Need help while crocheting? Feel free to leave a comment below and I’m happy to help!


Aw, these little rainbows are so sweet! And perfect for Pride.
Thank you very much, Erica! I was thinking the same thing for Pride, a smiling rainbow seemed appropriate!