
How to Crochet a Tube, or How to Crochet in Rounds (Version 1)
By Caissa "Cami" McClinton – 2 CommentsWhen we talk about crocheting in the round, it can mean many things. For example, you could be crocheting a flat circle in rounds or in spirals. You could also be crocheting an oval in the round. However, there is another way to crochet around and around. Instead of crocheting flat, like a coaster or a placemat, you’re crocheting up, like a basket or hat. This techniques creates a three-dimensional piece and can be used in countless applications.


For the purpose of practicing this skill, we’ll make a small swatch in this tutorial. Yarn and hook size don’t matter for this practice swatch.
You may mouse over images for left-handed views.
Abbreviations:
ch – chain
dc – double crochet
sl st – slip stitch
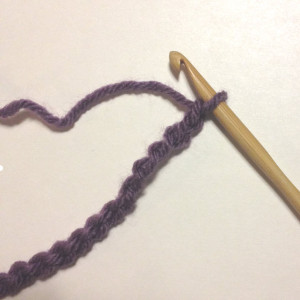
Foundation: ch 12. The photo below shows this in progress.
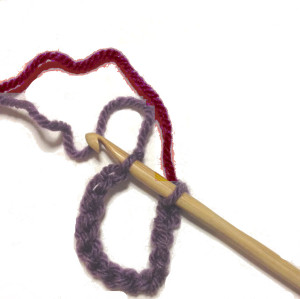
Without twisting chain, join with a sl st into the first chain. The photos below show this in progress. The red yarn is the working yarn, not the tail.
Circle made.
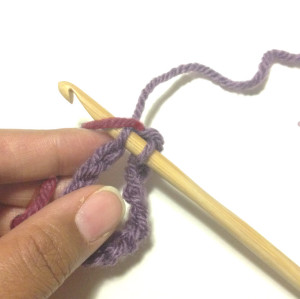
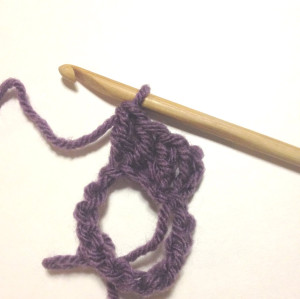
Round 1: ch 3 (counts as 1 dc here and throughout). The photo below shows this completed and highlighted in red.
Do not turn. dc into next ch and into each ch around. The photo below shows this in progress.
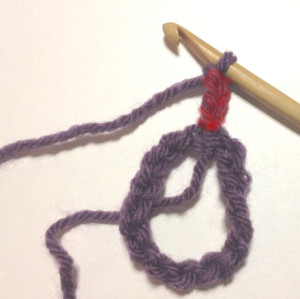
Join with sl st into the top of the beginning ch-3. (You will have 12 dc made) The photos below show this in progress, and then completed, with the ch 3 highlighted in green, and the final dc and working yarn highlighted in red.

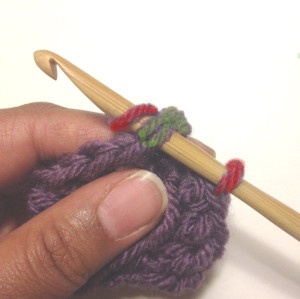
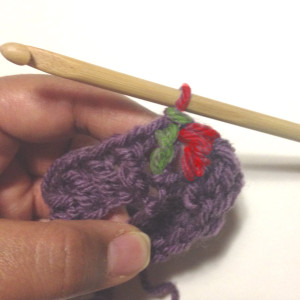
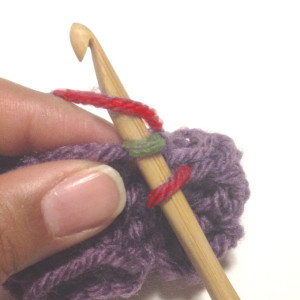
Round 2: ch 3. Do not turn. dc into next dc and into each dc around. The photos below show this in progress, and then completed, with the ch 3 highlighted in green, and the next dc and working yarn highlighted in red.
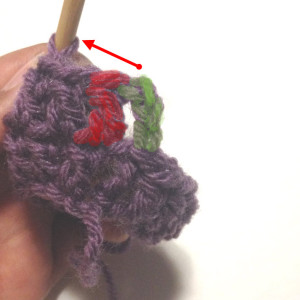
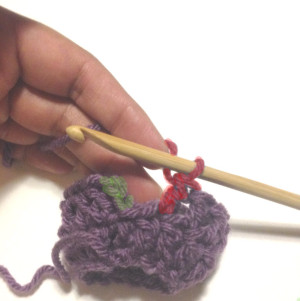
Join with a sl st into the top of the first ch 3. (You will have a total of 12 dc on this round too) The photos below show this in progress, with the ch 3 highlighted in green, and the next dc and working yarn highlighted in red.
I’m going to end the tutorial here, but the next step would be to continue in this manner. You can make tubes of any shape and length. They can be used for cowls, bags, earwarmers, beginnings of amigurumi parts… The possibilities are endless.
As always, If you need any help with this tutorial, or if you have any questions, please leave a comment below. Thanks for reading!

Hello Rachel.
Your site is wonderful and informative. Thank you kindly for sharing your craft with the rest of us.
This may be a silly question, but when you’re working in rounds in the manner described above for a project like a bag or a hat, how do you close the hole that is created when you make your chain circle?
Thank you in advance!
Hi Megan! In this tutorial the method is being shown working in rounds where the foundation chain is suppose to have a hole in it. When you make a hat or bag where there shouldn’t be a hole, the pattern usually starts with less chains so there isn’t a noticeable hole.