
How to Crochet: Knit Stitch
By Amy Yarbrough – 11 Comments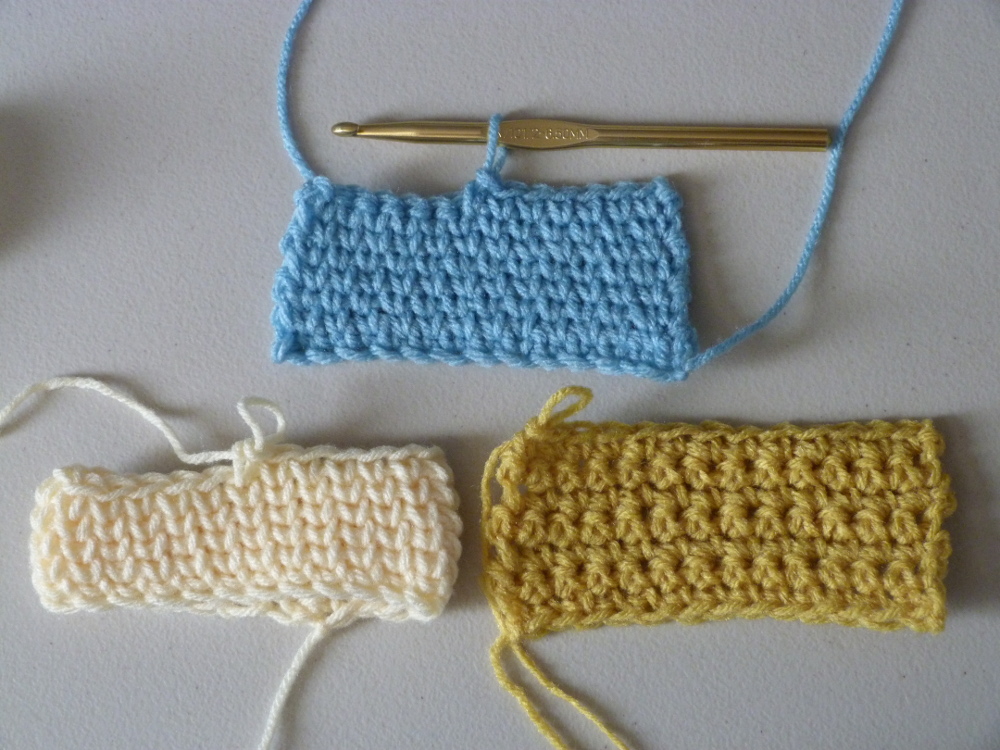
Have you ever wanted your crocheted garments to have that knit look without actually having to knit them? Let me show you how to crochet the knit stitch!
There’s something so classic about the stockinette stitch in knitting that makes us crocheters want to imitate it slightly in our own line of work. Sure, you could just learn to knit, or if you know how, switch to your needles instead of your hook. But when you can work a simple crochet stitch pattern and get the desired look, why compromise?
The knit stitch goes by many names: waistcoat stitch, center single crochet, center post single crochet, shallow single crochet. It can sound intimidating but don’t worry, it’s as simple as your basic single crochet with a slight alteration.
What you will need to do is work a single crochet, by inserting the hook into the stitch, draw up a loop, yarn over and pull through both loops. The only thing that separates the single crochet from the knit stitch is where you insert your hook.
The Knit Stitch in Rows
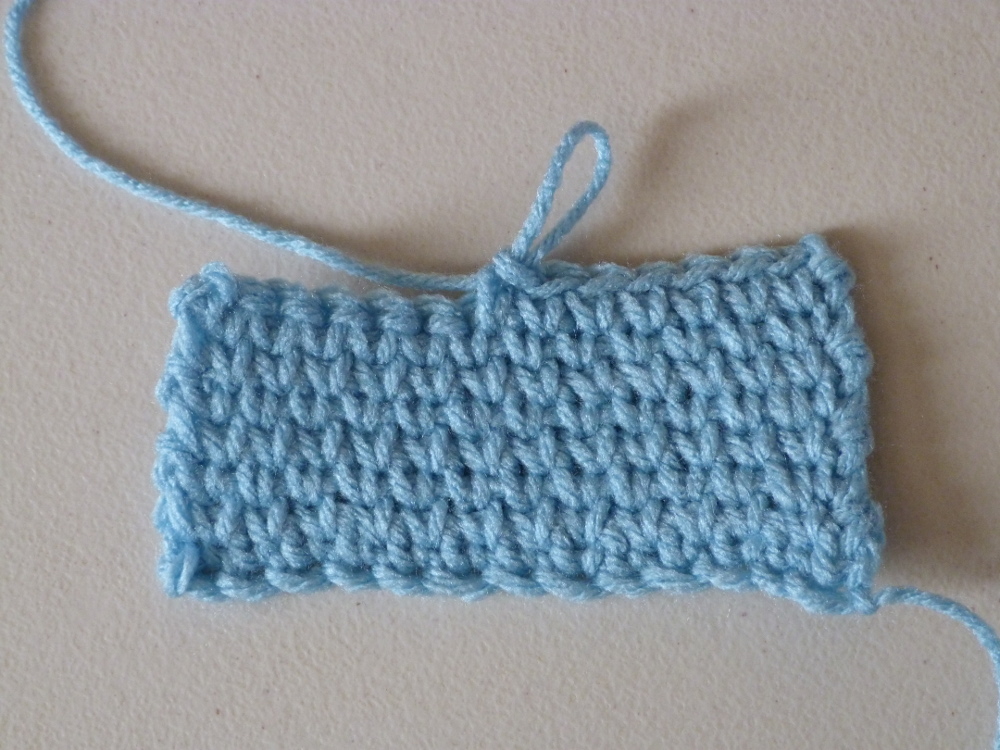
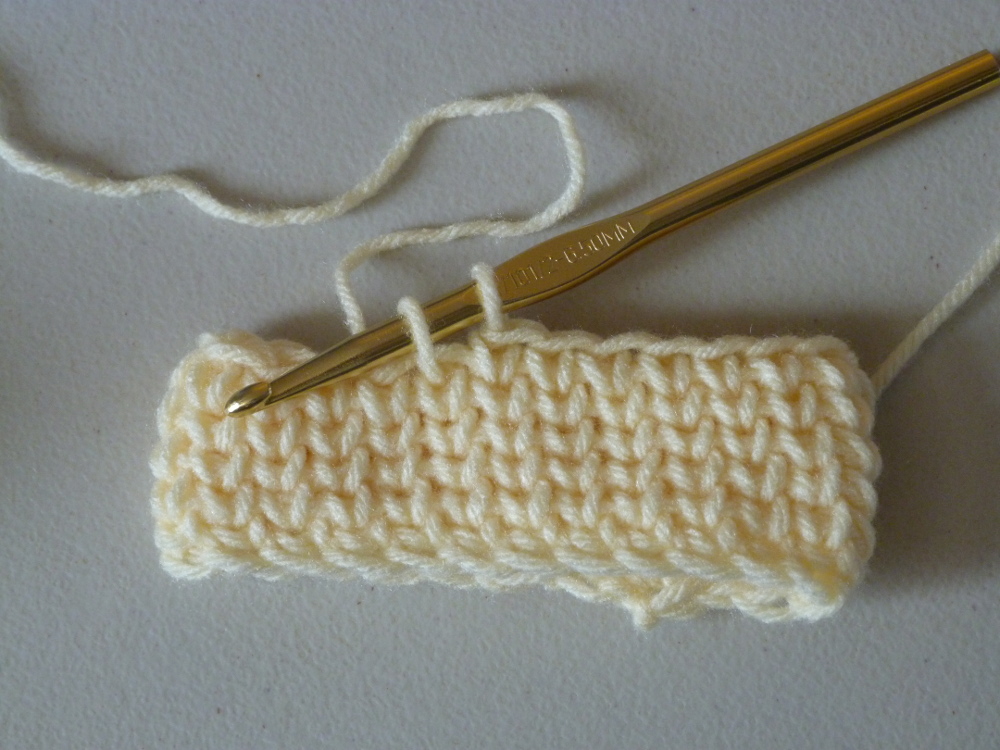
To start you will need to make a foundation chain and crochet one row of single crochet. The second row is where you will begin the knit stitch pattern. From then on, the pattern is worked the same.
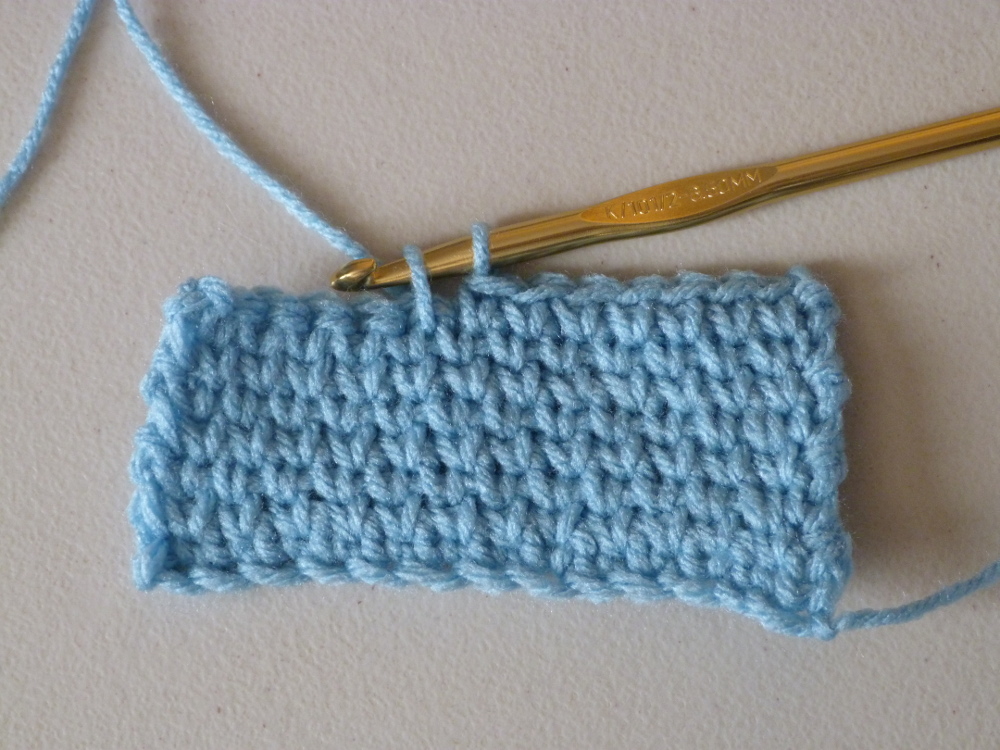
Instead of inserting your hook just under the top two loops of the next single crochet, insert it under the two horizontal lines and between the two vertical lines below them. See where I have drawn up a loop in the picture above? Now finish off your single crochet. Easy, right?
When ending the row, you will not have a single crochet at the end to work into so simply make a regular single crochet in the last space.
The Knit Stitch in the Round
When working in rounds you can still turn and work it as instructed above. But what about when you don’t want to turn your work?
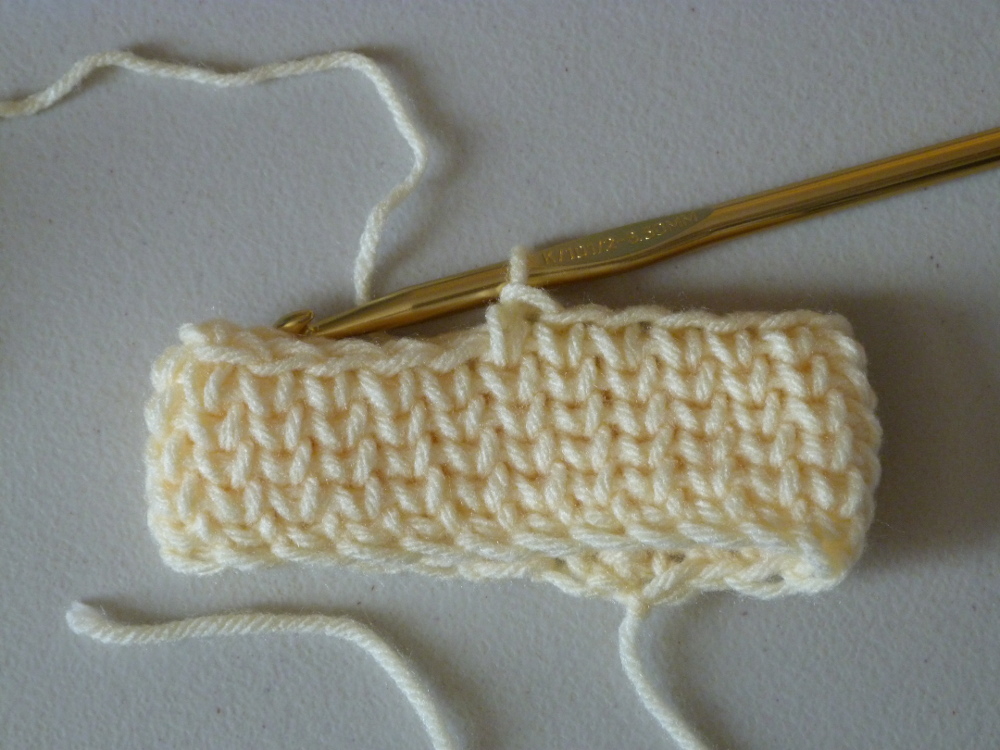
You will still need a base round of regular single crochet before beginning the knit stitch pattern. To work the knit stitch, insert the hook between the two vertical lines, or “V”, and pull up a loop.
In my opinion, the knit stitch looks the most realistic when worked in the round. However, you will notice the tendency the stitch pattern has to lean. This is where it is different from knitting.
A Few Things to Remember
When working this stitch use a larger hook than you would normally use for single crochet. The knit stitch is dense and requires extra room for easy working. Also note that the knit stitch material will be smaller. In the top picture I have crocheted three swatches. The yellow is a swatch of regular single crochet worked in the same size yarn as the other two, with the same size hook. It is obviously more roomy than the other. Be careful to account for that to save yourself some headache further in the pattern.
And that should cover what you need to know about crocheting the knit stitch! I hope you have enjoyed this tutorial. Let me know if you have any questions!
If you are interested in a pattern using this stitch, check out the Chunky Bun Beanie.

Thanks for sharing, Amy.
My pleasure, Lita!
Amy
can i use this stitch for a baby blanket, its so adorable
Sure thing, Maria! Like I said in the tutorial, you can use it practically anywhere you would a regular single crochet stitch. So a baby blanket in the knit stitch would be adorable!
Amy
THANKS FOR SHARING DO NYOU HAVE MITTENS AND HAT THAT HAS THE KNIT STITCH ANDDISHCLOTH IF YOU NDO COULD YOU EMAIL ME NOT REAL DIFFICULT ONES
THOUGH WILLING TO PURCHASE THANKS
JUST COMMENTED ABOVE BUT FORGOT TO ASK YOU WHAT SIZE HOOK DID YOU
USE IN THECREAM COLOR SWATCH AS THAT LOOKS JMUST LIKE A KNITTED STITCH
COULD YOU EMAIL ME THAT ALSO GREAT TUTORIAL
Hello Patricia,
I used crochet hook size K/6.50mm for each swatch in the example. We have a hat pattern already here on the blog using the knit stitch, the Chunky Bun Beanie, if you would like to give that one a go.
As for the mittens and dishcloth patterns, I will be pleased to design those for you. Return to the blog in another few weeks, and hopefully by then we will have the material you requested.
Keep crocheting,
Amy
thanks for replying i’ll check in a few weeks cant wait
likethe beanie alot would like to make but not sure when yoyu get
it done how to put hat together do you have a video on this
i understand how to crochet it but not put together yhanks
I’m sorry Patricia, but we don’t have a video for this pattern. However, the hat is worked in one-piece. You crochet the band by working in rows, then stitch them together and crochet across the top of the band in rounds until you have the hat shape. This pattern is especially easy since you do not have to close the hat at the top. Hope this helps!
I have been crocheting for a very long time (60 yrs). I always wanted to find a stitch to make a blanket that would be warm and not airy. This stitch is perfect! Thanks.
So glad to hear it, Roxanne! This stitch will make a lovely blanket. Don’t forget the tip to use a larger hook! It should make your knit stitch blanket that much easier to work. However, I have to say, having only about a third of your experience, I am honored to be able to help you out. Best wishes!
Amy