
Different Ways to Make Pom Poms (Part One)
By Amy Yarbrough – 12 CommentsAccording to the Merriam-Webster dictionary, a pom pom is “an ornamental ball or tuft used especially on clothing, caps, or costumesâ€. Technically, they are of no real necessity compared to a hat or scarf, and yet they are so adorable and cute! Who doesn’t like a tiny tuft of yarn on the top of their hat or on the end of their scarf?!
Pom poms are incredibly easy ways to brighten up any project. Besides the aforementioned, you can also attach them to the corners of a pillow, border of a blanket, or anywhere else you might want them. I’ve even seen an entire baby’s rug made out of large, plump pom poms!
Today, I want to show you some of the ways you can make pom poms. As with most things, there are special tools you can buy at nearly any craft store that are specifically made for creating pom poms. But for some of us, the Do-It-Yourself method is more appealing. So stick around for some easy how-to’s!
The Fingers
The most easy and less involved way to make these babies are to use your fingers. Rachel has a post on how to do it, complete with easy-to-follow instructions and pictures. Click here to read it.
The Fork
Here is another method. Using a common household implement like the fork works wonderfully to create tiny pom poms but the ending size all depends upon the size fork you use. Want to try it? Just follow along!
What You Need
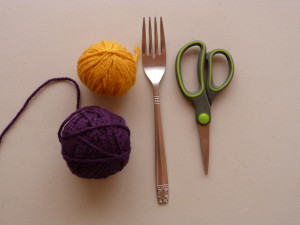
any size (kitchenware) fork
scissors
small amount of yarn

Cut a piece of yarn about 8 – 10†long.
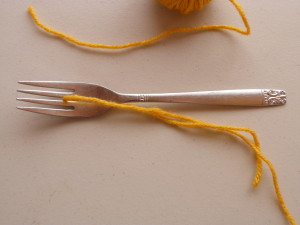
Slide the piece of yarn through one of the prongs of the fork.
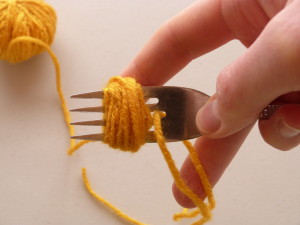
Wrap yarn around the prongs of the fork 25 times, or as many times as you wish.
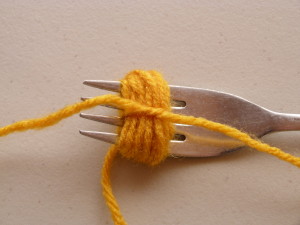
Cut the yarn and use the strand between the prongs to tie a single knot in the center of the bundle. Slide bundle off the fork, careful not to disturb the loops.
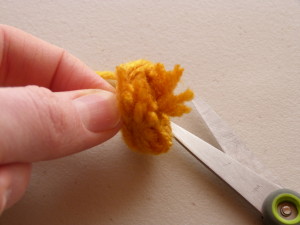
Pinch the knot with your thumb and forefinger. Begin snipping each loop until they are all free.
Now double the knot and tightend it as tight as you can. This will ensure a good pom pom. Your pom pom will look quite rough, but it’s okay. Now comes the styling.
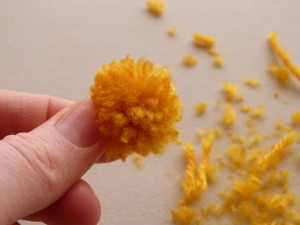
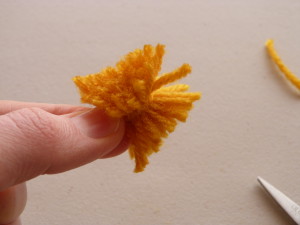
Trim the pom pom to your desired look. Everyone’s tastes are different. Some people like spriggly pom poms and some like them perfectly round. Just remember, it doesn’t have to be perfect!
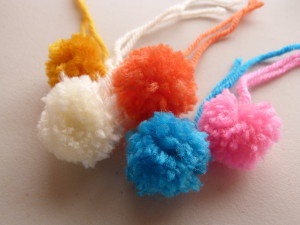
Make some more and experiment with thickness and color!
But what if you want bigger pom poms? Stick around. In part two, you will learn how to make an easy template for pom poms of all sizes!
So tell me, did you enjoy this tutorial? If you have any questions or other ideas on how to make these fabulous doodads, just tell me in the comments below. I’d love to hear from you!

Oh I do love a pompom – they are so cute, years ago we used to make them using two small circles of card with a hole in the middle, it took forever (read I am impatient!) I now have some pompom makers, I love them. The fork method looks really good.
Hi Lorna, I love them too! Stick around, soon I’ll post a tutorial on how to make them with a simple cardboard template that’s easy and quick. Thanks for reading!
Amy
I like the little ones! Good tutorial! 🙂
Thanks! I think the little one’s are the most adorable.
This is a great tutorial! I especially like the fork method ~ and you could probably make them bigger with a serving fork, I would think. I’m looking forward to Part 2. 🙂
I remember reading years ago that the correct spelling for a fuzzy ball is pompon, and that pompom means cannonball. So I looked it up in the dictionary on my computer and found that that is only partly right. It lists pompom as a fuzzy ball and also gives a second meaning as cannon, and it lists pompon as an alternate spelling of pompom as a fuzzy ball.
WOW! Amy I love this idea. I make pom poms of all sizes and I tend to use my fingers and would have my husband or son to hold the string down to tighten. I can’t wait for part 2.
I remember making the fork ones when I was about 10 years old :-). Looking forward to the templates!
I have been trying for a while to make a good pompom…thank you for the different ways of making them!! This was a big help!!! LOVE your newsletter!!! & blog!!
Love the post. Pom Poms are the basis of so many different craft projects that having an easy and friendly way to make them is a great asset!
Thank you very much, thats looks so lovely. I like your pom pom.l want to try your method. I was thinking of going to the shop to buy one for the poncho. When l saw your own how u make l find it so easy, neat, & lovely. Thanks
Thank you, Zodwa! I’m so happy it worked out for you.