
How to Crochet: Picot Stitches
By Claire Ortega-Reyes – 23 CommentsThe word picot originates from the French verb for “to prick.” Picots have been used not only in crochet but in other crafts as well–to add decorative points and interesting dimension. And yes, it is pronounced p
 k
k or p-k (I know I had trouble deciding how to say it the first time).
Picots in crochet are done by making 3 or more chains, and then making a slip stitch or single crochet into the first chain. This slip stitch or single crochet can be made into the V of the chain, or into the back ridge of the chain. There is also a relatively new technique, where the slip stitch or single crochet is made on top of the stitch made before the chains made for the picot.
This tutorial shows how these various picots are made. Mousing over the images shows the photos for the left-handed tutorial.
The First Step
We make a group of chains for the first step of the picot. For this particular tutorial, we use three chains. But you can make picots with more chains too, and the result will be a taller picot.

Step 1: Ch 3.
The Second Step
Here is where the different kinds of picots differ. There are two major choices to make: 1.) where to insert the hook; and 2.) whether to make a slip stitch or single crochet stitch. Experiment with all the variations, and stick to the one you’re most comfortable with.
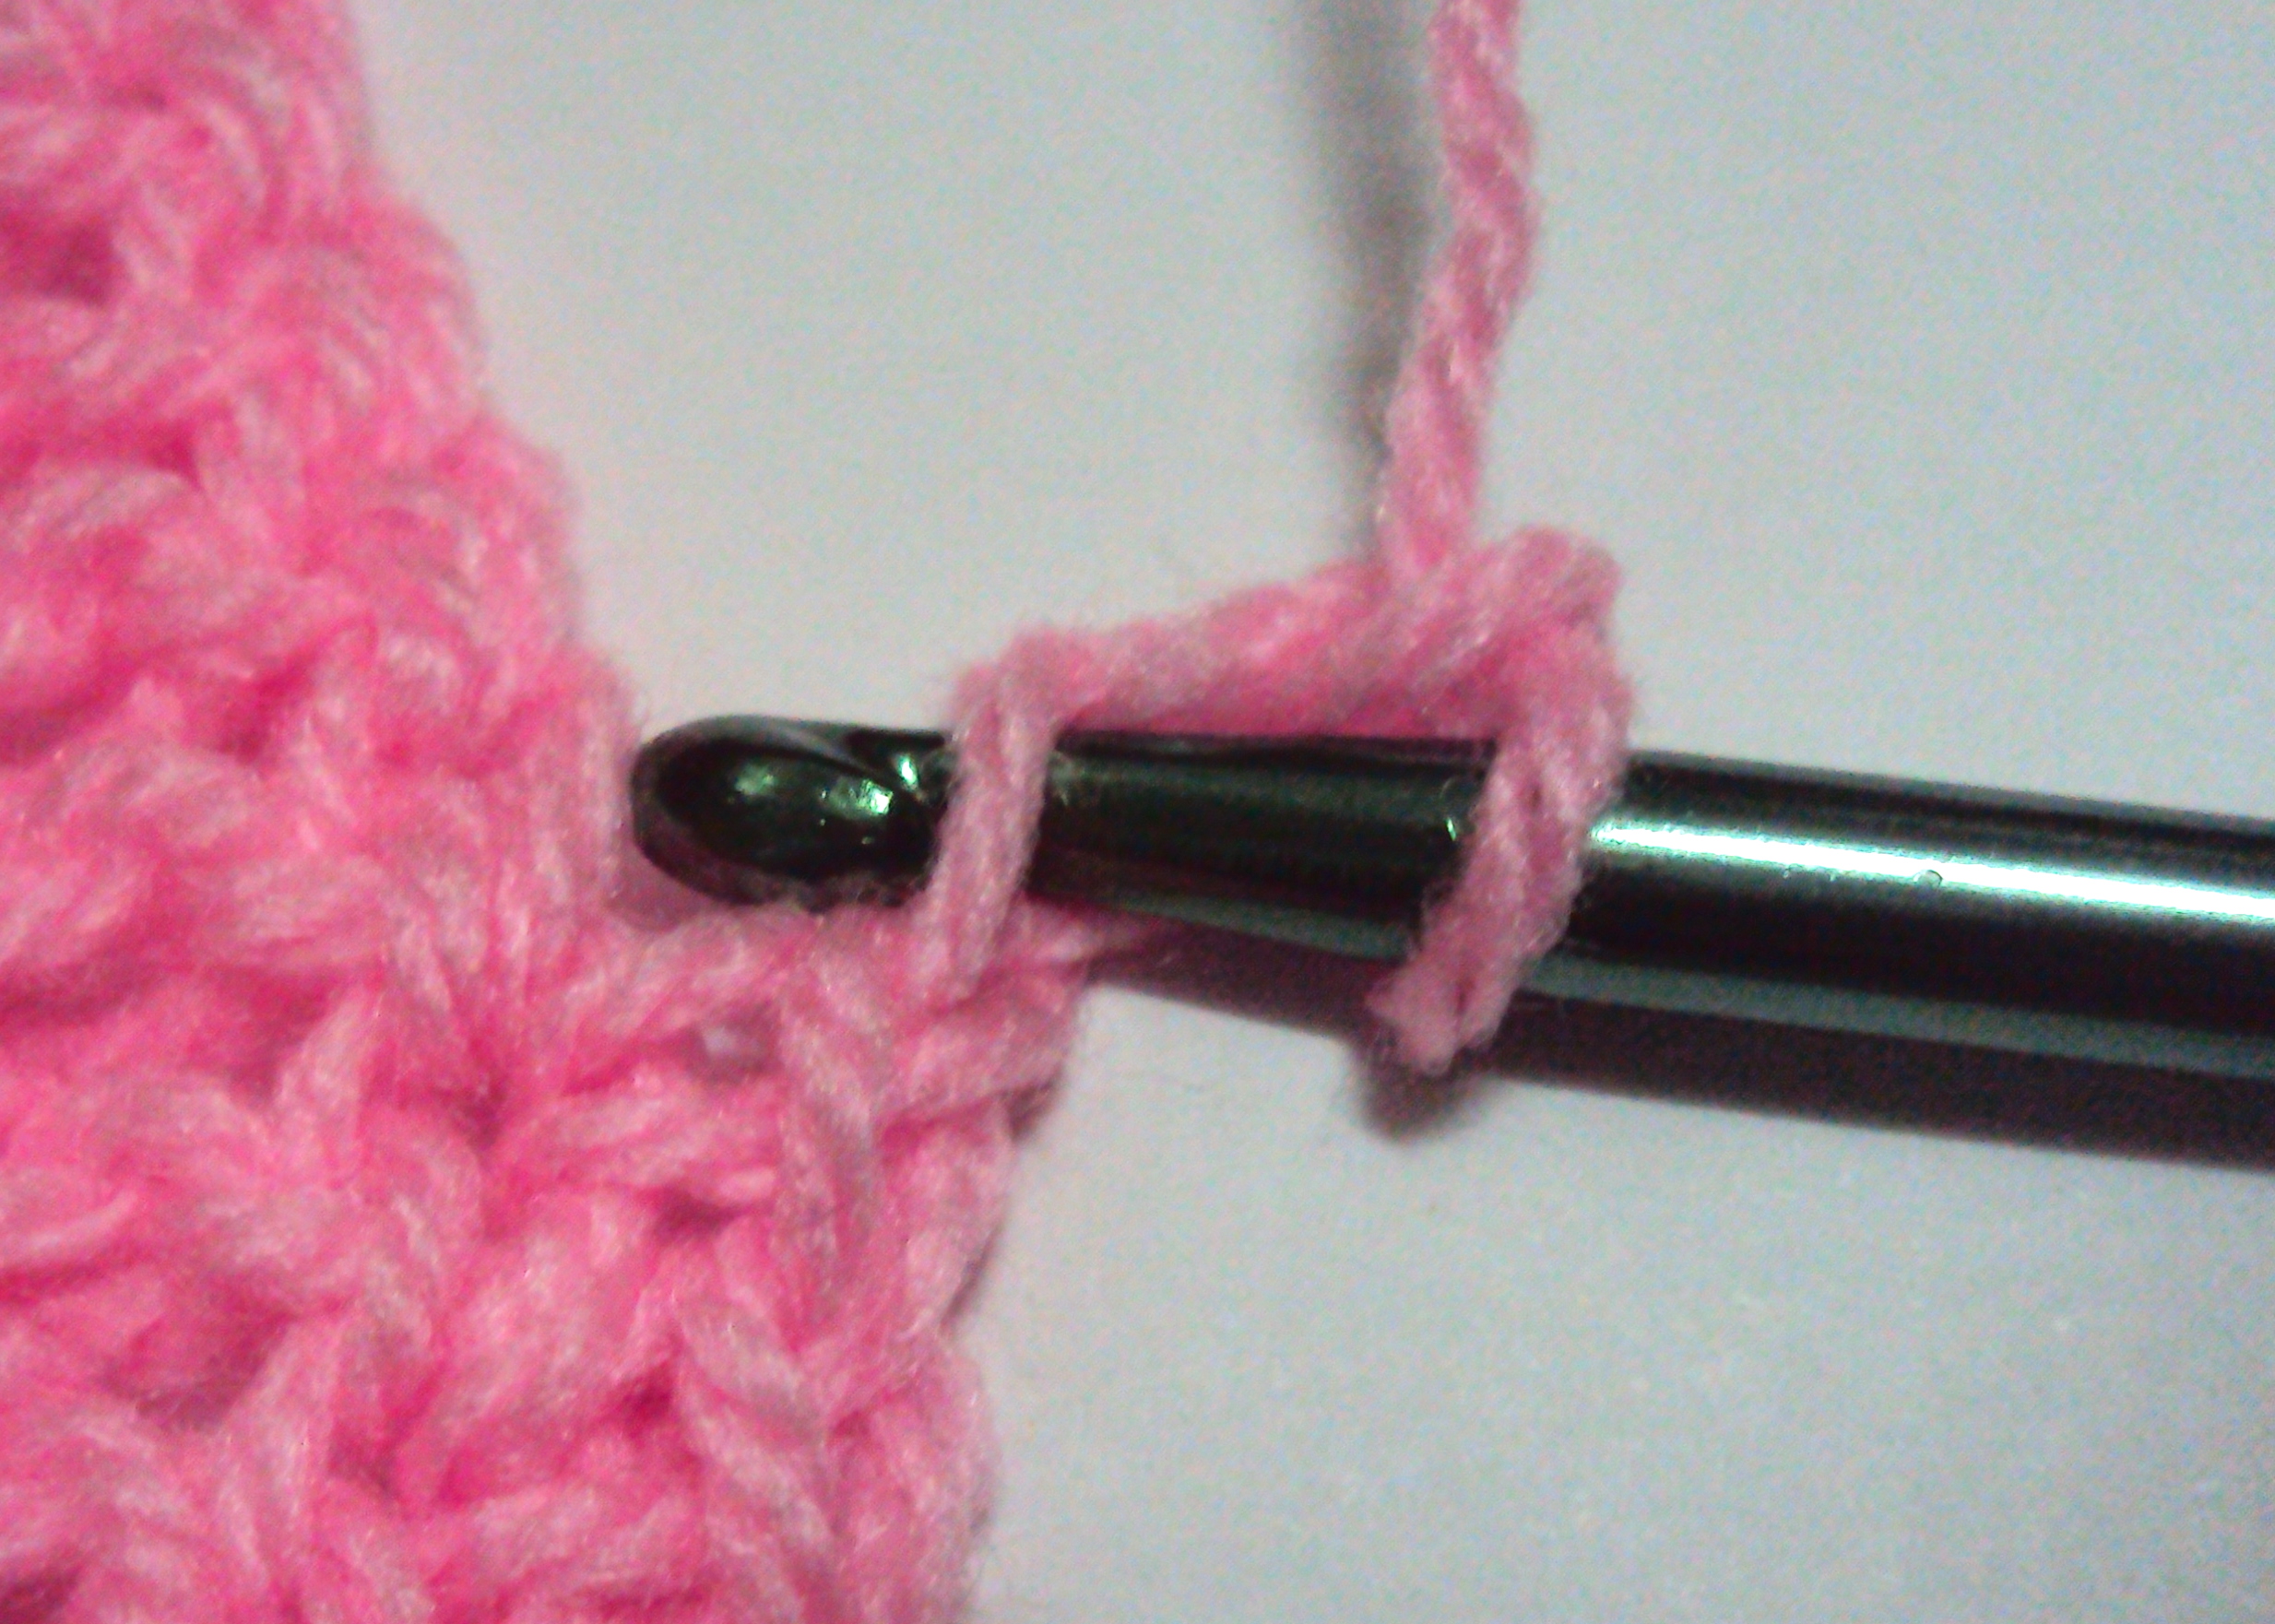
Insert hook into the V of the first chain.
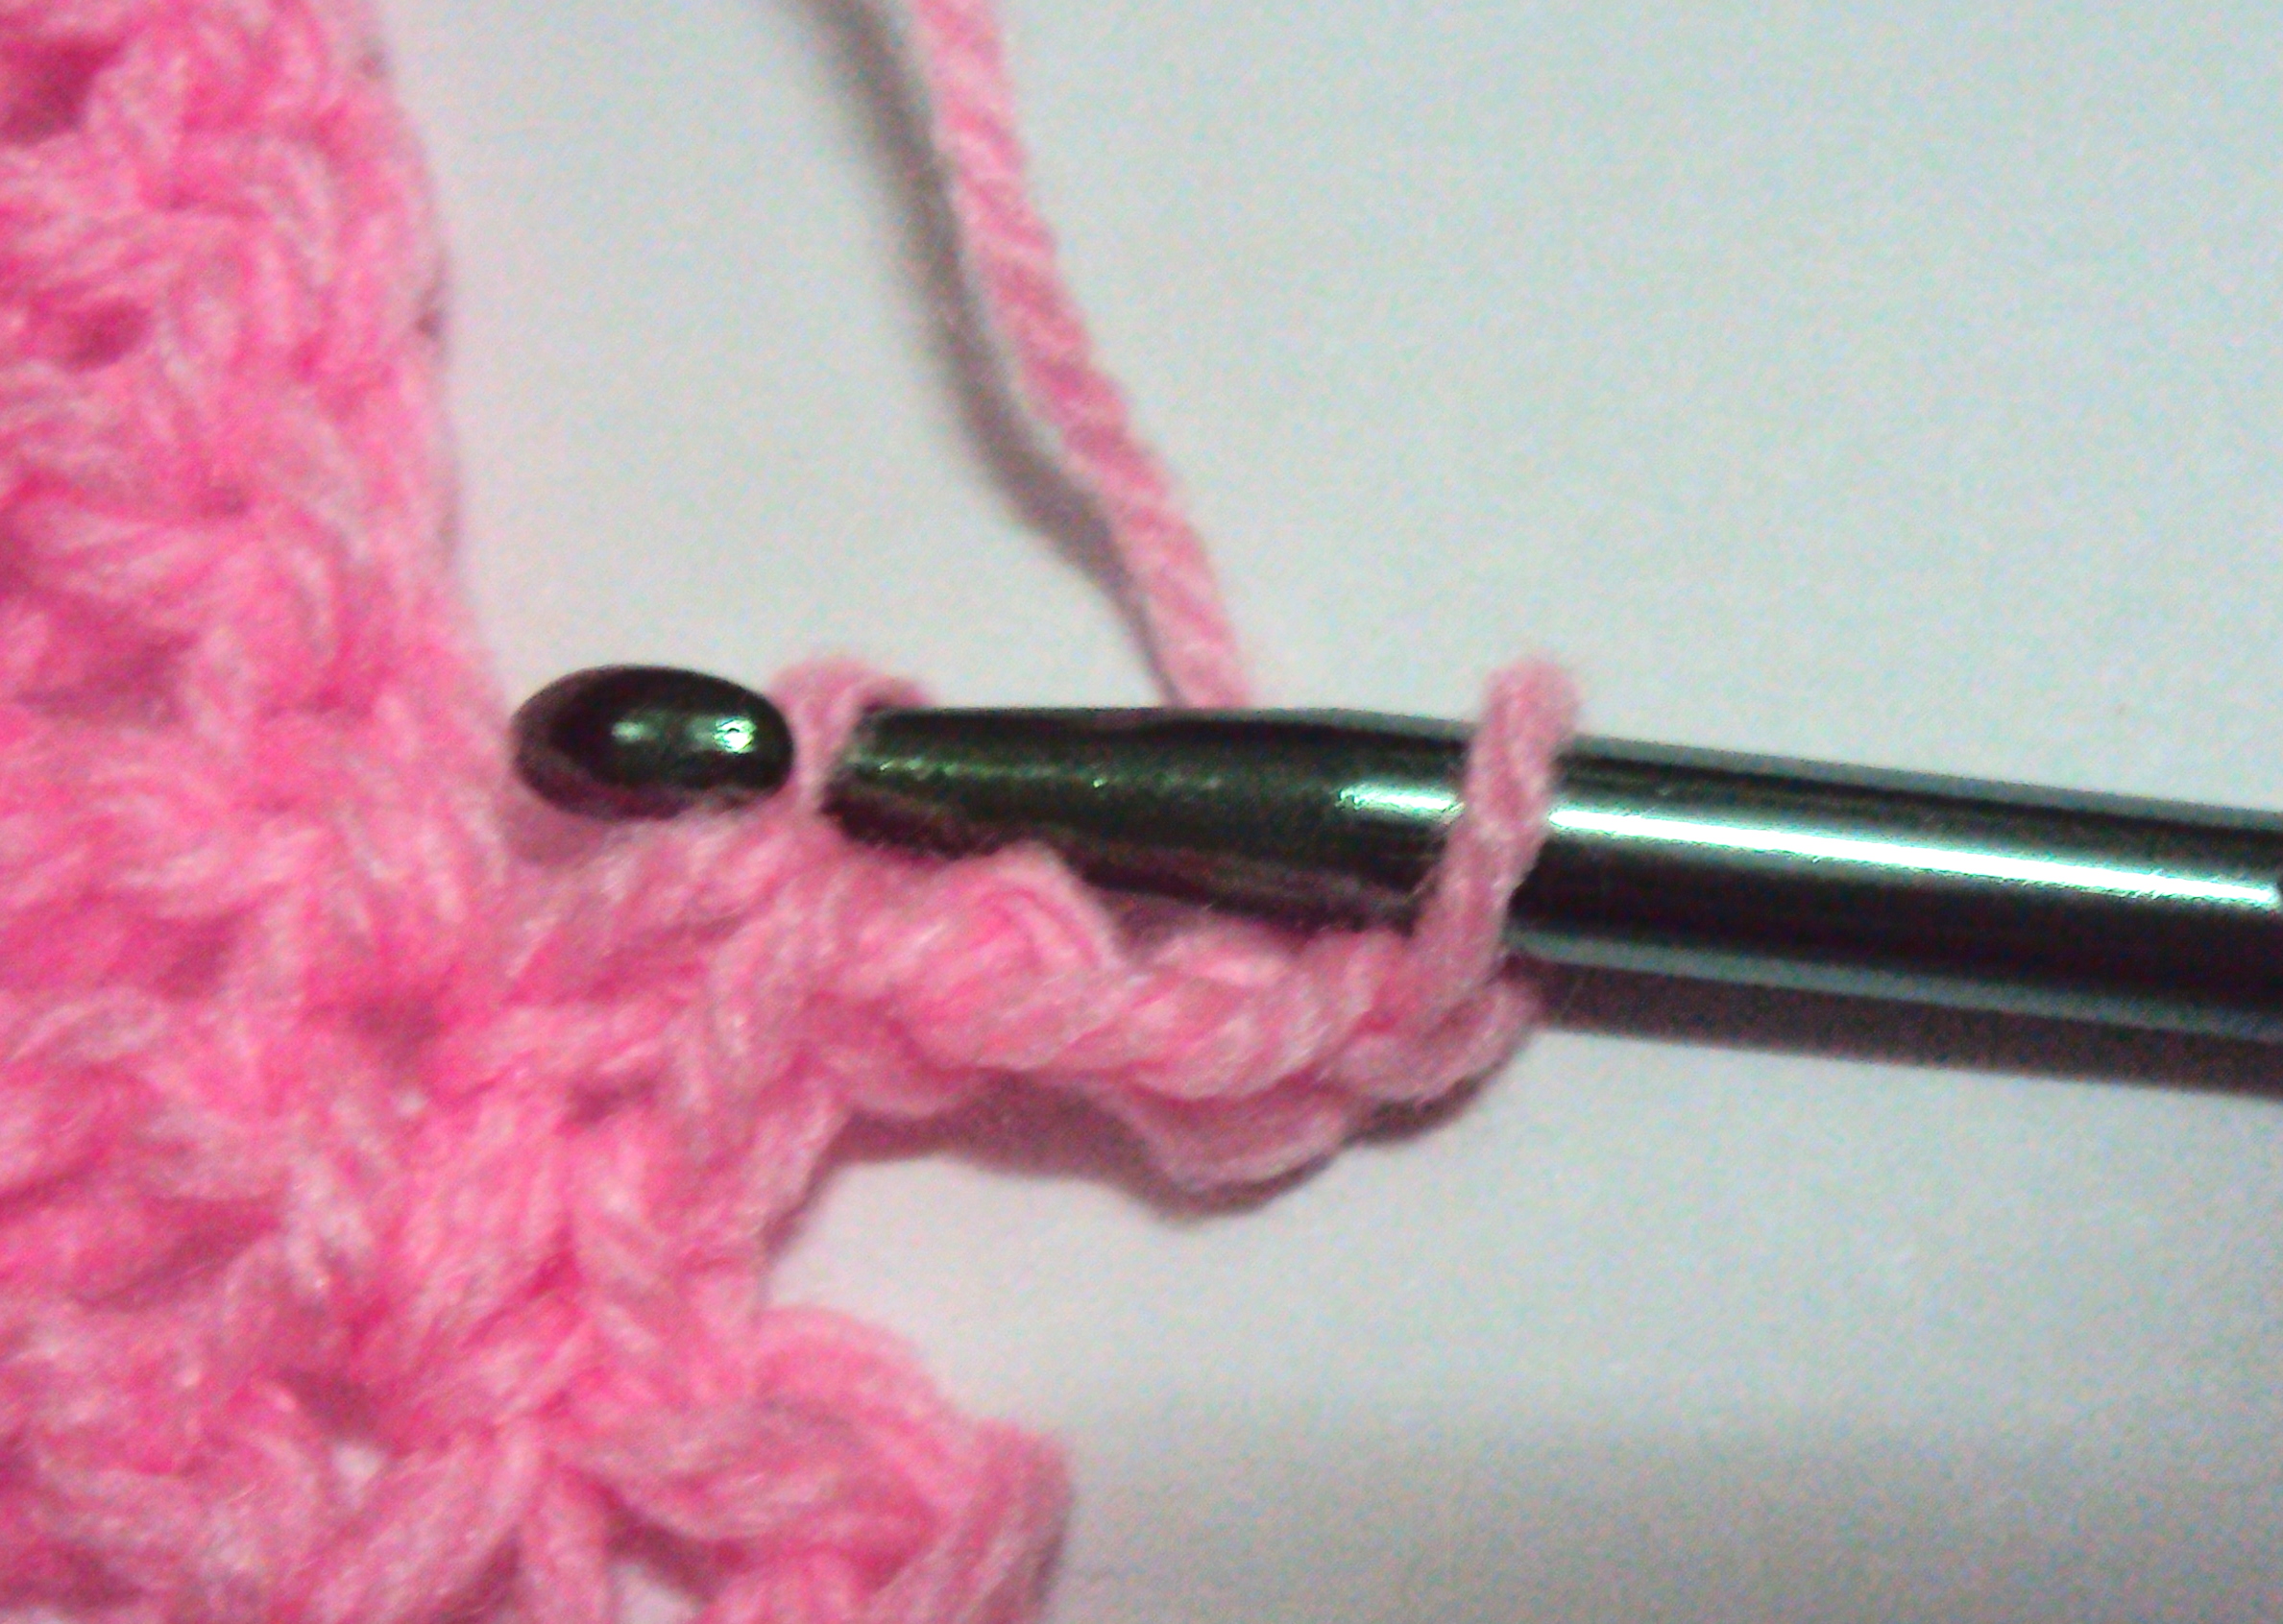
Insert hook into the back ridge of the chain.
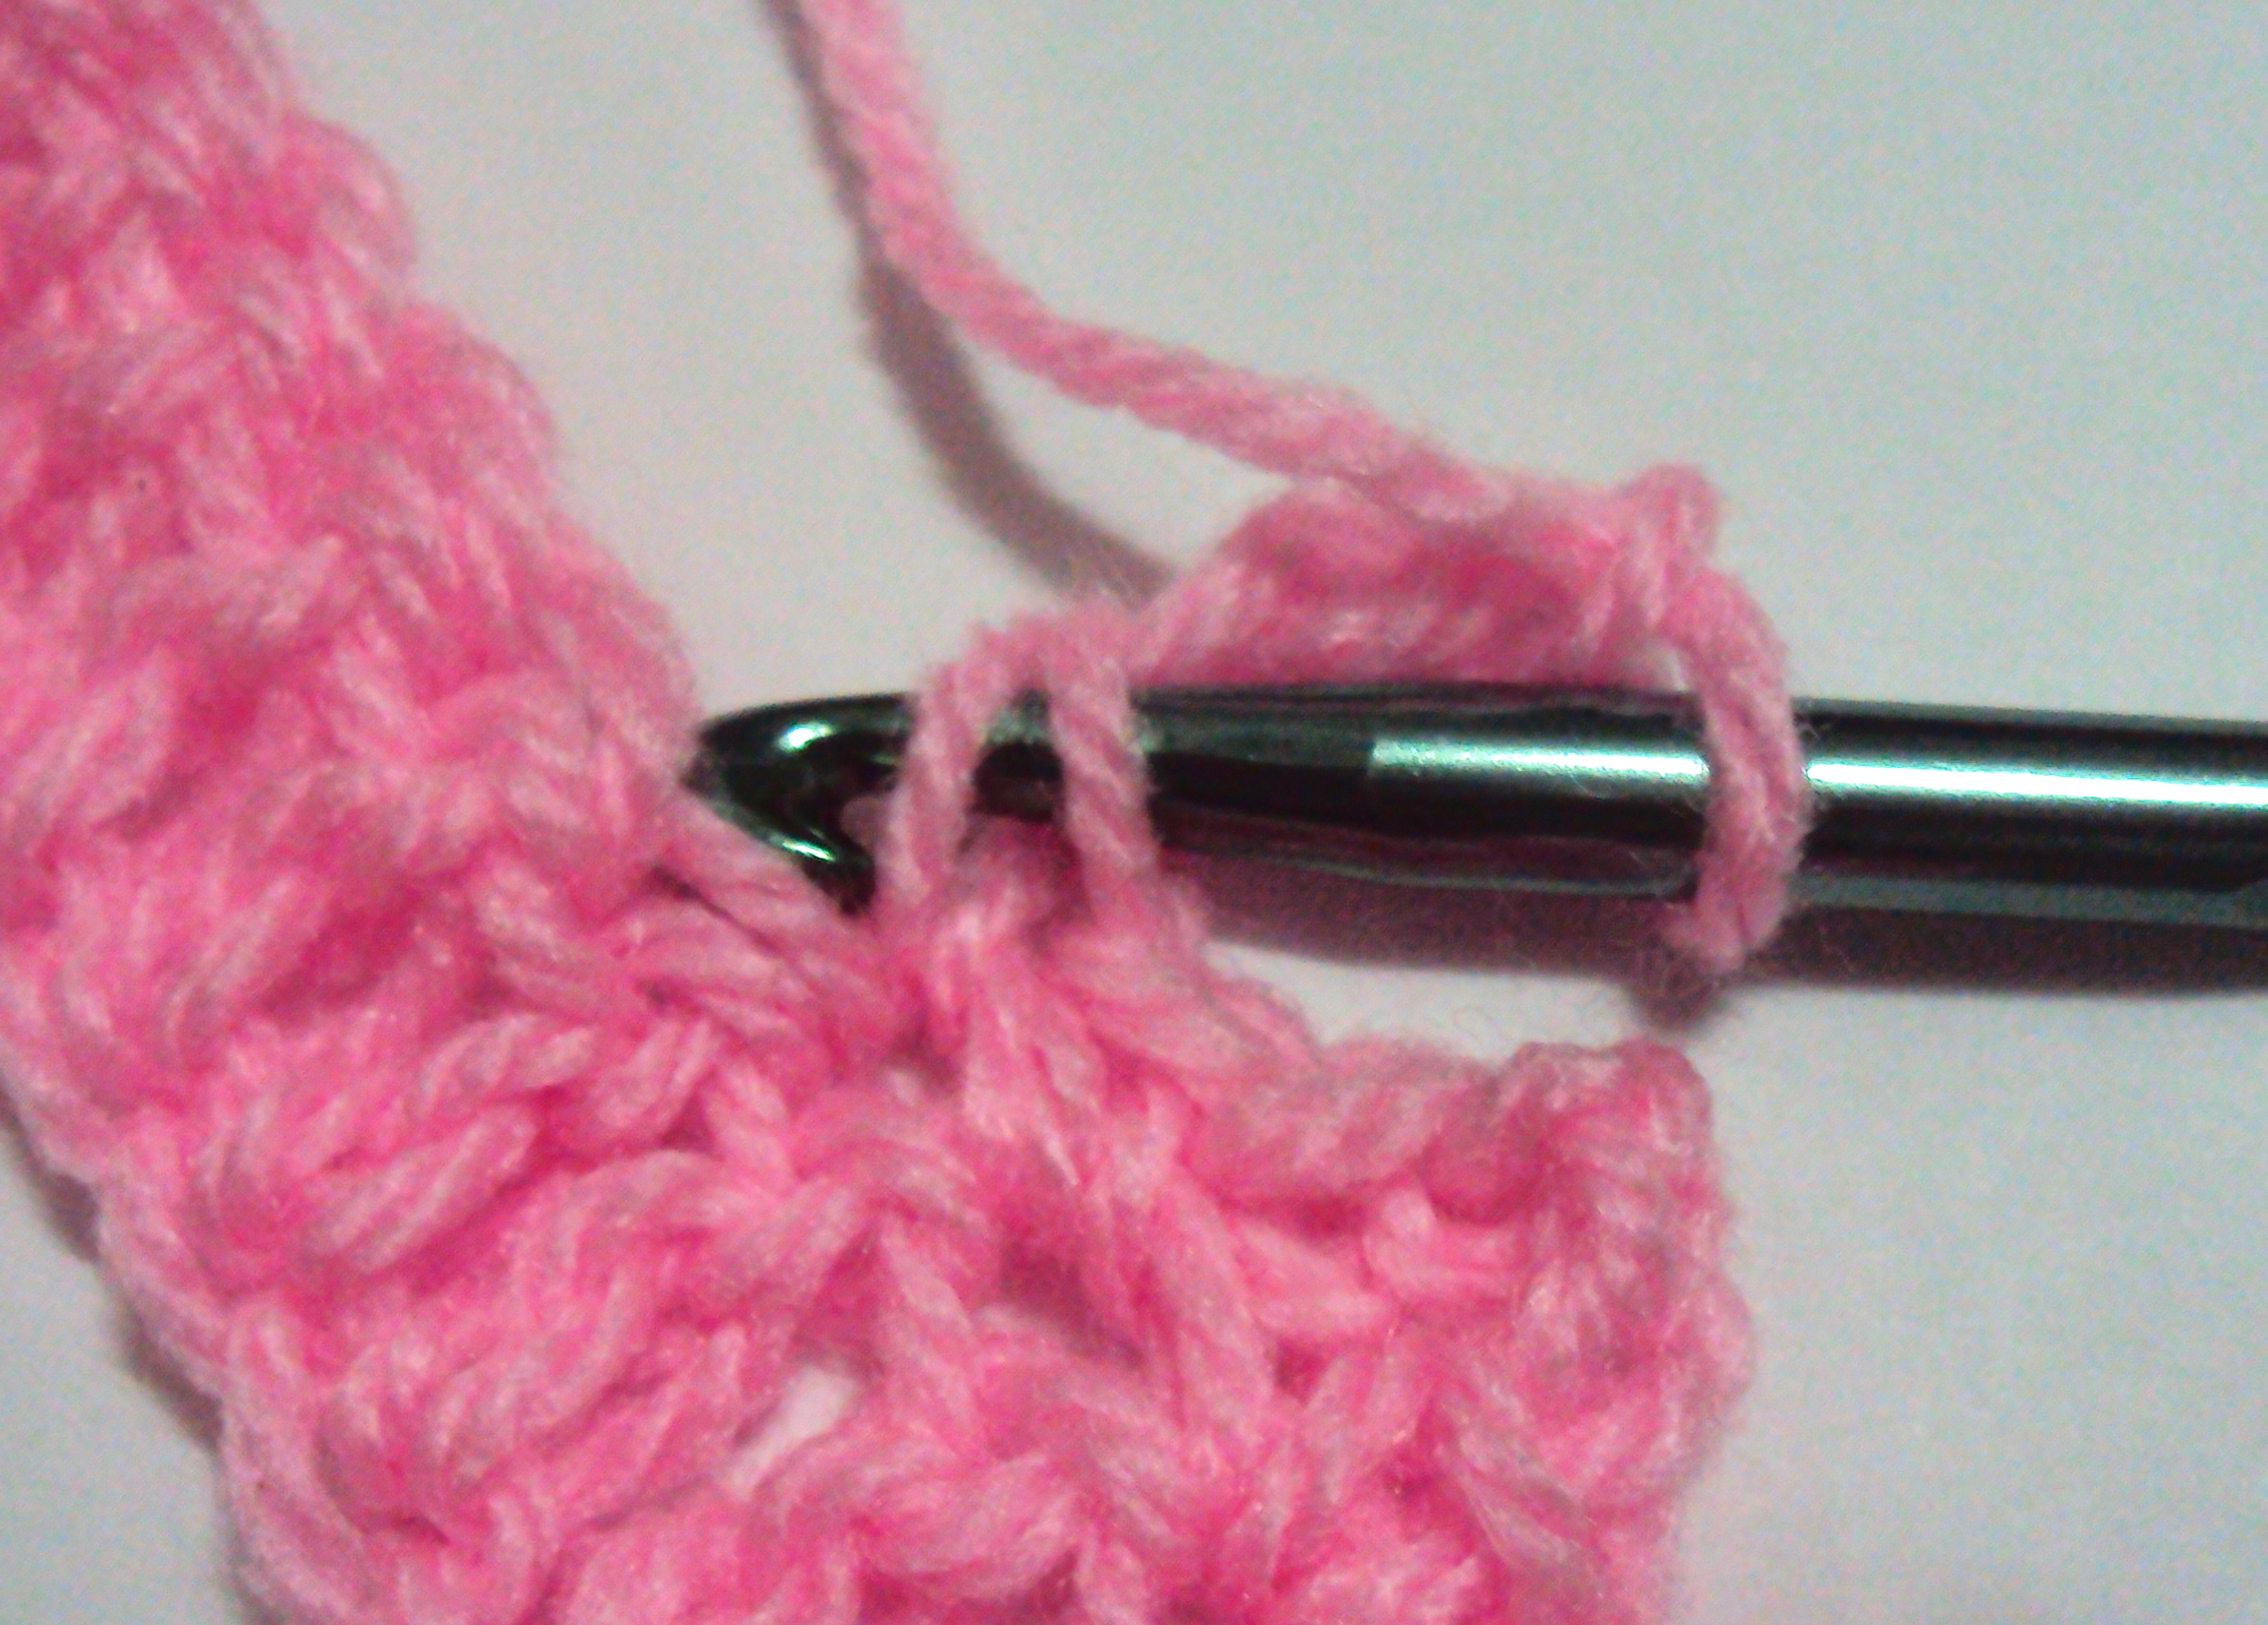
Insert hook into top and under a leg of the stitch made before the chains.
After this, yarn over and make a slip stitch or single crochet stitch.
In Comparison

The photo shows the six different picots that can be made from the tutorial. On the right side are the picots made with slip stitch, with the picot made into the V of the first chain (rightmost picot), into the back ridge of the first chain (middle picot), and on top of the stitch made before the chain (leftmost picot). On the left side are the picots made with single crochet, with the picot made into the V of the first chain (rightmost picot), into the back ridge of the first chain (middle picot), and on top of the stitch made before the chain (leftmost picot).
Note that the picots made with slip stitch are more pointed than the rounder picots made with single crochet. The picots made on top of the stitch previous to the chains made for the picot also blend more seamlessly into the work as opposed to the stitches made into the first chain of the picot.
I hope that was helpful! If you need any help, just leave a comment below.

Is this used as a border or in the midst of a piece? If it’s in the midst of stitching, do you have a pic of what it looks like? I’m pretty new at this so don’t know a lot about crocheting.
Hi Rene’, picots can be made both in the middle of the work and as a border. Usually, picots made in the midst of crochet work are used for lace patterns. They pretty much look the same as when they are used as a border.
Hi Jessica, so happy I was able to help! Good luck on your projects. 🙂
Thanks Claire I’m going to be making a baby blanket for my cousin and I wanted to do a picot border but didn’t know how but now I do thank you .
[…] a scarf fit for royalty! This lacy little number makes use of fans spaced with varied sizes of picots, making the scarf look like it is edged with […]
Thanks Claire – this tutorial if very helpful – I appreciate the variations and, more importantly, how each version looks when completed. I definately have a favorite so, thanks again.
Thanks. I was crocheting something last year, and it said make a picot stitch and blah, blah, blah. I’m going like “picot?” What the heck is a picot? I had to look it up online, and found several methods…each given as “the one.” I just tried several and made do. Thanks so much for this article. I finally understand why there were so many ways shown!
[…] are smaller and the middle one is larger. For more information on picot stitches, check out the picot stitches tutorial. You can use this stitch to edge a doily or a […]
[…] few crochet books to help you along as well. You can practice with various stitch patterns, such as picot, popcorn stitch, bobble stitch, etc. Just make sure you are not investing too much energy in big […]
i need help with a picot edge i am making a granny bibs
Hi Dawn, I’ll be glad to try and help you. Let me know what your question is 🙂
i so appreciate the lefty directions! and all of the details that you have put into this tutorial! i am hoping that this edging will be less stretchy than the picot edge cast off for knitting. do you have any experience with that? many many thanks, karen
Hi Karen, I don’t have any experience with the knitting picot edging, but maybe someone else will be able to chime in with some advice for you. Sorry!
This blog rocks. That is all I can say.
Thanks for the picot info. Haven’t tried this stitch, but want to. Appreciate your instructions!
What is difference in Picot and LG Picot
Hi Linda! It depends on the pattern you are using. The large picot probably uses more chains in it. If it’s a Crochet Spot pattern you are using, let me know the exact name of it of let me know it’s URL link and I can take a look at it to help!
I just came upon your site as I was looking for some information on crocheting. After viewing several bits of information, I find your site is very helpful and informative – better than many sites I’ve seen. Thank you!
I am wondering if it is necessary to do a slip stitch or single crochet into the chain for an edging because the instructions for the neckband crochet edging of a sweater says to (4 sc, ch 3) around and mentions nothing of slipping or crocheting into the chains (to close or make the picot). Do you think the instructions are incomplete or would an edging like that work out okay. I will say it is done with light yarn (weight 2) and a small crochet hook size E-4 (3.5 mm) so maybe being that small it wouldn’t be as necessary?? Even though it may not be technically a picot edge, would such an edge work, or do you think something’s missing in the directions.
It is from the book seamless (or nearly seamless) knits by Andra Knight-Bowman.
Here is a link to a picture of the sweater from Amazon.com: http://ecx.images-amazon.com/images/I/8111ofMJc0L.jpg
Now can you tell if that is proper picot around the neckline (and left out was the instruction to slip stitch or crochet into one of the chains) or can the look be achieved just 4 sc, 3 ch around with weight 2 yarn, and and E crochet hook. I am worried that it will leave a loop if I do that and that the instructions given in the book might be incomplete in regards to the the crochet edging.
Hi JJ, it seems fine the way it is written. The next single crochet after the ch 3 will make the ch 3 look like a picot, even though it is not into a chain. When a single crochet or slip stitch is made into the chain, it does give a more defined picot look. But the way you described the pattern will still give a picot look too.
Thank you so much. And I guess the way I described it will leave the neckline with more ability to stretch/expand as you pull it over your head.
So glad I found this. I feel more comfortable now using my picot of choice – the one that slip stitches into the base of the sc below the picot (that is used by Sheru Knitting). I can see now that there really isn’t a lot of difference, and to me that is by far the easiest method.
When you are using picots not as an edging but as part of the fabric, I assume you SC into the middle of the 3 chains, using it as an opening? I’ve got a pattern calling for this, but it’s only a chart and since I’d never seen picots used this way, I want to be sure.
Thanks for your clear step by step instruction.
Thanks so much for the detail you cover in your tutorials. Not only do you explain each variation of making a stitch but you also provide a left-handed version as well. I haven’t come across any other site that is so clear and comprehensive. Thank you.