Archive for 2009

Free Crochet Pattern: Simple Sassy Shrug

Posted in Free Crochet Patterns on May 4th, 2009 by Rachel Choi – 35 Comments
With beginner crocheters in mind, here is a shrug that is simple yet sassy. If you can crochet a rectangle then you can easily crochet this. The basic idea is to first crochet a rectangle and then sew up the two ends to form the sleeves. It is just as simple as that! Anyone can fit into this shrug since it can be easily adjusted. Just follow the instructions within the pattern to adjust the sleeves and the length as needed.

Skill Level: beginner crochet skill level

Finished Size: 30” (76 cm) width from end of arm to arm, 10” (25.5 cm) tall from neck to bottom
Note: to alter the size of this shrug, follow the directions within the pattern

Materials:
Medium Weight Yarn (approximately 200 yards)
Crochet Hook J (6.00 mm)
Yarn Needle
Scissors
crochet yarn size 4
crochet shrug
crochet shrug

Crochet Pattern: Shrug
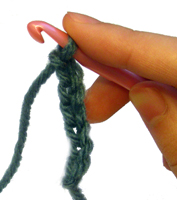
Start by chaining 28 or a chain that fits around the largest part of your arm
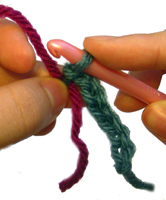
Row 1: ch 2, dc in third ch from hook and in each ch across: 28 dc
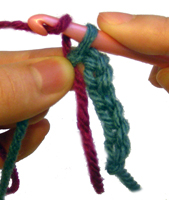
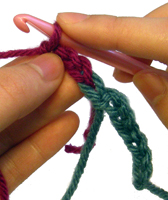
Row 2 – 42: ch 2, turn, dc in each dc across: 28 dc
Finish off.

Note: If the shrug is not the width that you desire (from the end of one sleeve to the other), continue to repeat the last row in the pattern.

To create sleeves, fold your work in half such that each row is folded in half. Starting at one end, sew piece together until you have sewed the length of 12 rows. Sew together the same length on the other side for the second sleeve. If you chose to alter the size of this shrug you may also want to alter the length of each sleeve.

If you need help crocheting this shrug, just leave a comment and I would be glad to help!

Mother’s Day Events at Michaels

Posted in News on May 3rd, 2009 by Rachel Choi – 2 Comments

This week (May 2 – May 10) Michaels is having FREE workshops for kids to make their mother presents. I thought this was a neat idea, even thought there wasn’t any crochet. I’m not sure if these workshops are at every Micheals store, so you may want to check with the one closest to you. Here are the different workshops that was on the flyer I found.

Saturday, May 2: Create a personalized keepsake plate
Sunday, May 3: Make a one of a kind t-shirt for Mom to wear
Monday, May 4: Create a corsage
Tuesday May 5: Using colorful papers you can create a unique bouquet of flowers
Wednesday, May 6: Make a personalized coupon book that Mom can redeem for chores, nights out, a massage, etc.
Thursday, May 7: Card making using a template to color
Friday, May 8: Decorate a wooden picture frame
Saturday, May 9:Make beaded jewelry and learn the latest trends and techniques
Sunday, May 10: Decorate cookies with Mom

These events sound like fun! Anyone going?

Crochet Spot Store: Coming Soon!

Posted in News on May 2nd, 2009 by Rachel Choi – 11 Comments

Yes, you read the title right! Yours truly is making a store. I’m so excited I can’t put my hook down! I’ll be filling the store with my very own patterns. I still plan to have my free patterns, if you’re worrying about that. The store will give me the chance to earn some extra bucks so I can make even more patterns and tutorials to share. Feel free to visit the Crochet Spot Store tab to learn more about what’s going on!

Cotton Yarn Experiment

Posted in Fun Ramblings on May 1st, 2009 by Rachel Choi – 38 Comments

I’m no expert, so I figured I’ll do some experimenting of my own to see what’s so great about cotton yarn and what’s not. I started my adventure off with some simple kitchen and bath accessories.

First off, the dishcloth!
Using Lily Sugar n’ Cream cotton yarn (which I’ve witnessed people raving about) I crocheted the simplest dishcloth I could think of (I even wrote a crochet pattern for it). It turns out that I love my dishcloth, other than the part where I haven’t worked up the nerve to use it yet. So much for an experiment huh? I’ll let you know how well it works when I use it!

Second, the super fluffy bath puff!
I always use nylon bath buffs that you can buy at the store for about $1, so I thought I’ll make my very own just for fun. Of course I made a crochet pattern for that too! This time I couldn’t wait to use it. I was so excited, I hopped into the tub, soaked it up and started cleaning. To my dismay, cotton bath puffs don’t lather like nylon!!! I’ll have to use a different type of yarn next time, maybe nylon yarn? Also cotton is super absorbent making the puff so heavy I thought it was going to break, lol. Better luck next time! (Update: A reader informed me that the cotton bath puff lathers much better after using them for a while. After wearing them down, you can rub the sides together to get it to lather. It won’t be as much lather as traditional nylon bath puffs, but the trade off is that the cotton should be softer on the skin.)

Whelp, there isn’t a definite conclusion to draw just yet. I still have more exploring to do. I can tell you that cotton yarn is really soft and fun to use. It might not be the best material to use for cleaning accessories (even though lots of people use cotton to make them), atleast for bath puffs, but I bet I will find something great to make with it. For now, the adventure is to be continued!

Do you use cotton yarn? What do you like to make with it? Do you have any tips?

Crochet Pattern: Super Fluffy Bath Puff

Posted in Free Crochet Patterns on April 30th, 2009 by Rachel Choi – 67 Comments
There isn’t a store bought bath puff that can compare to my super fluffy version. It is made with 100% cotton yarn and oh so soft against my skin, but for extra scrubbing power, add some nylon netting. I dislike how my bath puffs always wear out so hopefully this one will last a long time as it is ten times more durable then the ones I used! I think I will make a few as gifts. Here is the pattern if you would to like to make one, even a beginner can do it. Also, check out the cotton yarn experiment post, since this bath puff is a part of it.

Skill Level: beginner crochet skill level
crochet bath puff

Finished Size: approximately 5” (13 cm) in diameter

Materials:
Medium Weight Yarn (approximately 190 yards / 4 oz)
Crochet Hook K (6.5 mm)
Scissors
crochet yarn size 4

Crochet Pattern: Bath Puff
Round 1: ch 3, 30 dc in third ch from hook, place marker
Round 2 – 3: 6 dc in each dc around
Finish off weaving end into bath puff.

Strap
Row 1: ch 30, sl st in first ch made forming loop, attach to center of bath puff.

If you need help crocheting this bath puff, let me know and I would be glad to help!

Rachel’s First Crochet Dishcloth

Posted in Free Crochet Patterns, Fun Ramblings on April 29th, 2009 by Rachel Choi – 20 Comments
I always wondered what the big hype about crocheted dishcloths was and now I know! I’ve read many testimonials of people that love their cotton crocheted dishcloths and how they are just addicted to making and using them. Finally, I got around to buying 100% cotton yarn to give dishcloth making a shot. I used the classic single crochets as I love simplicity and of course yellow yarn as it’s my favorite color. crochet dishcloth

Once I started crocheting I didn’t understand why the infamous dishcloth was so great, but half way through it finally clicked. Not to sound crazy, but I kept sniffing and rubbing the cloth on my face, lol! There’s just something so cute and soft about a crocheted dishcloth that makes it so irresistible. Now I plan to make many more. Here is the simple pattern that I made, which is great for beginners.

Skill Level: beginner crochet skill level

Finished Size: 8” (20 cm) square

Materials:
Medium Weight Yarn (approximately 50 yards / 1 oz)
Crochet Hook H (5.00 mm)
crochet yarn size 4

Crochet Pattern: Dishcloth
Row 1: ch 30, sc in second ch from hook and in each ch across: 29 sc
Row 2 – 34: ch 1, turn, sc in each sc across: 29 sc

Free Crochet Pattern: Box

Posted in Free Crochet Patterns on April 28th, 2009 by Rachel Choi – 45 Comments
Here is a simple box that can be used as a gift box or as a safe place to store small treasures. The lid is detachable and you can even adjust the size of the box if you desire. Make this a special box by adding appliqués! Just follow the crochet instructions below to create your very own box!

Skill Level: crochet skill level easy
crochet box

Finished Size: 3” (7.5 cm) x 3” (7.5 cm) x 2 ½” (6.5 cm)
Note: to alter the size of the box, follow the directions within the pattern
read more »

Crochet Spot Not Working?!

Posted in Fun Ramblings on April 25th, 2009 by Rachel Choi – 4 Comments

I woke up Friday morning, rolled out of bed as I normally do, brushed my teeth, then sat at my computer to check my email and of course the wonderful comments that you all leave for me to read. I refreshed the browser to look at Crochet Spot and there was this big ugly server error!

I immediately started freaking out, I mean Crochet Spot is like my baby and it wasn’t breathing. So I called up a friend who assured me that the web hosting techs were already on it. But of course I couldn’t sit still, too much stress for one person to handle. So I spun around in my chair, grabbed a crochet hook and started crochet. Crochet is proven to help reduce stress after all. If a woman can use crochet to survive an earthquake, I was sure that I could use it to survive the down time of Crochet Spot.

I started crocheting a purse using Tunisian simple stitches so that I can sell the pattern in my soon to come store (and hopefully afford a better hosting plan). It’s almost done, but I haven’t decided how I’m going to make a closure for it. I’ll post picks soon!

Hopefully this Crochet Spot down time isn’t as nerve racking for you as it is for me. But I am glad that it motivates me to crochet even more!

Free Crochet Pattern: Amigurumi S’more

Posted in Free Crochet Patterns on April 24th, 2009 by Rachel Choi – 23 Comments
Crochet this s’more with the simple crochet instructions below. Start off by making two graham crackers, and then add a piece of chocolate. Finish off with the cutest marshmallow ever. This s’more can make a great addition to any kid’s play food set. Just remember not to eat it or this s’more might not smile any more. crochet smore
Skill Level: crochet skill level easy

Finished Size: 2” (5 cm) tall, 2 ½” (6 cm) wide

Materials:
Medium Weight Yarn
Crochet Hook F (3.75 mm)
Polyester Fiberfill
2 Beads
Yarn Needle
Scissors
crochet yarn size 4

Need help understanding the abbreviations? Check out the crochet abbreviation chart.

Crochet Pattern: S’more
Graham Cracker (make 2)
Row 1: ch 14, dc in third ch from hook and in each ch across: 12 dc
Row 2 – 6: ch 2, turn, dc in each dc across: 12 dc

Chocolate
Row 1: ch 12, dc in third ch from hook and in each ch across: 10 dc
Row 2 – 5: ch 2, turn, dc in each dc across: 10 dc

Marshmallow
Note: stitches are crocheted in the back loop only unless otherwise indicated.
Round 1: with white, ch 2, 6 sc in second ch from hook, place marker: 6 sc
Round 2: 2 sc in each sc around: 12 sc
Round 3: (2 sc in next sc, sc in next sc) around: 18 sc
Round 4: (2 sc in next sc, sc in next 2 sc) around: 24 sc
Round 5: sc in both loops of each sc around: 24 sc
Round 6 – 10: sc in each sc around: 24 sc
Round 11: sc in both loops of each sc around: 24 sc
Round 12: (decrease, sc in next 2 sc) around: 18 sc
Stuff marshmallow with fiberfill
Round 13: (decrease, sc in next sc) around: 12 sc
Finish off and sew marshmallow shut.

Using photo as a guide, sew graham crackers, chocolate and marshmallow together with a yarn needle. Sew on face as desired.

If you need help with crocheting a s’more, just leave a comment and I would be glad to help!

How to Change Colors in Crochet

Posted in Tutorials and Help on April 23rd, 2009 by Rachel Choi – 155 Comments

If you are new to crochet, here are some tips on how to change colors in your crochet work. The basic idea is to simply let go of the yarn you are currently using and pick up the new yarn that you want to use. Sounds easy enough, right? Let’s explore some examples!

This tutorial is for both right and left handed people. For left handed pictures, roll your mouse over the image and it will change for you.

Changing Colors In a Chain
Suppose you want to change the color in the middle of a chain. Just let go of the color your are using and pick up the new yarn and hold it against your work and start chaining with it.


Changing Colors in Crochet Stitches
Sometimes you may want to change colors after a certain crochet stitch. You change colors the same way, but you do it during the last step of a stitch. Here is an example using single crochet.
read more »