
Free Crochet Pattern: Kawaii Pencil Amigurumi
By Amy Yarbrough – 4 Comments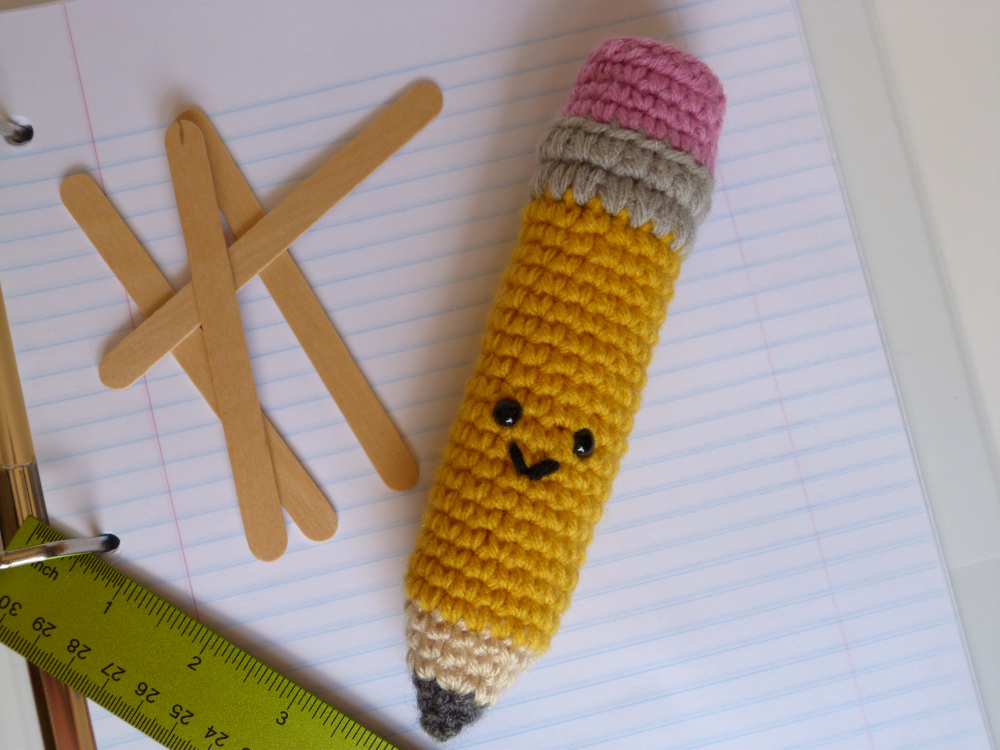
With “Back to School” on everyone’s mind, how could I not design a Kawaii Pencil Amigurumi?
This little school-themed amigurumi is an easy project, great for beginners, with just a few fun techniques to add particular looks.
I had reservations on how fine a point I would be able to achieve with crochet but it was surprisingly easy. By only increasing by 3 stitches instead of the normal 6 to begin a round you have the perfect point. However, I especially love the look of the pencil metal. First you work a round of single crochet and then crochet the next round over the last for larger and bulkier stitches. You do this twice and then work the pink for the eraser in the back loops only, to give the impression that it fits into the pencil metal. To cap it off, I could have simply decreased but I wanted a sharp edge to the top instead of a gradual edge. So you finish off the pencil and then crochet a separate round and sew it on top.
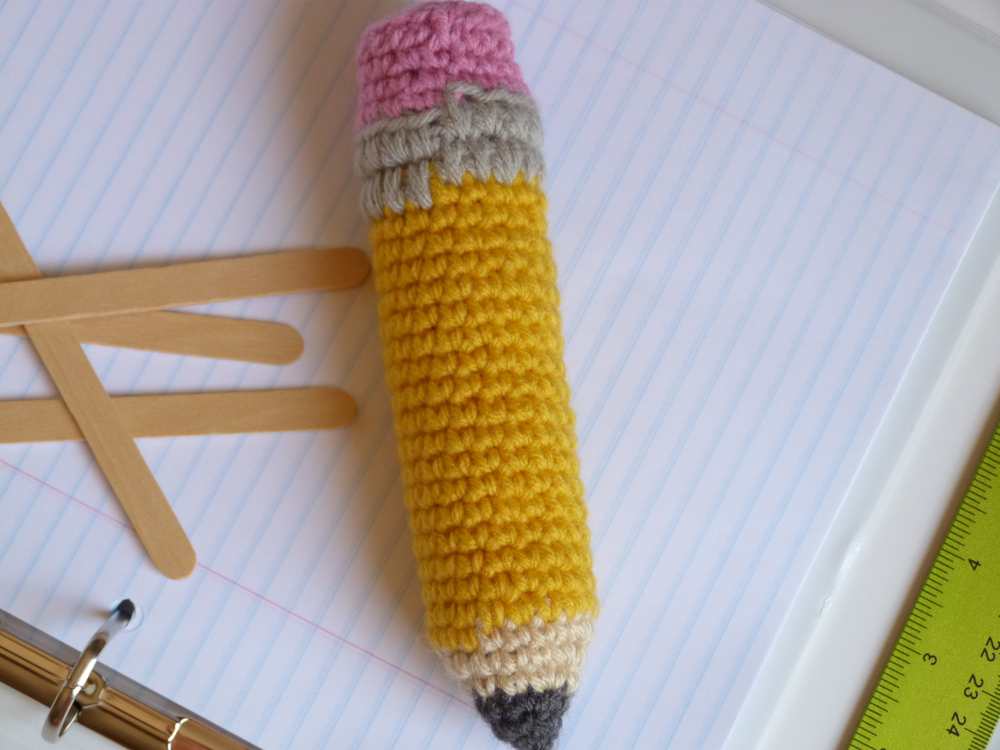
Be sure to read the Pattern Notes! Because of the nature of working in a spiral, the seam works its way around the project and can end up near the front — yikes! What I do with this amigurumi is move the seam. When you change to gray for the pencil metal you will work a few more stitches of yellow before starting the gray to make a new round beginning. It might sound complicated but it is really simple and described in the instructions.
Ready to give it a try? Let me know what you think about our Kawaii Pencil Amigurumi!
| Skill Level: |  |
Finished Size: 7†(17.5 cm) long, 5†(12.5 cm) in circumference
| Materials: Medium Weight Yarn (approximately 20 yards of yellow, 10 yard of gray and pink, and a small amount of tan, dark gray, and black) Crochet Hook E (3.50 mm) Fiberfill Yarn needle 2 plastic safety eyes (8mm in diameter) |
Gauge:
4 sc = 1’’
4 rows = 1’’
Gauge Swatch: 1’’w x 1’’h (2.5 cm x 2.5 cm) ch 5.
Row 1: sc in second ch from hook and in each ch across: 4 sc
Row 2 – 4: ch 1, turn, sc in each sc across: 4 sc
Finish off.
Pattern notes
– Pattern is worked in a spiral, use a stitch marker to mark the beginning of each round
– Because the amigurumi is narrow, it is impossible to work in some ends near the beginning, so I recommend crocheting over the ends as you go.
Need help understanding the abbreviations and symbols? Check out the crochet abbreviation chart.
Crochet Pattern: Kawaii Pencil Amigurumi
Round 1: with dark gray, make an adjustable ring, ch 1, 3 sc: 3 sc
Round 2: 2 sc in each sc around: 6 sc
Round 3: * 2 sc in next sc, sc in next sc, repeat from * around: 9 sc
Round 4: change to tan, * 2 sc in next sc, sc in next 2 sc, repeat from * around: 12 sc
Round 5: * 2 sc in next sc, sc in next 3 sc, repeat from * around: 15 sc
Round 6: * 2 sc in next sc, sc in next 4 sc, repeat from * around: 18 sc
Round 7: change to yellow, sc in each sc around: 18 sc
Round 8 – 18: sc in each sc around: 18 sc
At about Round 12, attach eyes on Round 15 and sew on smile at Round 14.
Round 19: sc in next 4 sc, change to gray, sc in each sc around, place stitch marker at first sc of gray to represent new beginning of row: 18 sc
Round 20: sc in each sc working over Round 19: 18 sc
Round 21: sc in each sc around: 18 sc
Round 22: sc in each sc working over Round 21: 18 sc
Round 23: change to pink, sc in back loops only in each sc around: 18 sc
Round 24 – 25: sc in each sc around: 18 sc
Finish off. Stuff amigurumi, using the end of a hook, or even a pen or pencil to push the stuffing down to the tip.
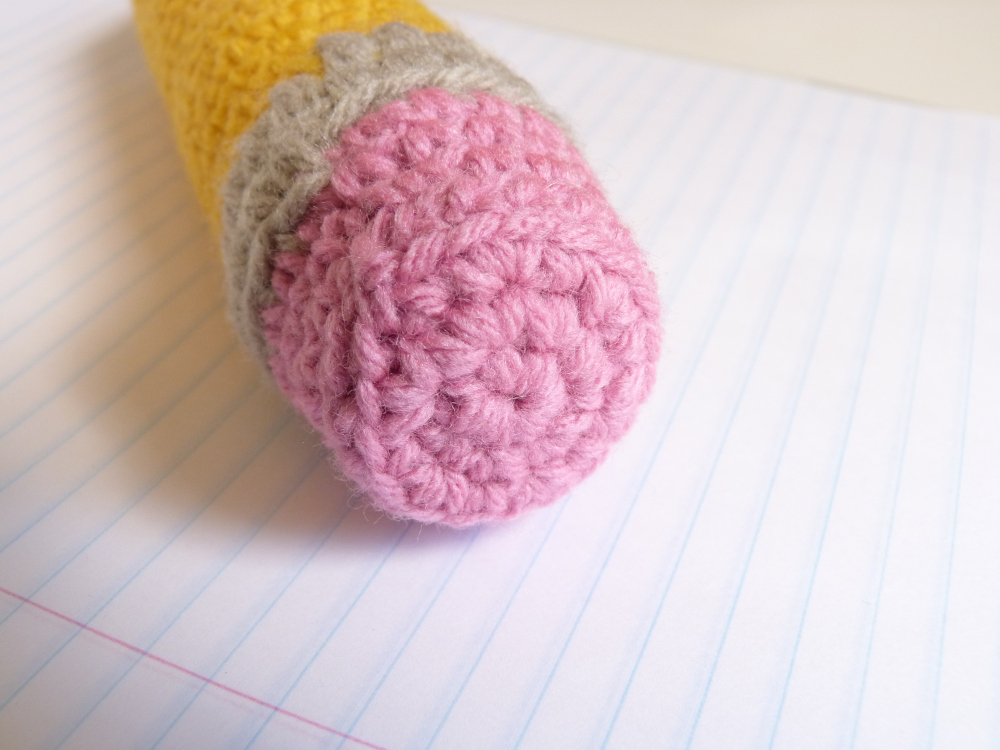
Eraser Cap
Round 1: with pink, make an adjustable ring, ch 1, 6 sc in ring: 6 sc
Round 2: 2 sc in each sc around: 12 sc
Round 3: * 2 sc in next sc, sc in next sc, repeat from * around: 18 sc
Finish off, whipstitch eraser cap to top of amigurumi.
Be sure to let me know if you have any questions while crocheting!

Amy, this is the cutest thing ever…what an adorable design!
Thanks Claire! Strangely enough I was going for a larger pencil pillow but somehow the idea transformed into an amigurumi, lol.
I already crocheted two pencils. The only part that is hard to do is using a small needle to make all those scs around and around. It is amazing how well the point comes out. Thank you
Hi Sandra,
How nice! I know, working with a small hook and consequently, small stitches, especially to achieve the point, is tough. But it’s worth it when you see the finished product. I’m glad to hear you like my pattern!
Keep Crocheting,
Amy