
How to Crochet: Back Crossed Tunisian Stitches
By Candace – 1 CommentIf you want to add lovely, serpentine cables to a Tunisian project, then crossing stitches will be a useful technique. Unlike front crossed stitches, back crossed stitches will give you stitches that lean to the right (to the left for left-handed crocheters). Play around using different types of stitches to make subtle cables or ones that pop.
For the purpose of this tutorial, you should already be acquainted with Tunisian crochet.
In this tutorial, I am working back crosses with two sets of two stitches in TSS, but have fun trying different combinations. You may find it helpful to use a cable needle or double-pointed knitting needle to hold the skipped stitches behind your work to make it easier, but it is not required.
For a left-handed view, just hover your cursor over the photos.
Work to the point where you want to cross your stitches. Then, skip the stitches that will be in the back and work the rest of the stitches in the cross. (I’m skipping two then working two.)
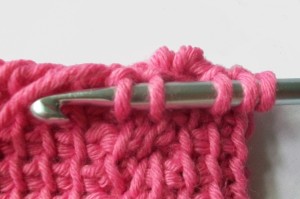
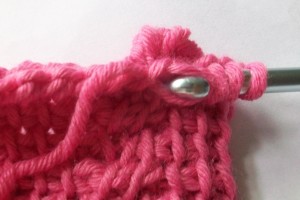
Keeping the stitches on your hook in front of your work, work in the skipped stitches. Take note of how my hook is positioned before I work the skipped stitches.

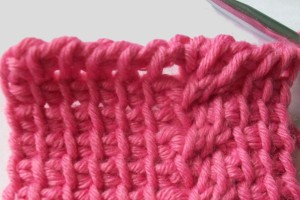
Finish your row and make the return pass as usual, and you will have completed a row with back crossed stitches.
If you need help, feel free to leave a comment below.

You make something I thought complicated so easy to do. Really like the position of hook picture. Thank you.