How to Crochet: Front Crossed Stitches
By Candace – 2 CommentsMaking crossed stitches is a pretty simple affair once you get the hang of it. There are two ways to cross stitches: By crossing the second stitch in front of the first stitch, or crossing the second stitch in back of the first. This tutorial teaches you to make the former.
If you’re left handed, you can hover over the pictures with your cursor to see the left hand view.
Start making your stitch (mine is a tr). Instead of inserting your hook into the next stitch, skip the number of stitches indicated by your pattern (3 stitches in this example), and insert the hook in the next stitch after the skipped stitches.
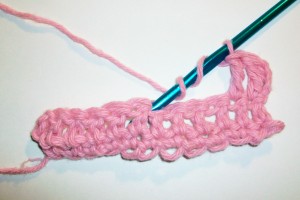
Finish working the stitch as usual. Chain one fewer than the number of stitches you skipped. If you skipped three stitches, chain two.
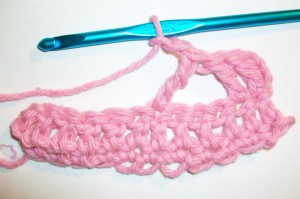
Start making your next stitch, and hold your hook in front of the last stitch you made.
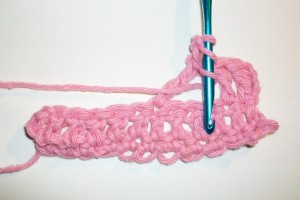
Insert the hook into the first skipped stitch from back to front.
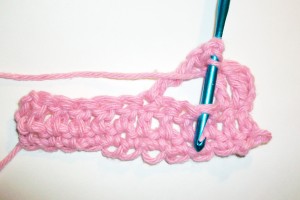
Finish working the stitch as you normally would.
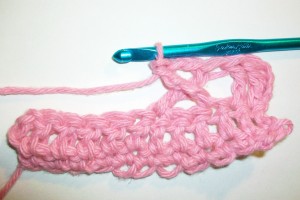
Your stitches are now crossed!
Need clarification? Leave a comment, and I’ll be glad to help.


Hello, Iv’e been looking around your site… Very informative! Lots of charity links too… thanks I was looking for a few.
I got the first row of front crossed triple crochet done. It was really neat. Now my pattern calls for two rounds, so how is the best way to start the next round on top of the first one?