
How to Crochet: Herringbone Double Crochet (HBdc)
By Caissa "Cami" McClinton – Be the first to commentHerringbone double crochet (HBdc) is one of the first special stitches I learned. It is an easy way to create texture in any project. To achieve the full effect of the stitch, Herringbone double crochet should be worked back and forth in rows. For the purpose of practicing this skill, we’ll make a swatch in this tutorial. Yarn and hook size don’t matter for this practice swatch.
Abbreviations:
ch – chain
fsc – foundation single crochet (link to tutorial)
HBdc – Herringbone double crochet
Instructions in brief: Yarn over, insert hook into stitch. Yarn over, and pull loop through stitch and first loop on hook. Yarn over and pull through one loop on hook. Yarn over and pull through both remaining loops on hook. Herringbone double crochet made.
Note: Any foundation will work, but to save time, I decided to use the foundation single crochet to begin the project.
You may mouse over images for left-handed views.
Foundation: Make 10 fsc
The photo below shows this done.

Row 1: Ch 3, turn. Yarn over. Insert hook into the second fsc, yarn over, and pull the loop through the fsc AND the first loop on hook. Yarn over.
The photo below shows this in progress. The blue yarn is the first loop on the hook and the red yarn is the yarn over and working yarn.
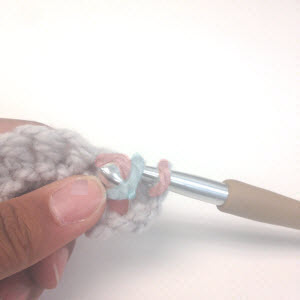
Yarn over and pull yarn through the first loop on the hook.
The photo below shows this done.
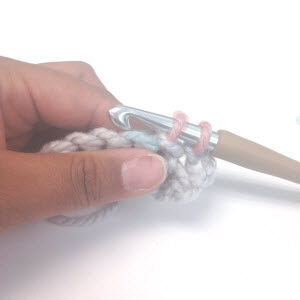
Yarn over and pull through the remaining two loops on the hook.
The photo below shows this in progress. The blue yarn represents the loops on the hook and the red yarn is the yarn over and working yarn.

HBdc made.
The photo below shows this done.
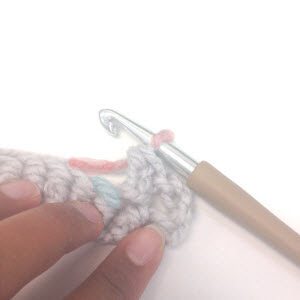
HBdc into each remaining fsc across. You will have a total of 9 HBdc and 1 ch-3 when the row is completed.
The photo below shows this done.

Row 2: ch3, turn. Skip first HBdc. HBdc into the next 8 HBdc and the top of the ch-3.
The photo below shows this done.
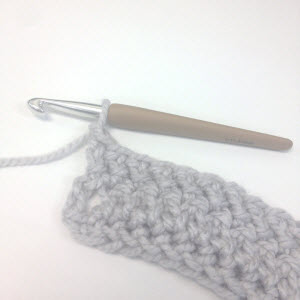
Rows 3 – 4: Repeat Row 2
The photo below shows this done.

Finish off.
Thanks for reading this tutorial. I hope you found it helpful. If you need any help or have any questions, please leave a comment below.
