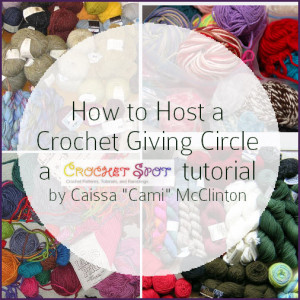
How to Host a Crochet Giving Circle
By Caissa "Cami" McClinton – 1 CommentThe concept for this tutorial came from a wonderfully fun event a funky college friend of mine used to host. The event was called a “sister circle” and it was based on the idea that one woman’s junk is another woman’s treasure.
A group of us would gather our extra clothes, shoes, and accessories and bring them into her dorm room. My friend would set the mood with great music and refreshments. We’d artfully arrange everything and swap to our heart’s content!
It was so much fun to see the cool stuff that everyone brought but no longer needed. And to think that any one of us could have it – for free! Everyone would leave feeling lighter. We’d all gotten rid of some stuff, chosen some cool stuff, and had a great time with friends!
More recently my local crafting group has did something similar but much yarnier! You betcha. It was a sister circle with yarn! I’m going to give you a step-by-step about how you can host your own Crochet Giving Circle.

Image modified from photos by TheKarenD, Kristin Roach, librarykyle, and splityarn, all via flickr. Links to licenses.
Step One: Select a guest list. Think about all of your crafty friends or other folk who might like to share in the goodness. If you’re part of a crafting group already, start there! See if those friends have other friends who might be interested in participating. If you have a local yarn shop, see if you can find any swappers by networking there. To expand your list, try social networks like facebook, Ravelry, or Meetup.com. If you’re part of a faith community, check with the leadership to see if there is an existing craft group or to see if they know anyone who might be interested.
Step Two: Schedule a time and place. With your guest list in mind, pick a time and place that might be convenient for all of you. If you don’t have a great party space in your home, some restaurants have private rooms or just areas where they wouldn’t mind having this kind of event going on. Check with a local cafe and see if you can use their space if the attendees buy something! If you’re part of a faith community, maybe you could use one of their rooms. Once you have your space in mind, choose a time that will be good for most of your intended guest list.
Step Three: Send out the invites! Yay! Your invites will vary based upon how your group connects. If you’ve connected on social media, use social media to manage the invitations. If you’re connecting through a faith community, maybe there is a bulletin or announcement you can advertise in. If you’re just a group of people, you can call, text, e-vite, or even send invitations through the mail!
Step Four: Search your stash for goodies to swap! Whee! Use this event as an excuse to blaze through your stash and make ruthless cuts. You don’t have to feel guilty because you know that your yarn will be going to good use – another yarn lover just like you! But don’t stop at just yarn, gather oddments, notions, project bags- anything yarn related. If you have skeins of the same kind or color, group those together to make it easier at the giving circle.
Step Five: Bring your stash to the event. Be sure to arrive at least 30 minutes early if you are the host. This is particularly important if you are meeting at a cafe and you don’t have a reserved space. You can make sure the area is ready for your friends! Arrange the stash into a designated area so everyone will be able to see it! When your friends arrive, they can do the same. As people come in, they can start to think about yarns they would like to snag, but don’t start choosing until the after the next step!
Step Six: Draw numbers and choose away! In order to see who goes first, you can let fate decide and ask each person to draw numbers. Alternately the oldest or youngest person can go first. Or maybe whoever got there first can pick first. Once the order is established, each person can choose whatever they want from the goody pile!
My crafting group handles this part is as follows: We each draw numbers. The lowest number goes first, and so on. Participants each choose one item* until the entire pile is gone or until we’re done. Some people “drop out” after a few rounds and if so, the remaining swappers continue to choose until they are done.
*Note: In my group a “lot” of yarn counts as one item. A “lot” is defined as multiple skeins of the same yarn in the same color. Keeping these lots together helps to maximize the potential for a larger project.
Step Seven: Give the leftovers to charity. If you have any left at the end of your event, take it and donate it to a local charity! Then go home and enjoy your new yarn!
So what about you, Crochet Spotters? Have you ever participated in a Crochet Giving Circle? Do you think you’d like to plan one? Do you have any event-planning tips to share? Please leave your thoughts, ideas and questions in the comment section below. I would love to hear about your stash-clearing/stash-building adventures!


Just curious if anyone has done this online? If so we’re any of the rules different? I’m worried that some will not actually mail out what they’ve traded.