Tutorials and Help

Crocheting Hats Without Patterns

Posted in Fun Ramblings, Tutorials and Help on October 30th, 2012 by Corinne Munger – 26 Comments
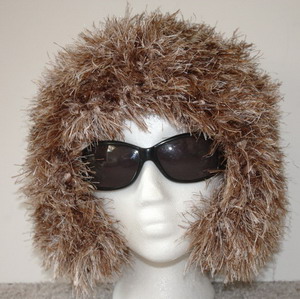
Hats are one of my favorite accessories – they help me express my mood on any particular day. If it’s super cold, it’s the “furry, no-named animal” hat that says I’m feeling “a little wild” today. My bulky yarn rolled brim says “I’m feeling preppy!” Then there’s my flat top, large flowered, multi-colored, multi-fiber yarn that states that I’m feeling artistic and love color! And there’s always the “Bad Hair Day Beanie” that I can just throw on and head out the door without spending an hour getting to know my curling iron better.

Basic Beanie with Ear Flaps embellished with furry yarn

Whatever your likes, there’s a pattern out there. In my experience in crocheting, there are really only 3 styles of hats you need to learn to make a very wide array of different hats.
read more »

Crocheted Cotton Washcloth Sampler

Posted in Fun Ramblings, Tutorials and Help on October 17th, 2012 by Corinne Munger – 49 Comments
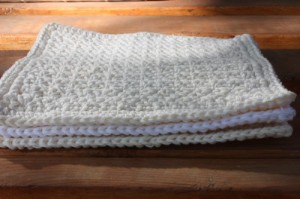
When I first thought of writing this post, I couldn’t make up my mind on what I wanted to talk about. Was it to be about using a luscious cotton yarn (that I love so much), about the incredible patterns you can make using only single crochet, or how washcloth patterns are really just “samplers” of your talent? Then I realized it should be about all 3!

Crocheted Washcloths

read more »

Crochet Finish Technique: “Crochet Evenly Around”

Posted in Tutorials and Help on October 4th, 2012 by Corinne Munger – 118 Comments

Many crochet items appear unfinished due to the uneven look of the sides. There are little “bulges” and “indents” that just don’t look as even (pretty) as the first or last rows and it can make an item look unappealing. To fix this, many patterns simply say, “Crochet Evenly Around”. What does that mean and how do you accomplish this?

What it means is that you need to crochet all the way around your piece, and place the stitches evenly around the edges so that there is an equal amount of stitches on both sides, and, of course, an equal amount on the top and bottom of your piece. You may have taken a stab at doing this only to end up with a ruffled edge, or too tight of an edge that makes your edges pull. But “crocheting evenly around” is actually easier than it seems. There are just a few simple rules to remember, but first let’s look at the example.
read more »

Tips for Adjusting Crochet Patterns

Posted in Tutorials and Help on September 29th, 2012 by Rachel Choi – 11 Comments

Most of us crocheters have worked with a crochet pattern at some time or another and thought it would be even better if the finished size was smaller, bigger, or just slightly different in some way. Some patterns will tell you how to adjust the pattern if you choose to adjust it, but others do not. Brave crocheters can venture into adjusting the pattern on their own, but there are others that aren’t quite sure how to go about it. Truthfully, there really isn’t a golden rule to follow when adjusting a pattern. How to adjust will always depend on the pattern and how it’s written. Here are some tips that may help you out along the way:
read more »

How to Crochet: Crocodile Stitch

Posted in Tutorials and Help on September 28th, 2012 by Rachel Lendyak-Peters – 54 Comments

This funky stitch is perfect for adding a little flare and texture to your projects. You know everyone is looking forward to your handmade holiday presents this year, and the crocodile or scale stitch is perfect for jazzing up a simple scarf or adding a feathery quality to a cute owl hat or bag. The best thing is that once you get into the rhythm of this stitch, it practically crochets itself!
read more »

How to Line to a Crocheted Bag

Posted in Tutorials and Help on September 18th, 2012 by Rachel Lendyak-Peters – 11 Comments
We put so much thought, energy and love into our projects, so it may be a little disheartening when your beautiful crocheted bag just isn’t doing the job you want it to do. There is a simple solution though: A fabric lining! I know what you’re thinking – If this requires a sewing machine, count me out. Don’t be intimidated. I already know you are super crafty because you are reading this page.

What a great little crocheted bag! So pretty and so practical…. Wait… that isn’t helpful at all!

Why not expand your horizons a bit! The best part is that since the lining is on the inside, little mistakes will go completely unnoticed!
read more »

How to Make Your Own Crochet Pattern

Posted in Fun Ramblings, Tutorials and Help on September 5th, 2012 by Rachel Choi – 8 Comments

As a designer of many crochet patterns, I’m often asked how I design my own patterns. The design process is probably different from designer to designer and there’s no one right or wrong way to design. Outlined below is what I do each time I make a new crochet pattern. My process probably isn’t as strict or structured as you may think! It is a fairly simple and easy process.
read more »

How to Crochet: Inverse Stitches

Posted in Tutorials and Help on August 21st, 2012 by Candace – 6 Comments

Creating an inverse stitch isn’t very complicated, and those who like to experiment should not have too hard a time incorporating them into their tinkering. Since they are mostly used in slip stitch crochet, this tutorial will demonstrate the technique using the slip stitch.
read more »

How to Crochet: Chainless Initial Double Crochet Decrease

Posted in Tutorials and Help on August 16th, 2012 by Candace – Be the first to comment

If you’re a fan of starting your rows or rounds without a turning chain, you may want to try using the technique when you have to start a row off with a decrease. This is not a beginner technique, so it is suggested you learn the double crochet decrease and the chainless initial double crochet before trying this.

As a side note, if your pattern says the turning chain counts as a dc, you should simply make the chainless dc then work the decrease to maintain the proper stitch count. This technique is for chains that do not count as a dc.

Lengthen your first ch to the height of a dc; holding the loop still, wrap the loop around the hook, yo, pull through two loops; (yo, insert hook into next stitch, yo, pull up a loop, yo, pull through two loops) for as many stitches as you need to decrease, yo pull through all loops.
read more »

How to Crochet: Treble Crochet 3 Together (Tr3tog)

Posted in Tutorials and Help on August 14th, 2012 by Candace – 7 Comments

Treble three together (tr3tog) is a decrease you can see used in the Cat Scrubbie pattern. Like other decreases, it’s performed by working each stitch up to its second to last step an then pulling through all remaining loops.

To complete a tr3tog: *yo twice, insert hook into next st, yo, pull up a loop, (yo, draw through 2 loops) twice, repeat from * two more times, yo, draw through all loops on hook.
read more »