
Free Crochet Pattern: Mini Crochet Donuts
By Amy Yarbrough – 4 Comments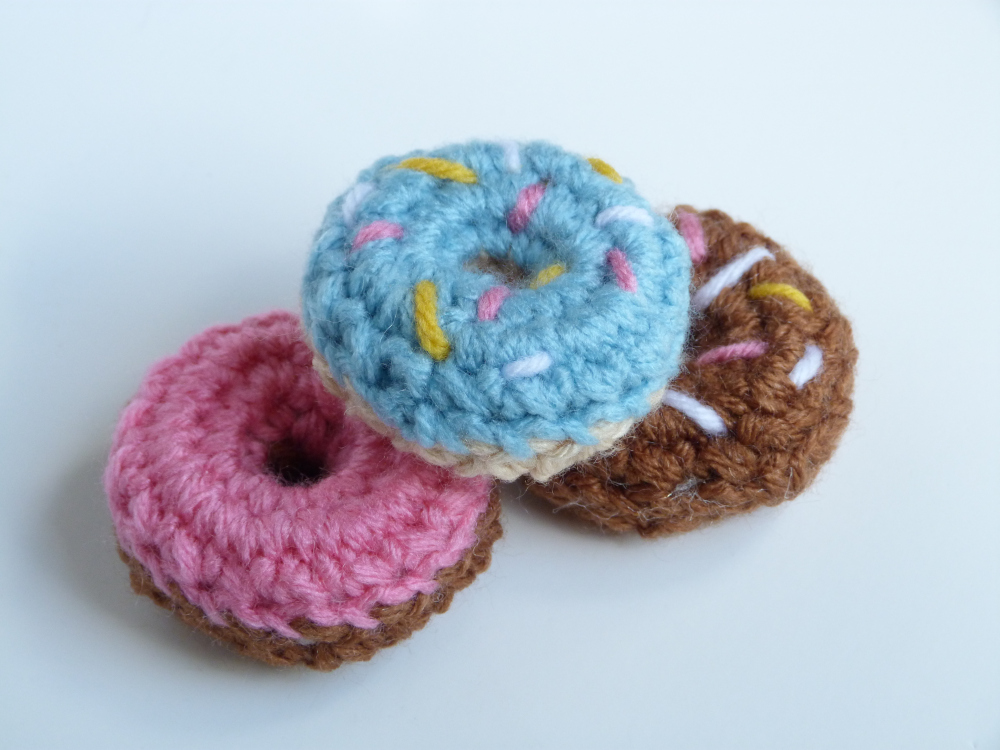
I can imagine many reasons for crocheting a set of mini donuts: 1) they make great play food for tea parties and cooking playsets, 2) you can easily make them into keychains with a few jump rings and a lobster clasp, and 3) it’s just so much fun!
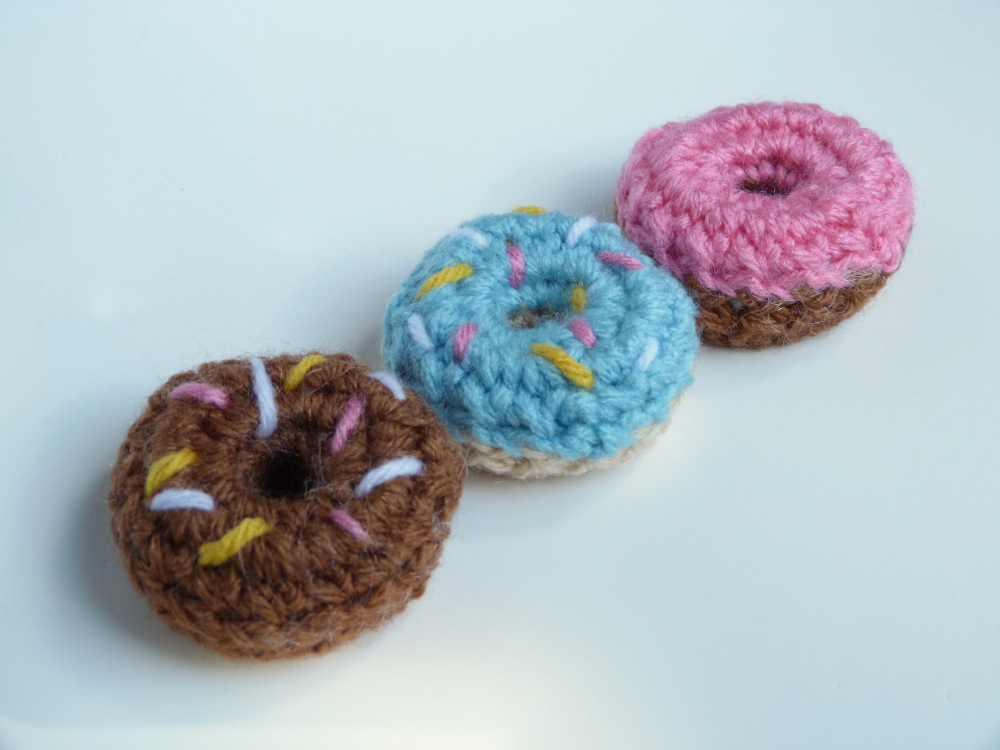
In the picture you see one with just sprinkles, one with just frosting, and one with both frosting and sprinkles. The instructions are terribly simple and customizable so don’t hesitate to design your own.
| Skill Level: |  |
Finished Size: about 2†(5 cm) wide and 1†(2.5cm) thick
| Materials: Medium Weight Yarn (approximately 20 yards of yarn per donut, and small amounts of various colors for sprinkles) Crochet Hook G (4.00 mm) Polyester Fiberfill Yarn needle |
Gauge:
4 sc = 1’’
4 rows = 1’’
Gauge Swatch: 1’’w x 1’’h (2.5 cm x 2.5 cm) ch 5.
Row 1: sc in second ch from hook and in each ch across: 4 sc
Row 2 – 4: ch 1, turn, sc in each sc across: 4 sc
Finish off.
Note: see Color Options for choosing different types of donut designs.
Need help understanding the abbreviations and symbols? Check out the crochet abbreviation chart.
Crochet Pattern: Mini Crochet Donuts
Lower Half
Round 1: ch 8, sl st in first ch to form ring, ch 1, sc in each ch around, sl st in first sc: 8 sc
Round 2: ch 1, sc in each sc around, sl st in first sc: 8 sc
Round 3: ch 1, 2 sc in each sc around, sl st in first sc: 16 sc
Round 4: ch 1, 2 sc in each sc around, sl st in first sc: 32 sc
Round 5: ch 1, sc2tog around, sl st in first sc: 16 sc
Finish off.
Upper Half
Round 1: with right side facing, join yarn in Round 1 of Lower Half, ch 1, sc in each ch around, sl st in first sc: 8 sc
Round 2 – 4: repeat Rounds 3 – 5 of Lower Half
Finish off, leaving a long tail for sewing.
Color Options
For frosting, use another color for the Upper half.
Add sprinkles by using bright colored yarn and making short, random stitches to the Upper Half, before seaming. Merely knot ends underneath.
Seaming
Hold both layers of the Lower Half and the Upper Half together and use the long tail to whip stitch together, stuffing with fiberfill as you go.
Tip: to push the fiberfill into the narrow opening I suggest using the end of a bigger hook, or a pen or pencil even. However, be careful not to overstuff!
Be sure to let me know if you have any questions!

These are adorable! I’m not usually susceptible to the amigurumi kauai, but these are great! I can’t wait to make my own dozen.
Thanks, Erin! I’m glad you think so!
They’re cute, and they’re a good way of using up odds and ends of yarn. But why would anyone bother with making a gauge swatch for something like this? They don’t have to be a precise size.
Hello Mary,
We do it as a rule here but you are right, it is not necessary that your gauge be accurate. However, it can be a guideline for others wanting to reach the exact size the pattern produces.
I’m glad you like them!
Amy