
How to Crochet: Beaded Rope
By Candace – 2 CommentsIf you’ve tried crocheting and beading, chances are you’ve come across beaded ropes. These lovely pieces are simple in concept– they’re made of beaded chains and slip stitches– but they’re easy to mess up, which makes them tricky in practice. Hopefully, by the end of this tutorial, you will have gotten the hang of the basic steps to this devilishly simple way to make beautiful jewelry.
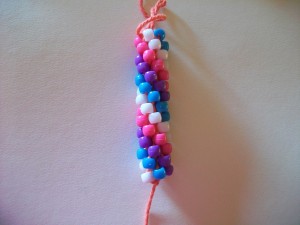
For this tutorial, I’m using four colors to make a simple pattern. This makes it easier to see where beads should be positioned. It is very important that your beads be positioned right when making these ropes, so be careful.
Before you start crocheting, string your beads in the desired pattern. Be sure to be consistent about the order. It’ll make things easier to line up once you get started.

Start by making a beaded chain stitch with each color. These first four beads will make up the first round. For left handed photos, mouse over the photos.
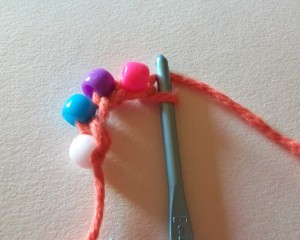
Note how the chain is oriented. Instead of using the top loops as normal, you will be working in the bottom bump where the bead is, so hold the chain with the bead facing up.
1. To close the circle, insert your hook into the last beaded ch from the hook. If your stitch doesn’t look quite like this, pay special attention to the next step.

2. Move the bead in the chain to the far side of your hook (To the right if you’re right-handed, to the left if you’re left-handed). The position of the bead is very important.
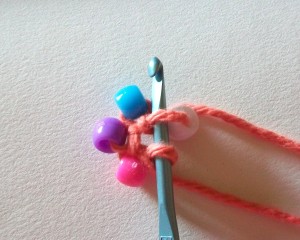
3. Move your next bead down to your hook. It should be the same color as the bead in the stitch you are working on.
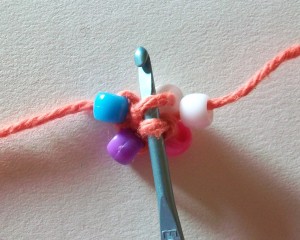
4. Yarn over.
5. Pull through the two loops on your hook.

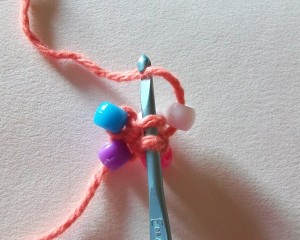
You have made a beaded slip stitch.
Move on to the next bead, inserting your hook into the stitch as you did before, and repeating each numbered step for every new bead. Each new beaded slip stitch should match the color of the bead in the previous round. The pattern makes it easy to tell where to make the next stitch.
As you go around and around, a tube with a spiral pattern will start to form, and you will have successfully made a beaded rope. Finish off as you normally would a crochet project in the round. If you’re using a slippery beading cord, more knotting or crimping may be necessary to keep your work in place.
If you need help, feel free to leave a comment.

My Great Aunt used to make beautiful jewelry with this pattern and I was never able to find her patterns! : (
THANK YOU SO MUCH!!!
Try using elastic threads for bracelets, they are awesome!
There are some amazing patterns online if you search for breaded rope (I really love the florals), but even the simple ones make beautiful pieces.