
How to Crochet: Invisible Decreases
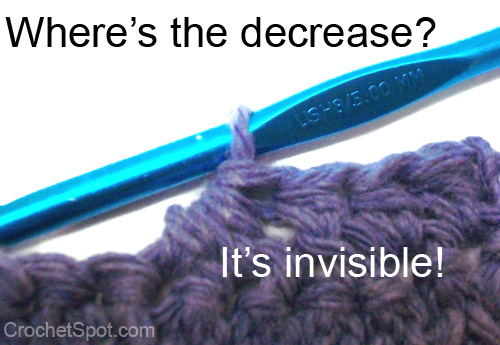
By Rachel Choi – Be the first to commentIncreasing and decreasing creates shape in your crochet projects, but traditional decrease stitches don’t always blend well and can stick out and be unsightly. The invisible decrease technique can be used with a lot of different stitches. The technique is similar for each stitch.
Stitch Variations
Below are tutorial links for invisible decreases using different crochet stitches. Once you understand the basic concept, you can also apply the technique to other crochet stitches. The basic concept is to insert your hook into the front loops only of each stitch that is apart of the decrease, instead of pulling up a loop into each of the stitches. This creates a stitch that looks like an ordinary stitch but functions like a decrease. Try the tutorials below to see if you can spot the invisible decreases in your work!
Single Crochet Invisible Decrease
Double Crochet Invisible Decrease
Half Double Crochet Invisible Decrease
Treble Crochet Invisible Decrease
Should you use the invisible decrease all the time?
No. The invisible decrease is best used when there is a clear right and wrong side of the work. The back (unused) loops will appear on the other side of an invisible decrease, which usually does not blend well into the project. The invisible decrease is great for projects where only one side of your work will show, like in patterns that are crocheted in the round without turning, such as toy and doll patterns. My rule of thumb is to use a traditional decrease stitch first, and if it doesn’t blend well, try an invisible decrease.
Have you tried it?
Leave your comments below! I would love to hear about your experiences with invisible decreases. What projects have you used it with?
