
How to Crochet: Granny Squares (Step-by-Step)
By Claire Ortega-Reyes – 55 Comments| I know we already have a post about how to crochet granny squares, but I thought that some would appreciate a step-by-step tutorial. We’ll be using the same pattern in that post, but more pictures will be included. As with all other tutorials here at Crochet Spot, mousing over the images shows the photos for the left-handed tutorial.
Need help understanding the abbreviations? Check out the crochet abbreviation chart. |
 |
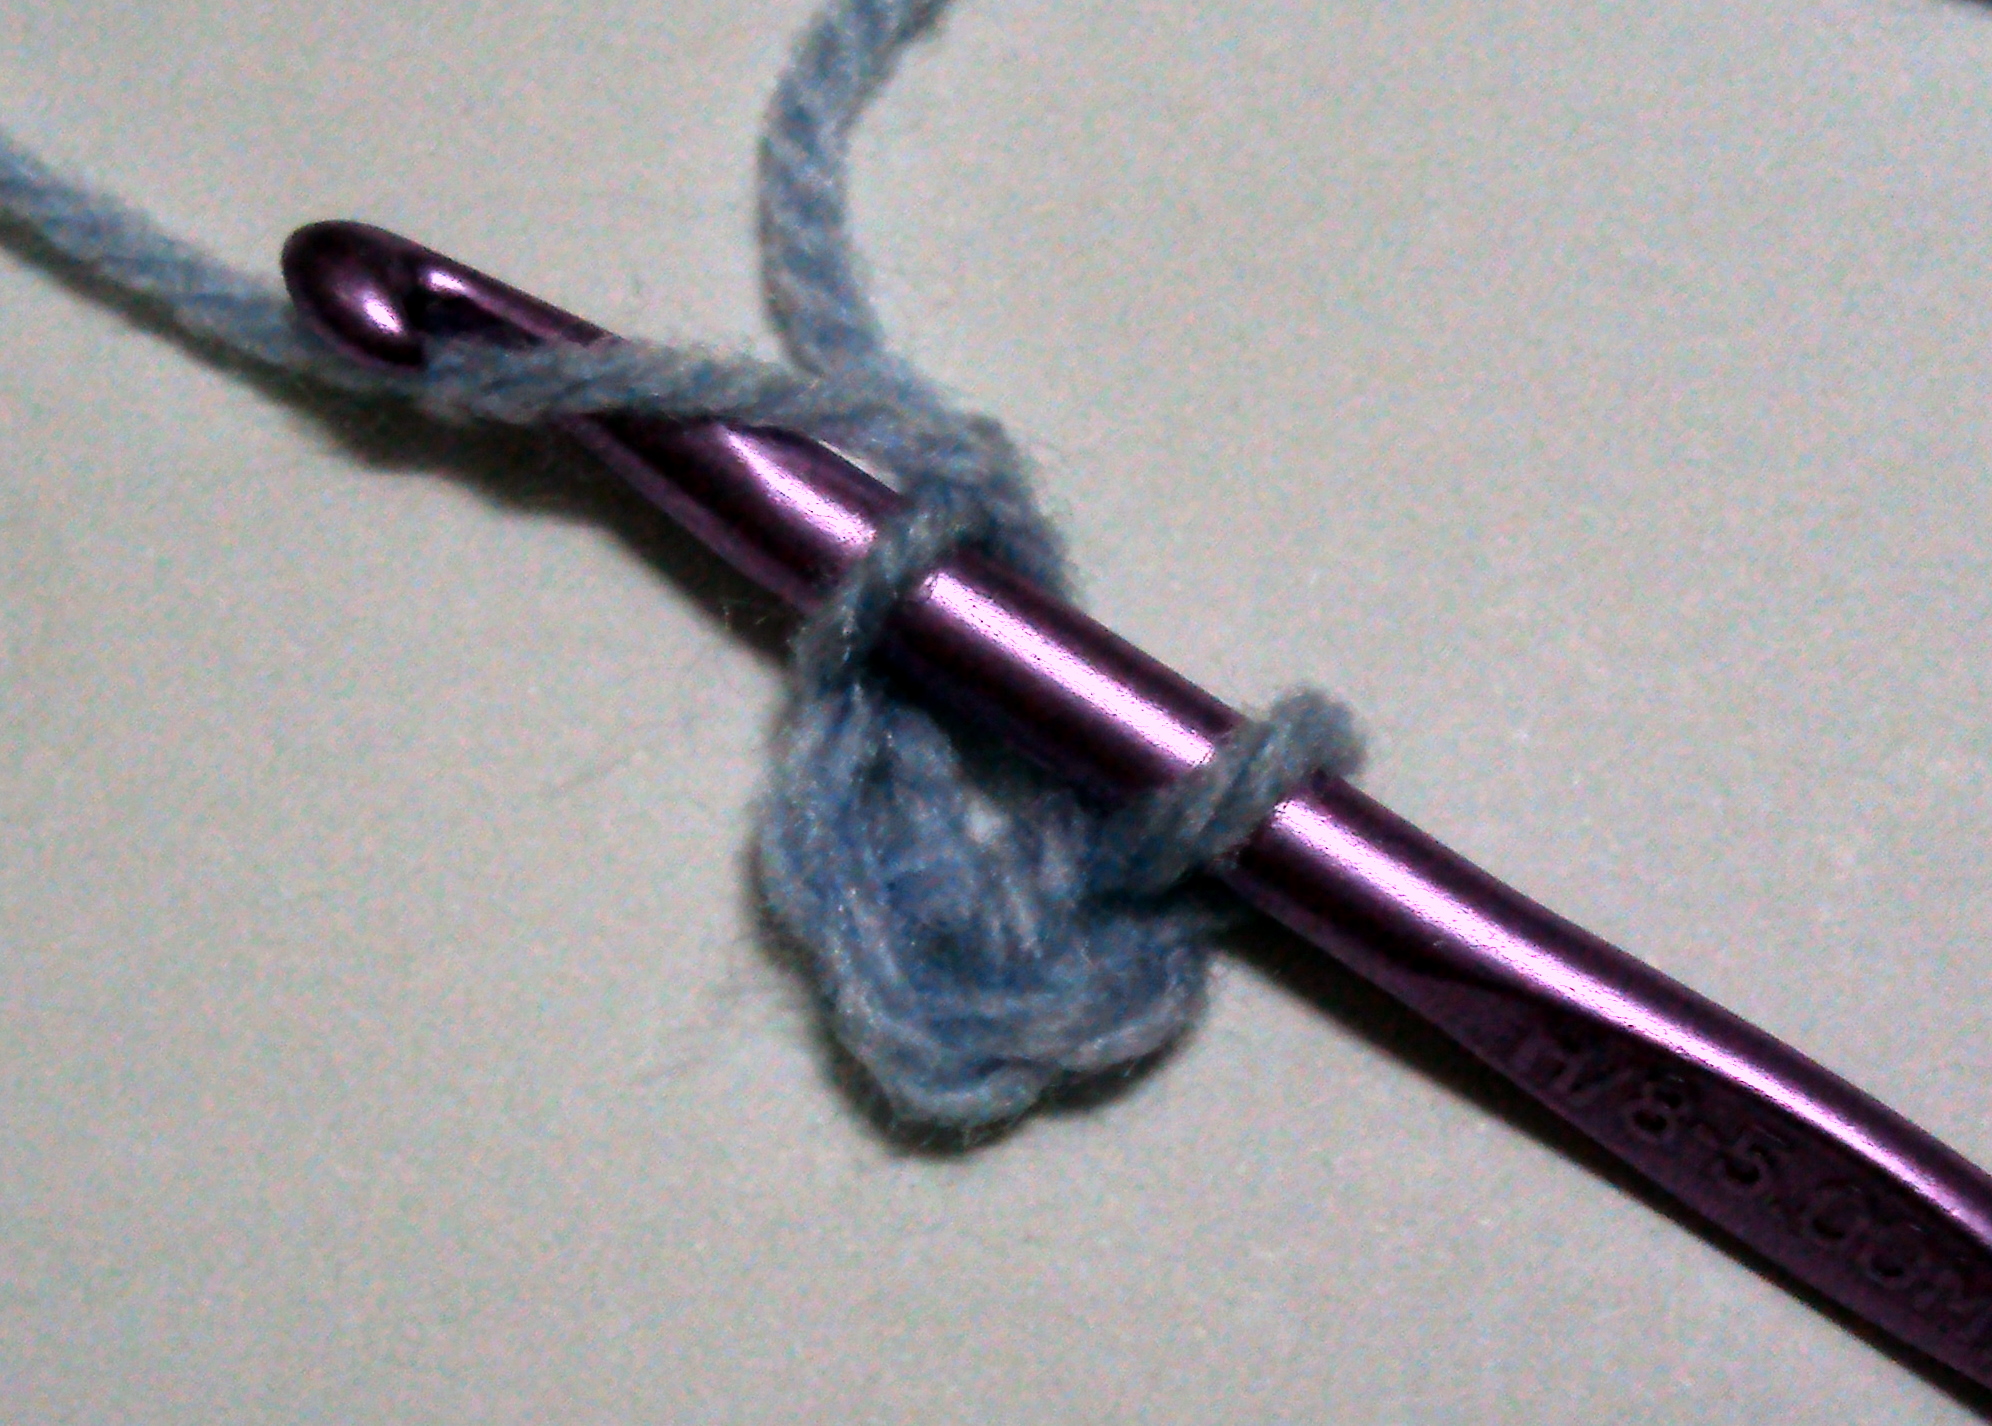
Round 1: Ch 4, sl st in forth ch from hook forming a loop.

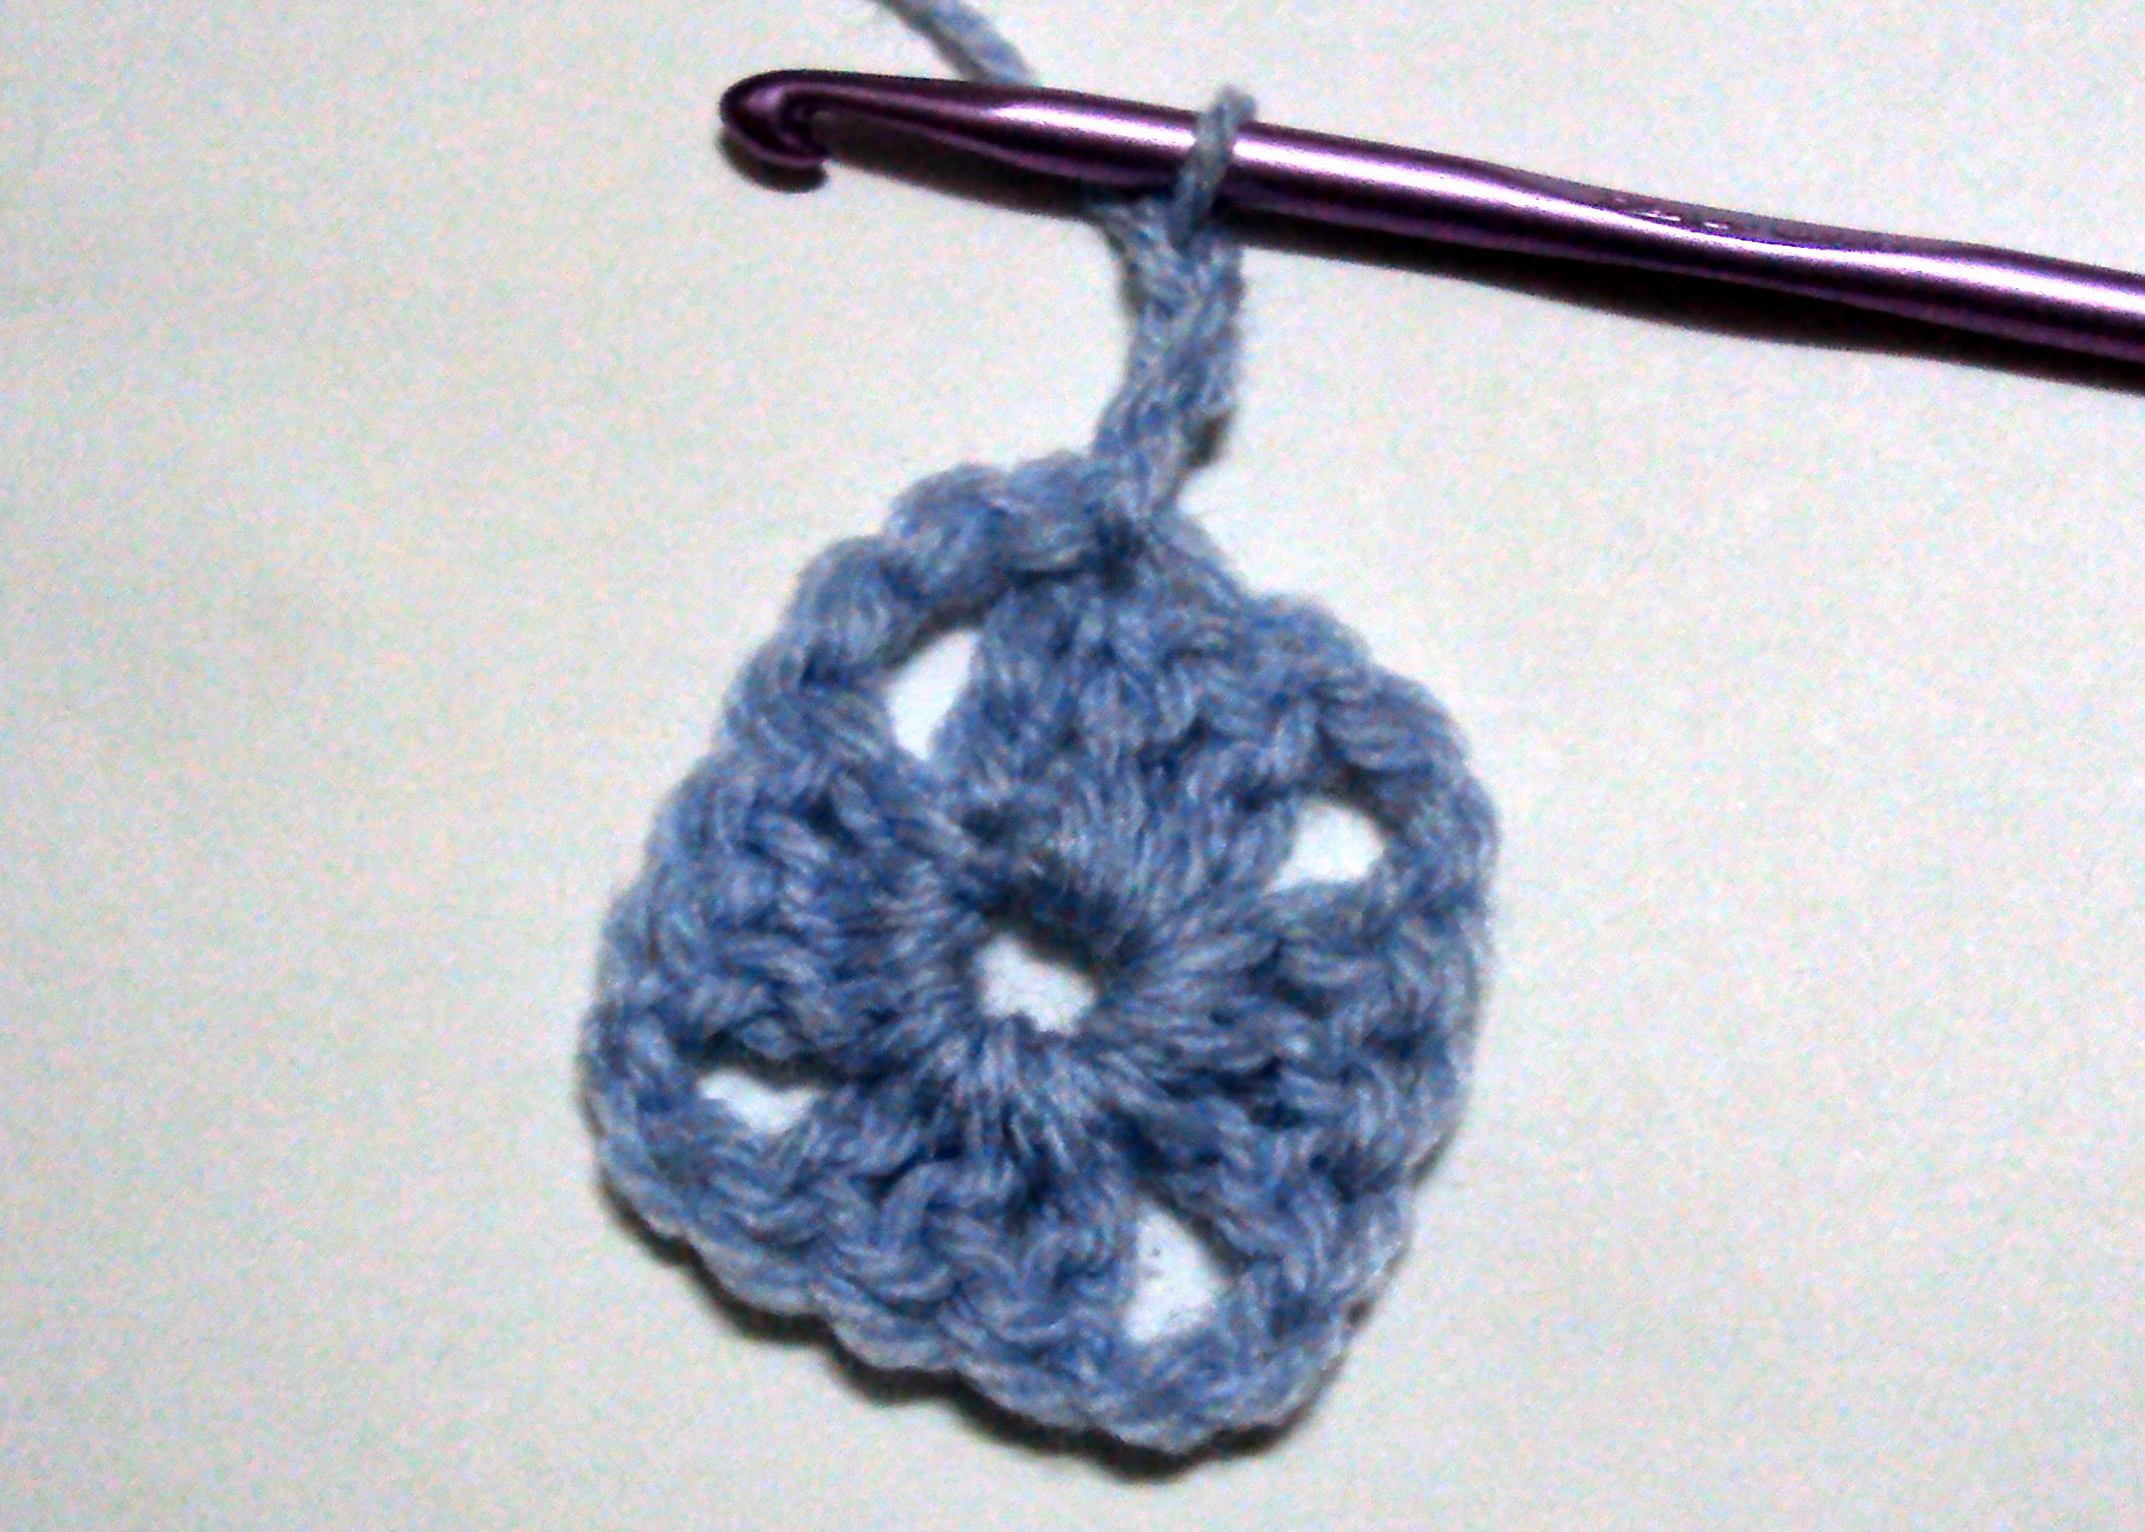
Round 2: ch 3 (counts as 1 dc now and throughout),
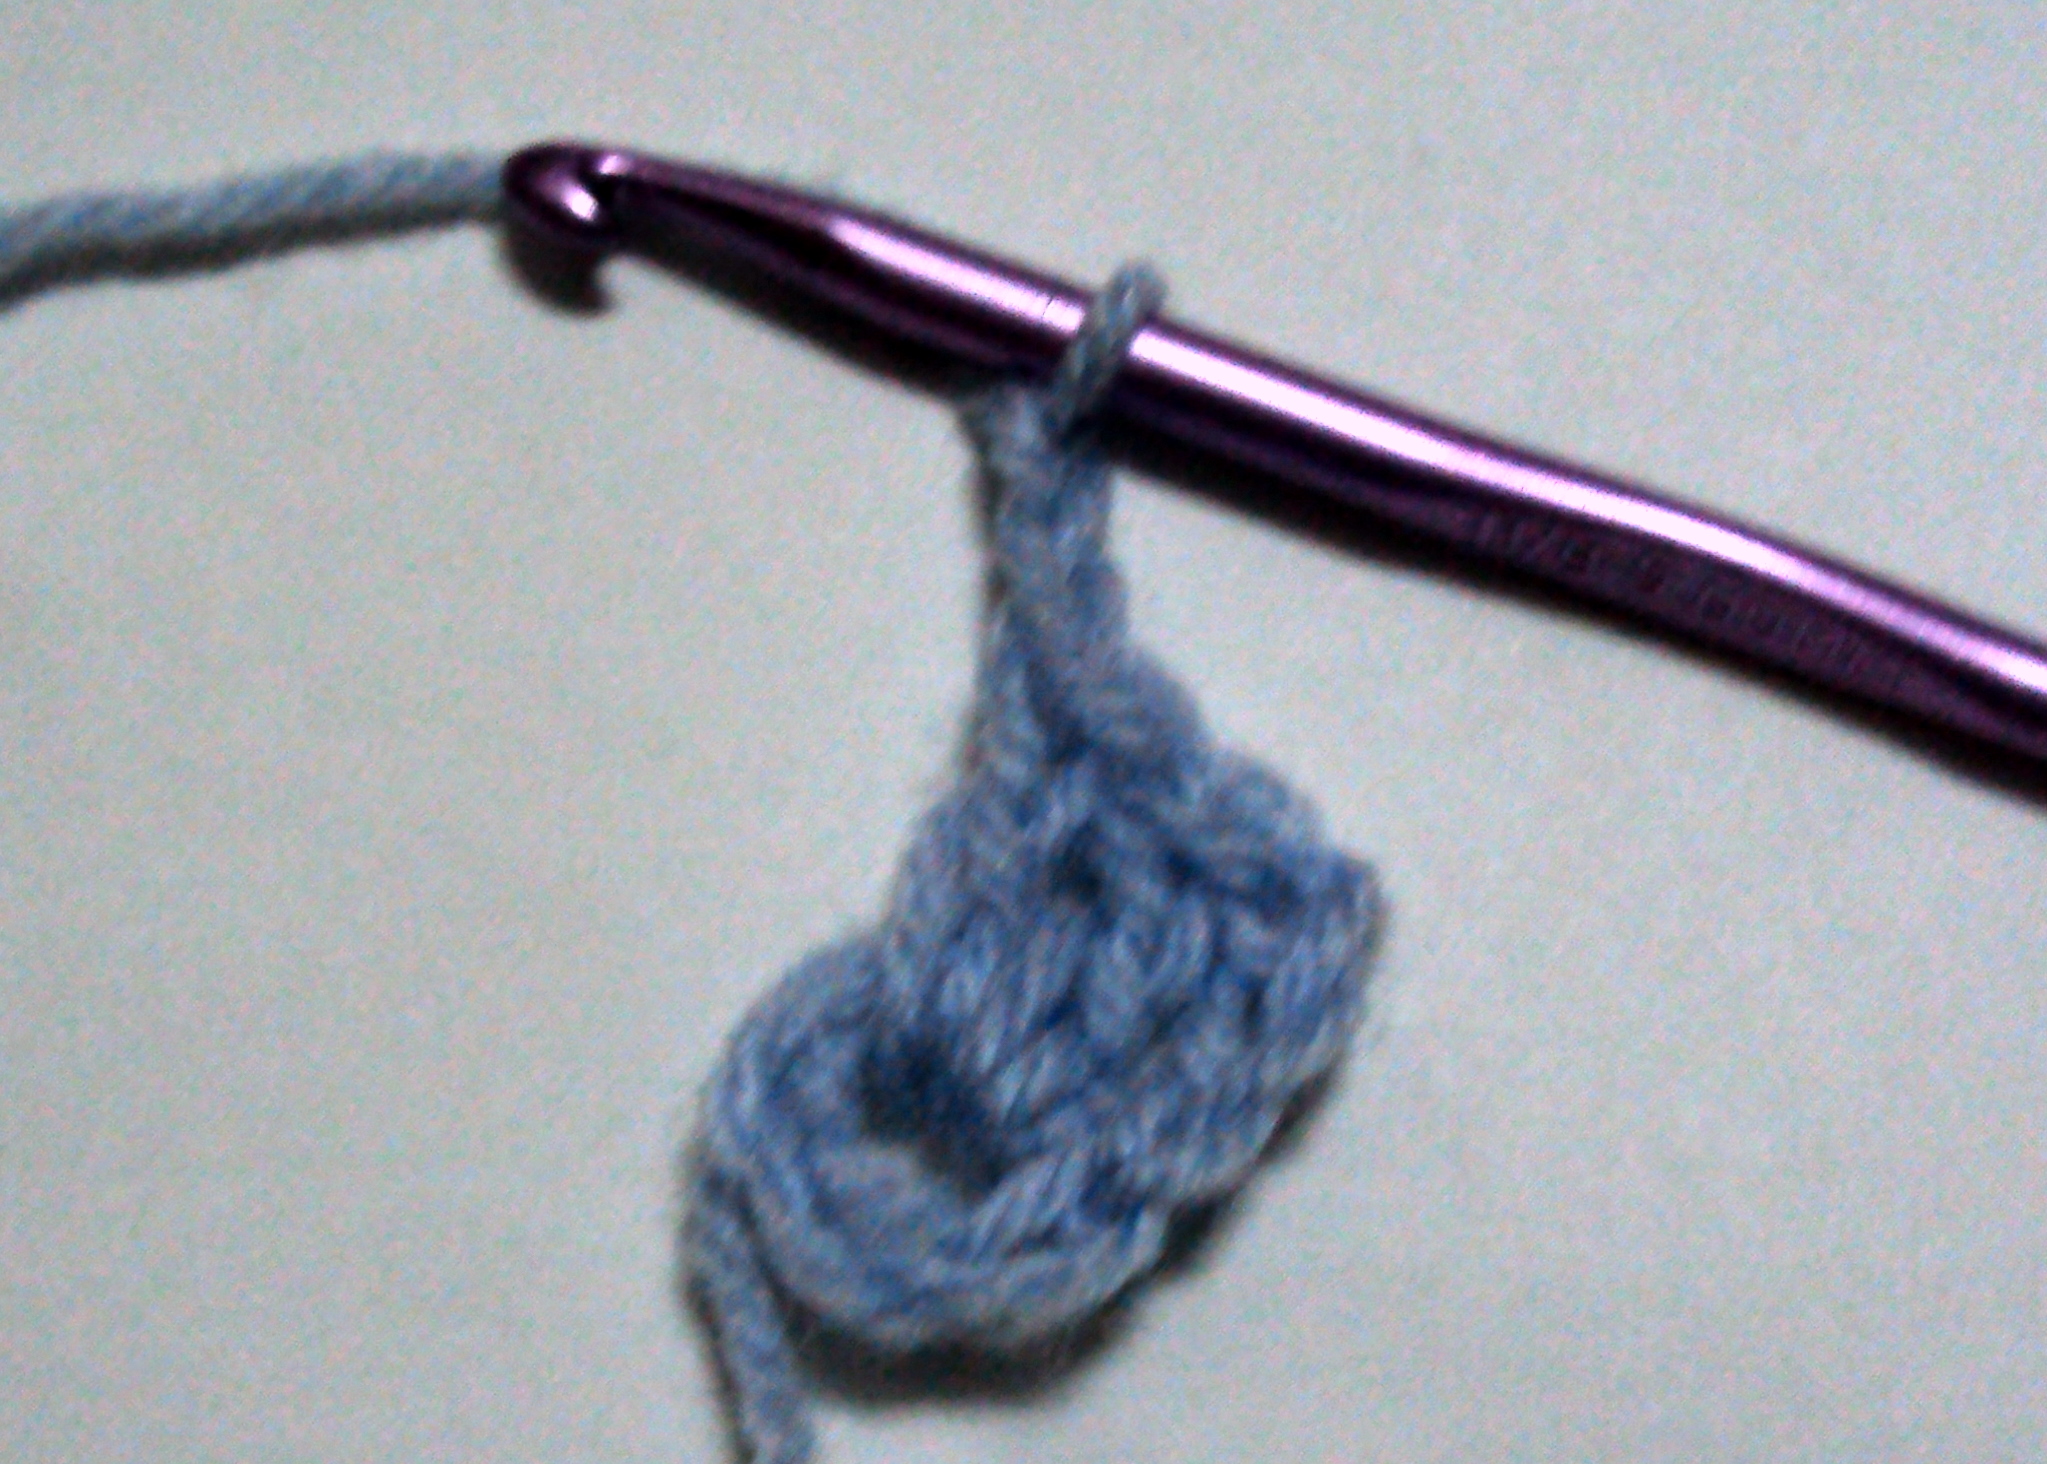
2 dc in loop, ch 2
3 dc in loop, ch 2 (we’ll be doing this two times more)

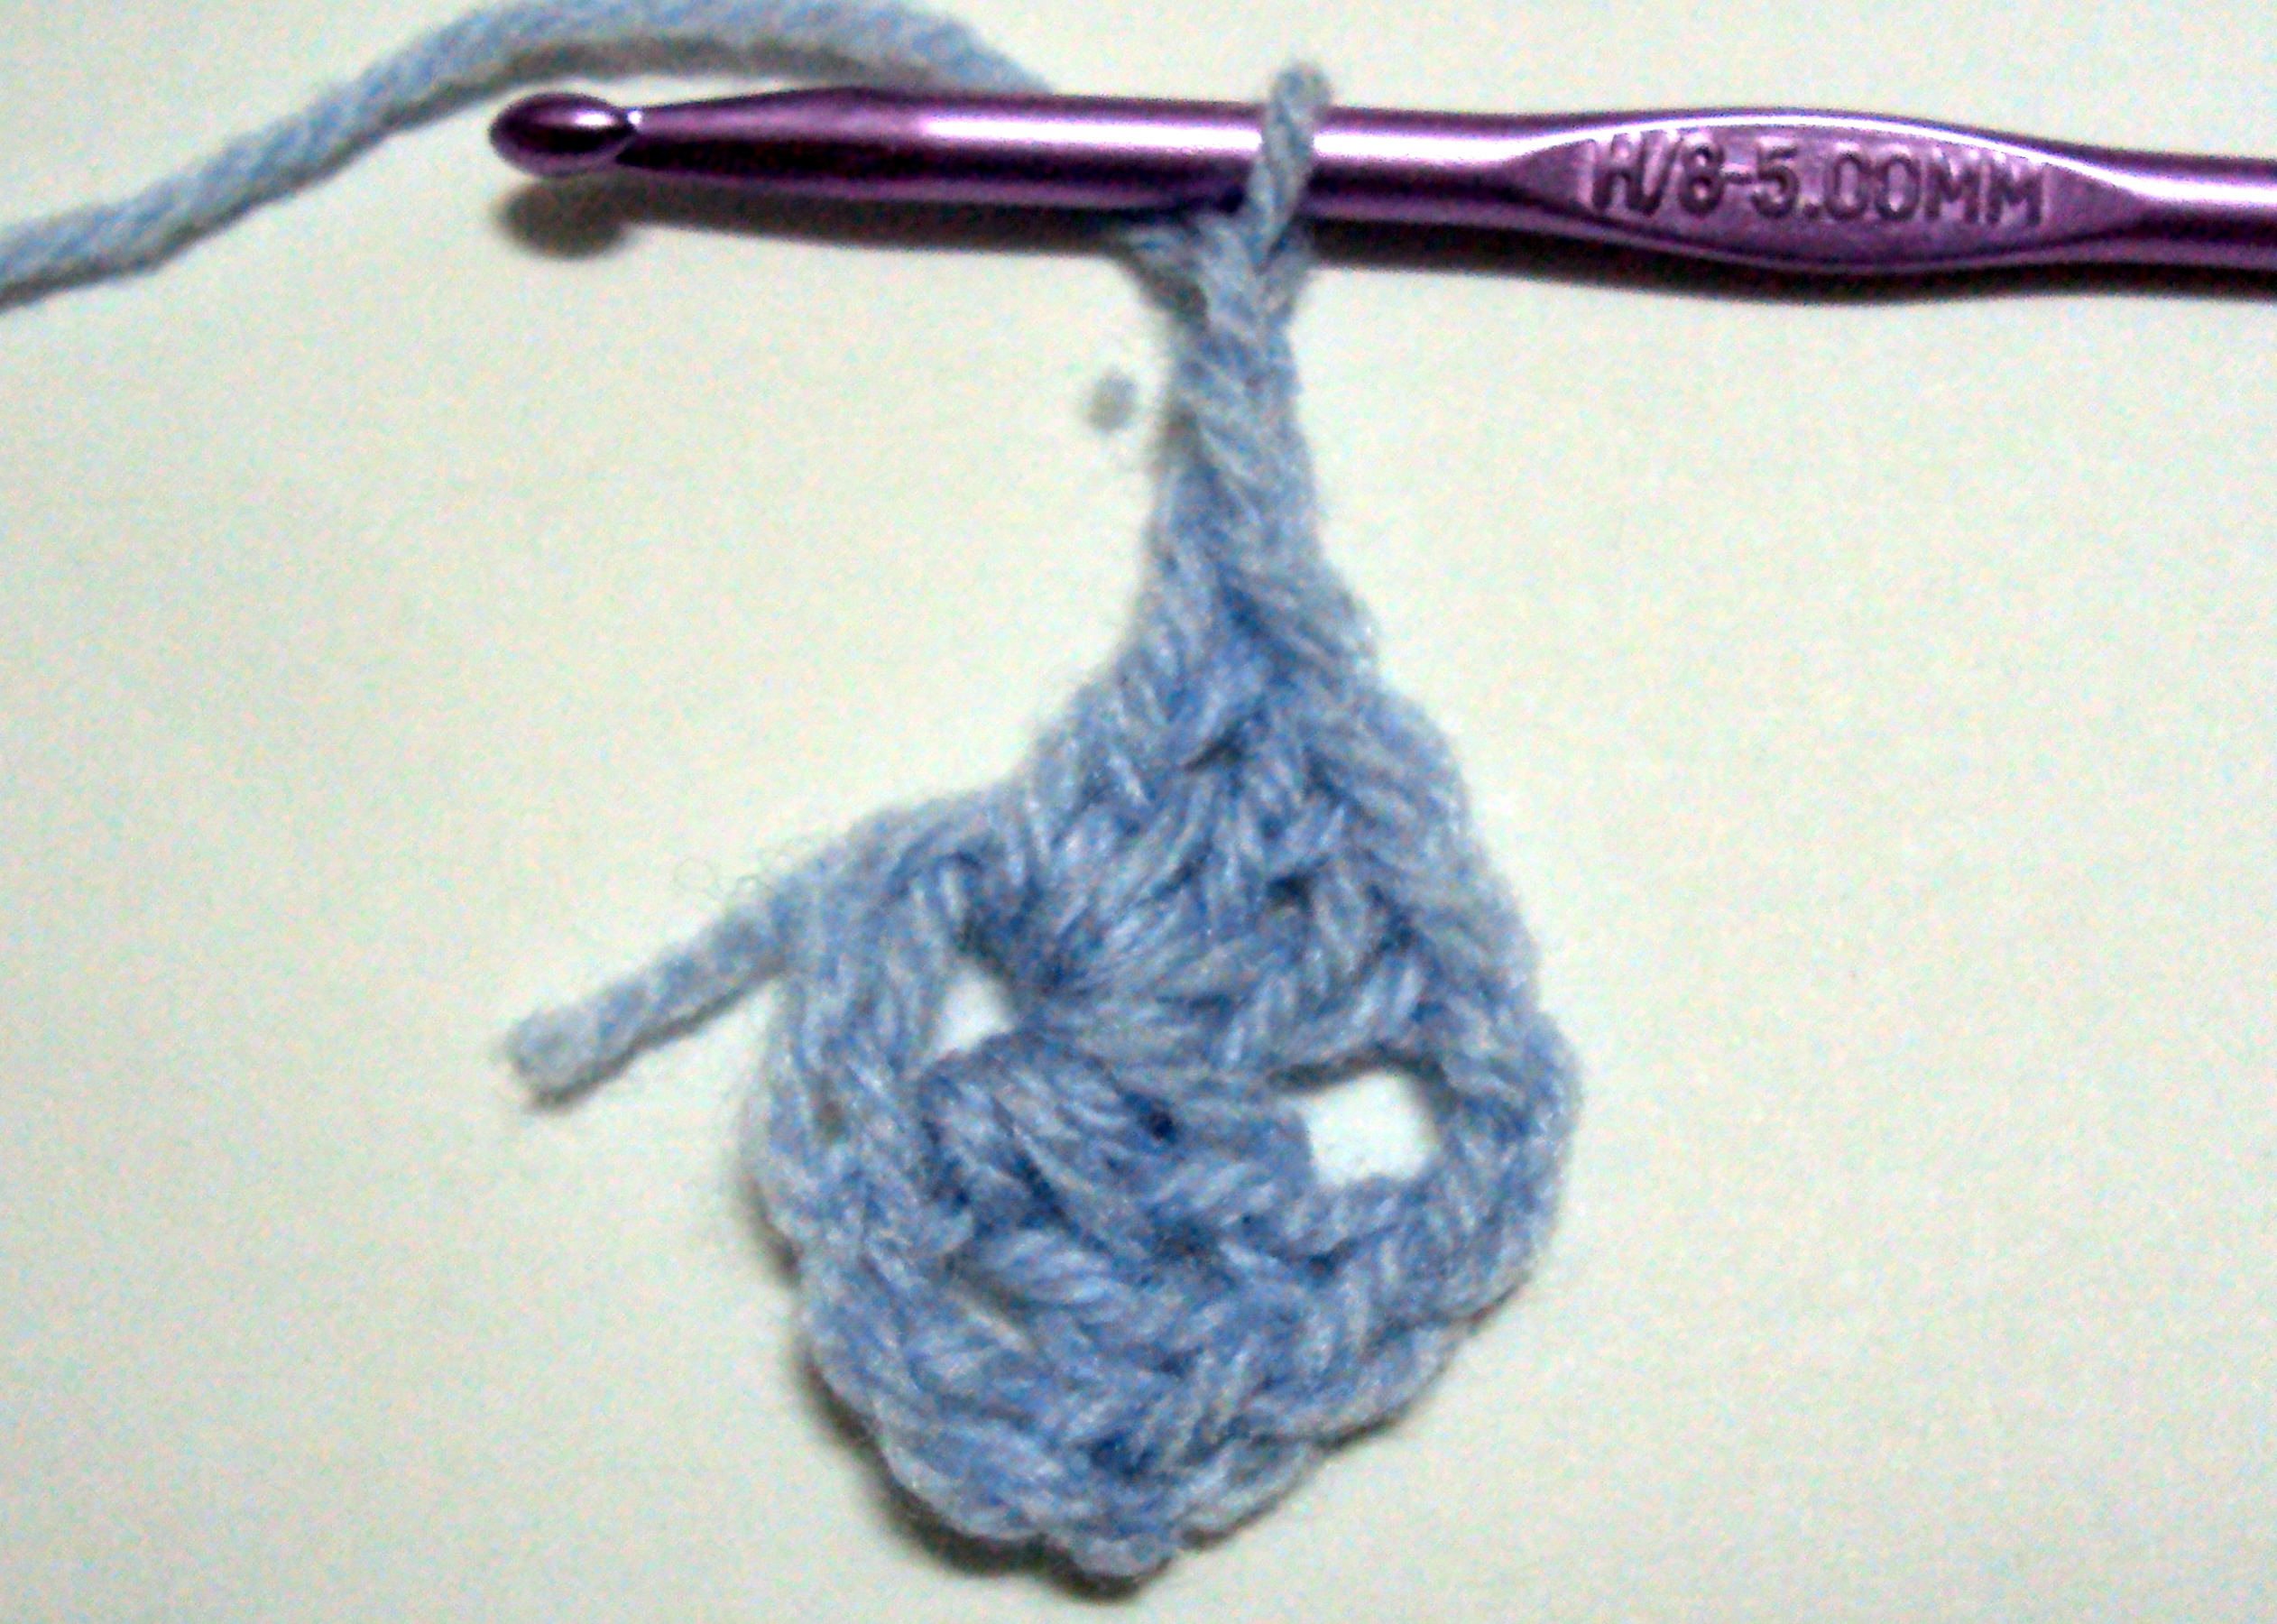
3 dc in loop, ch 2 (again)
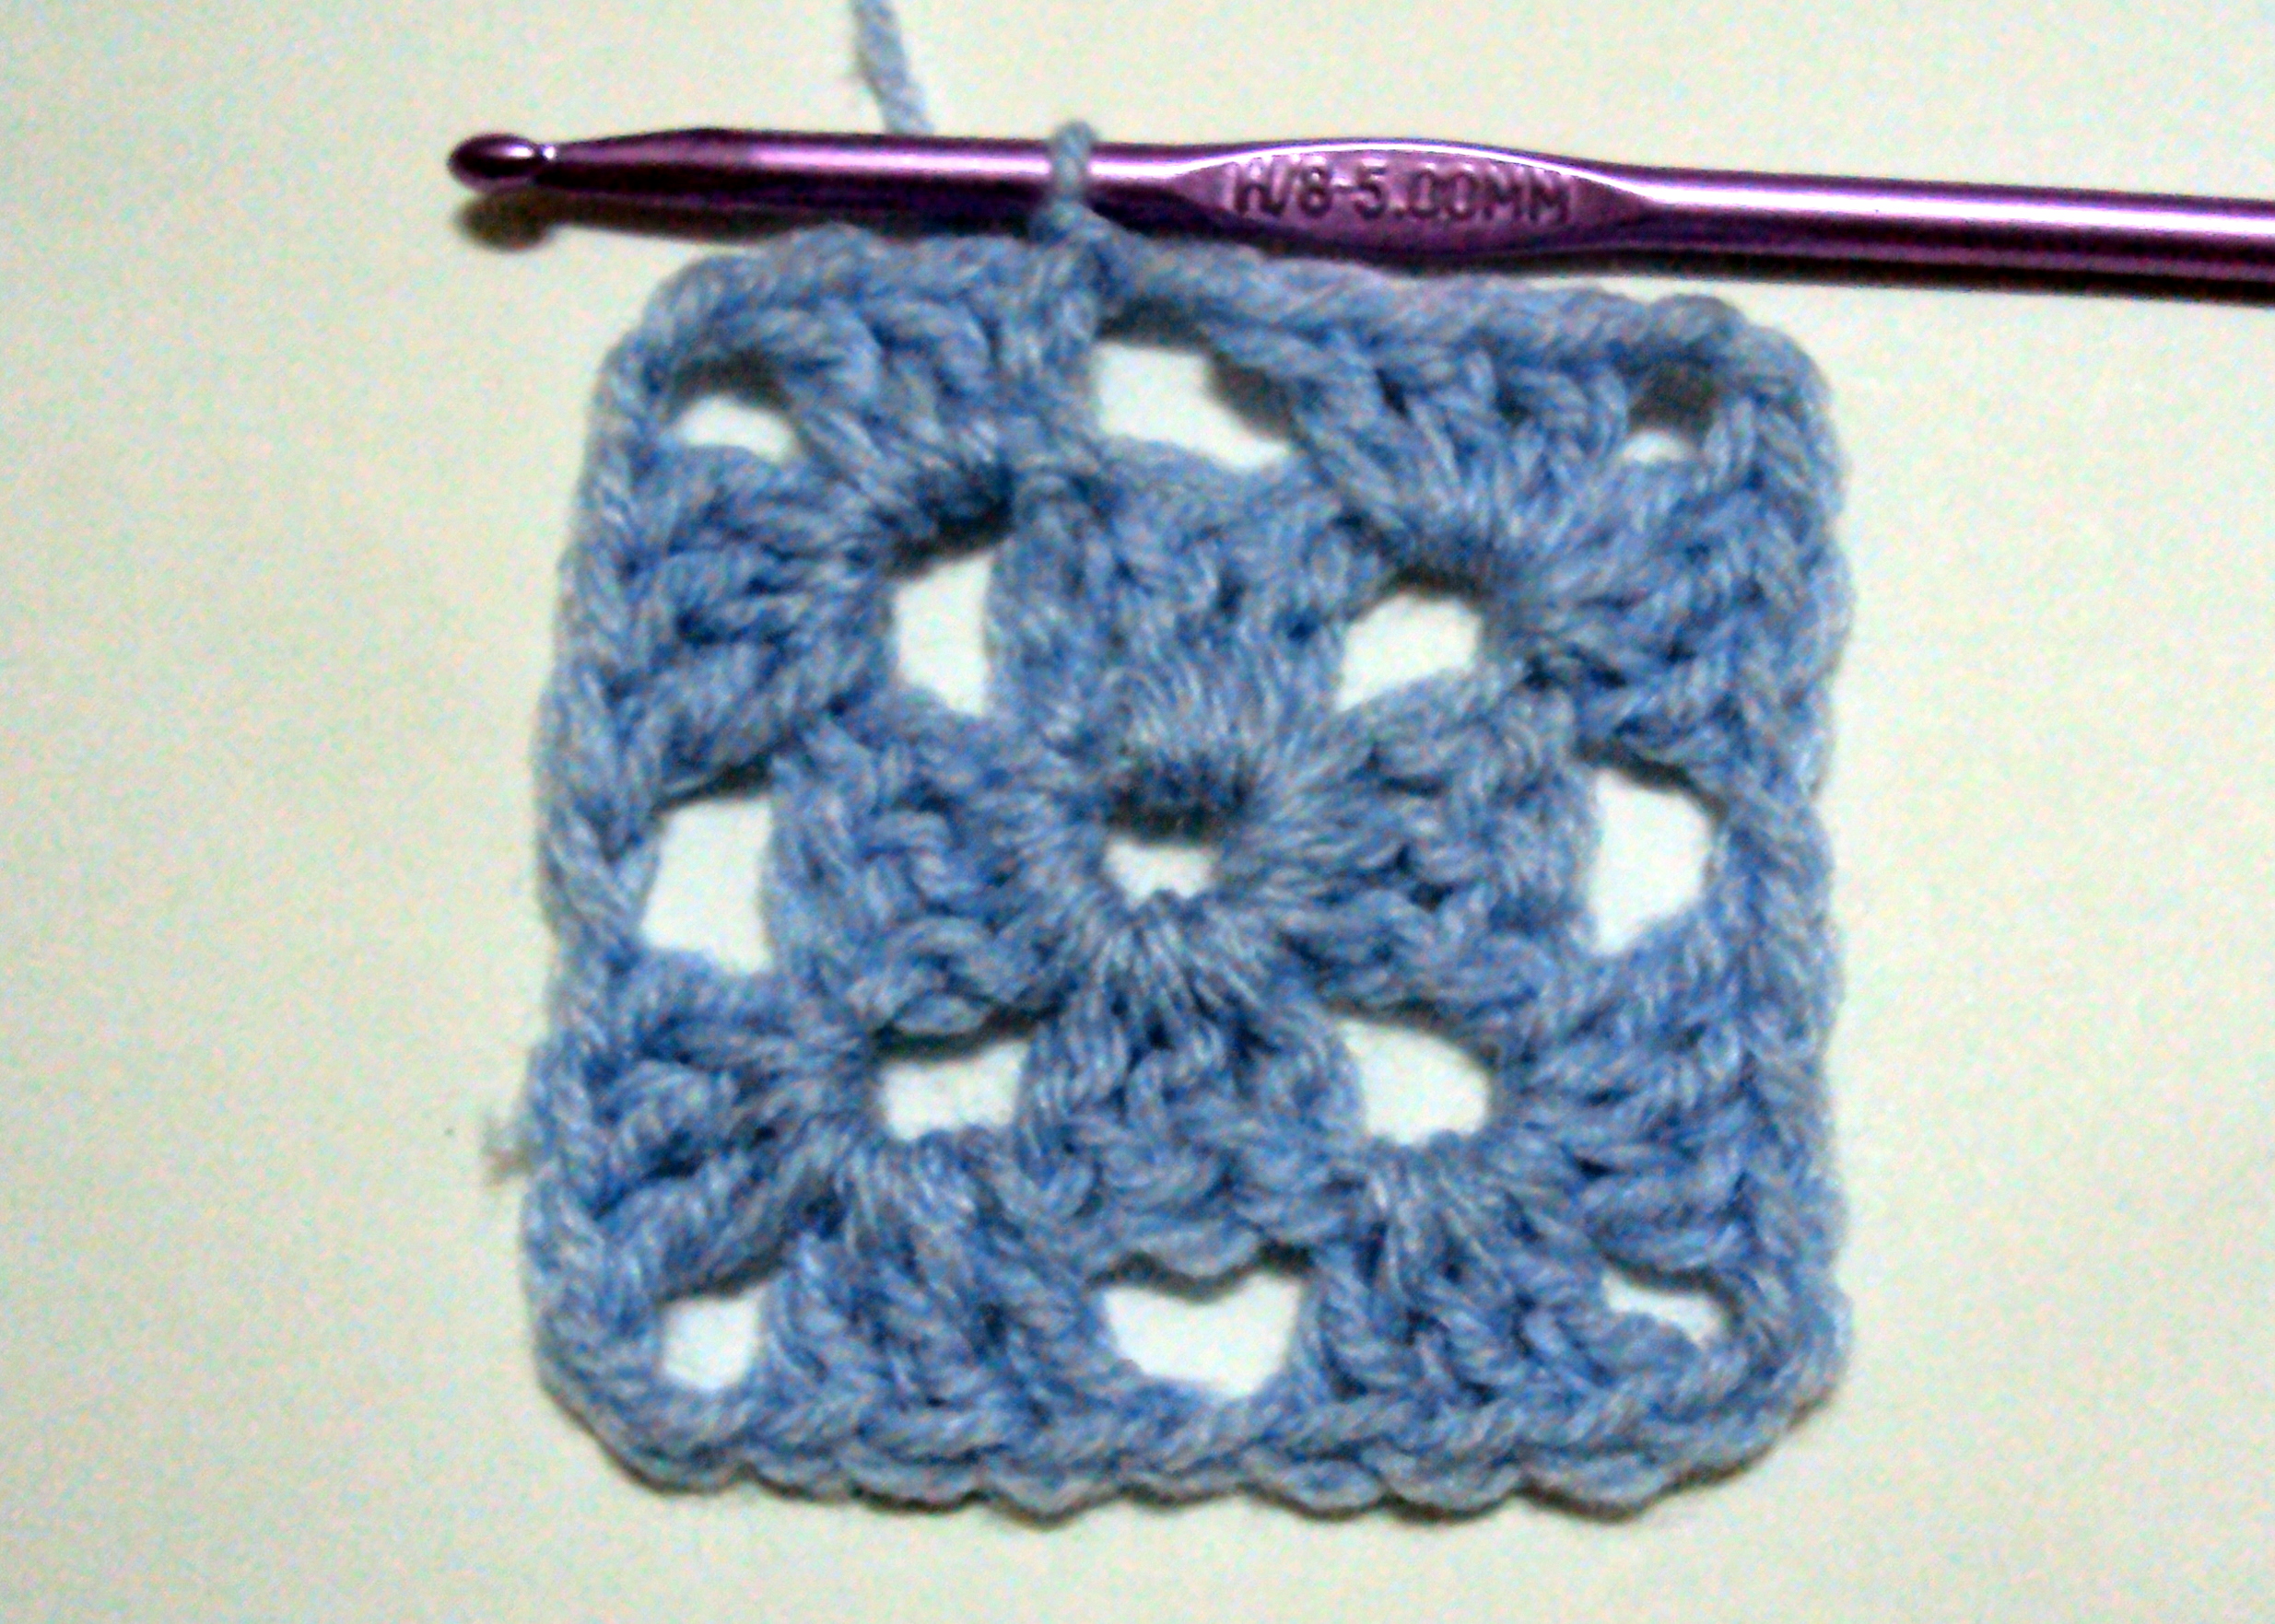
3 dc in loop, ch 2 (for the last time). Sl st in top of beginning ch-3: 12 dc. Round 2 completed!
Round 3: ch 3, turn
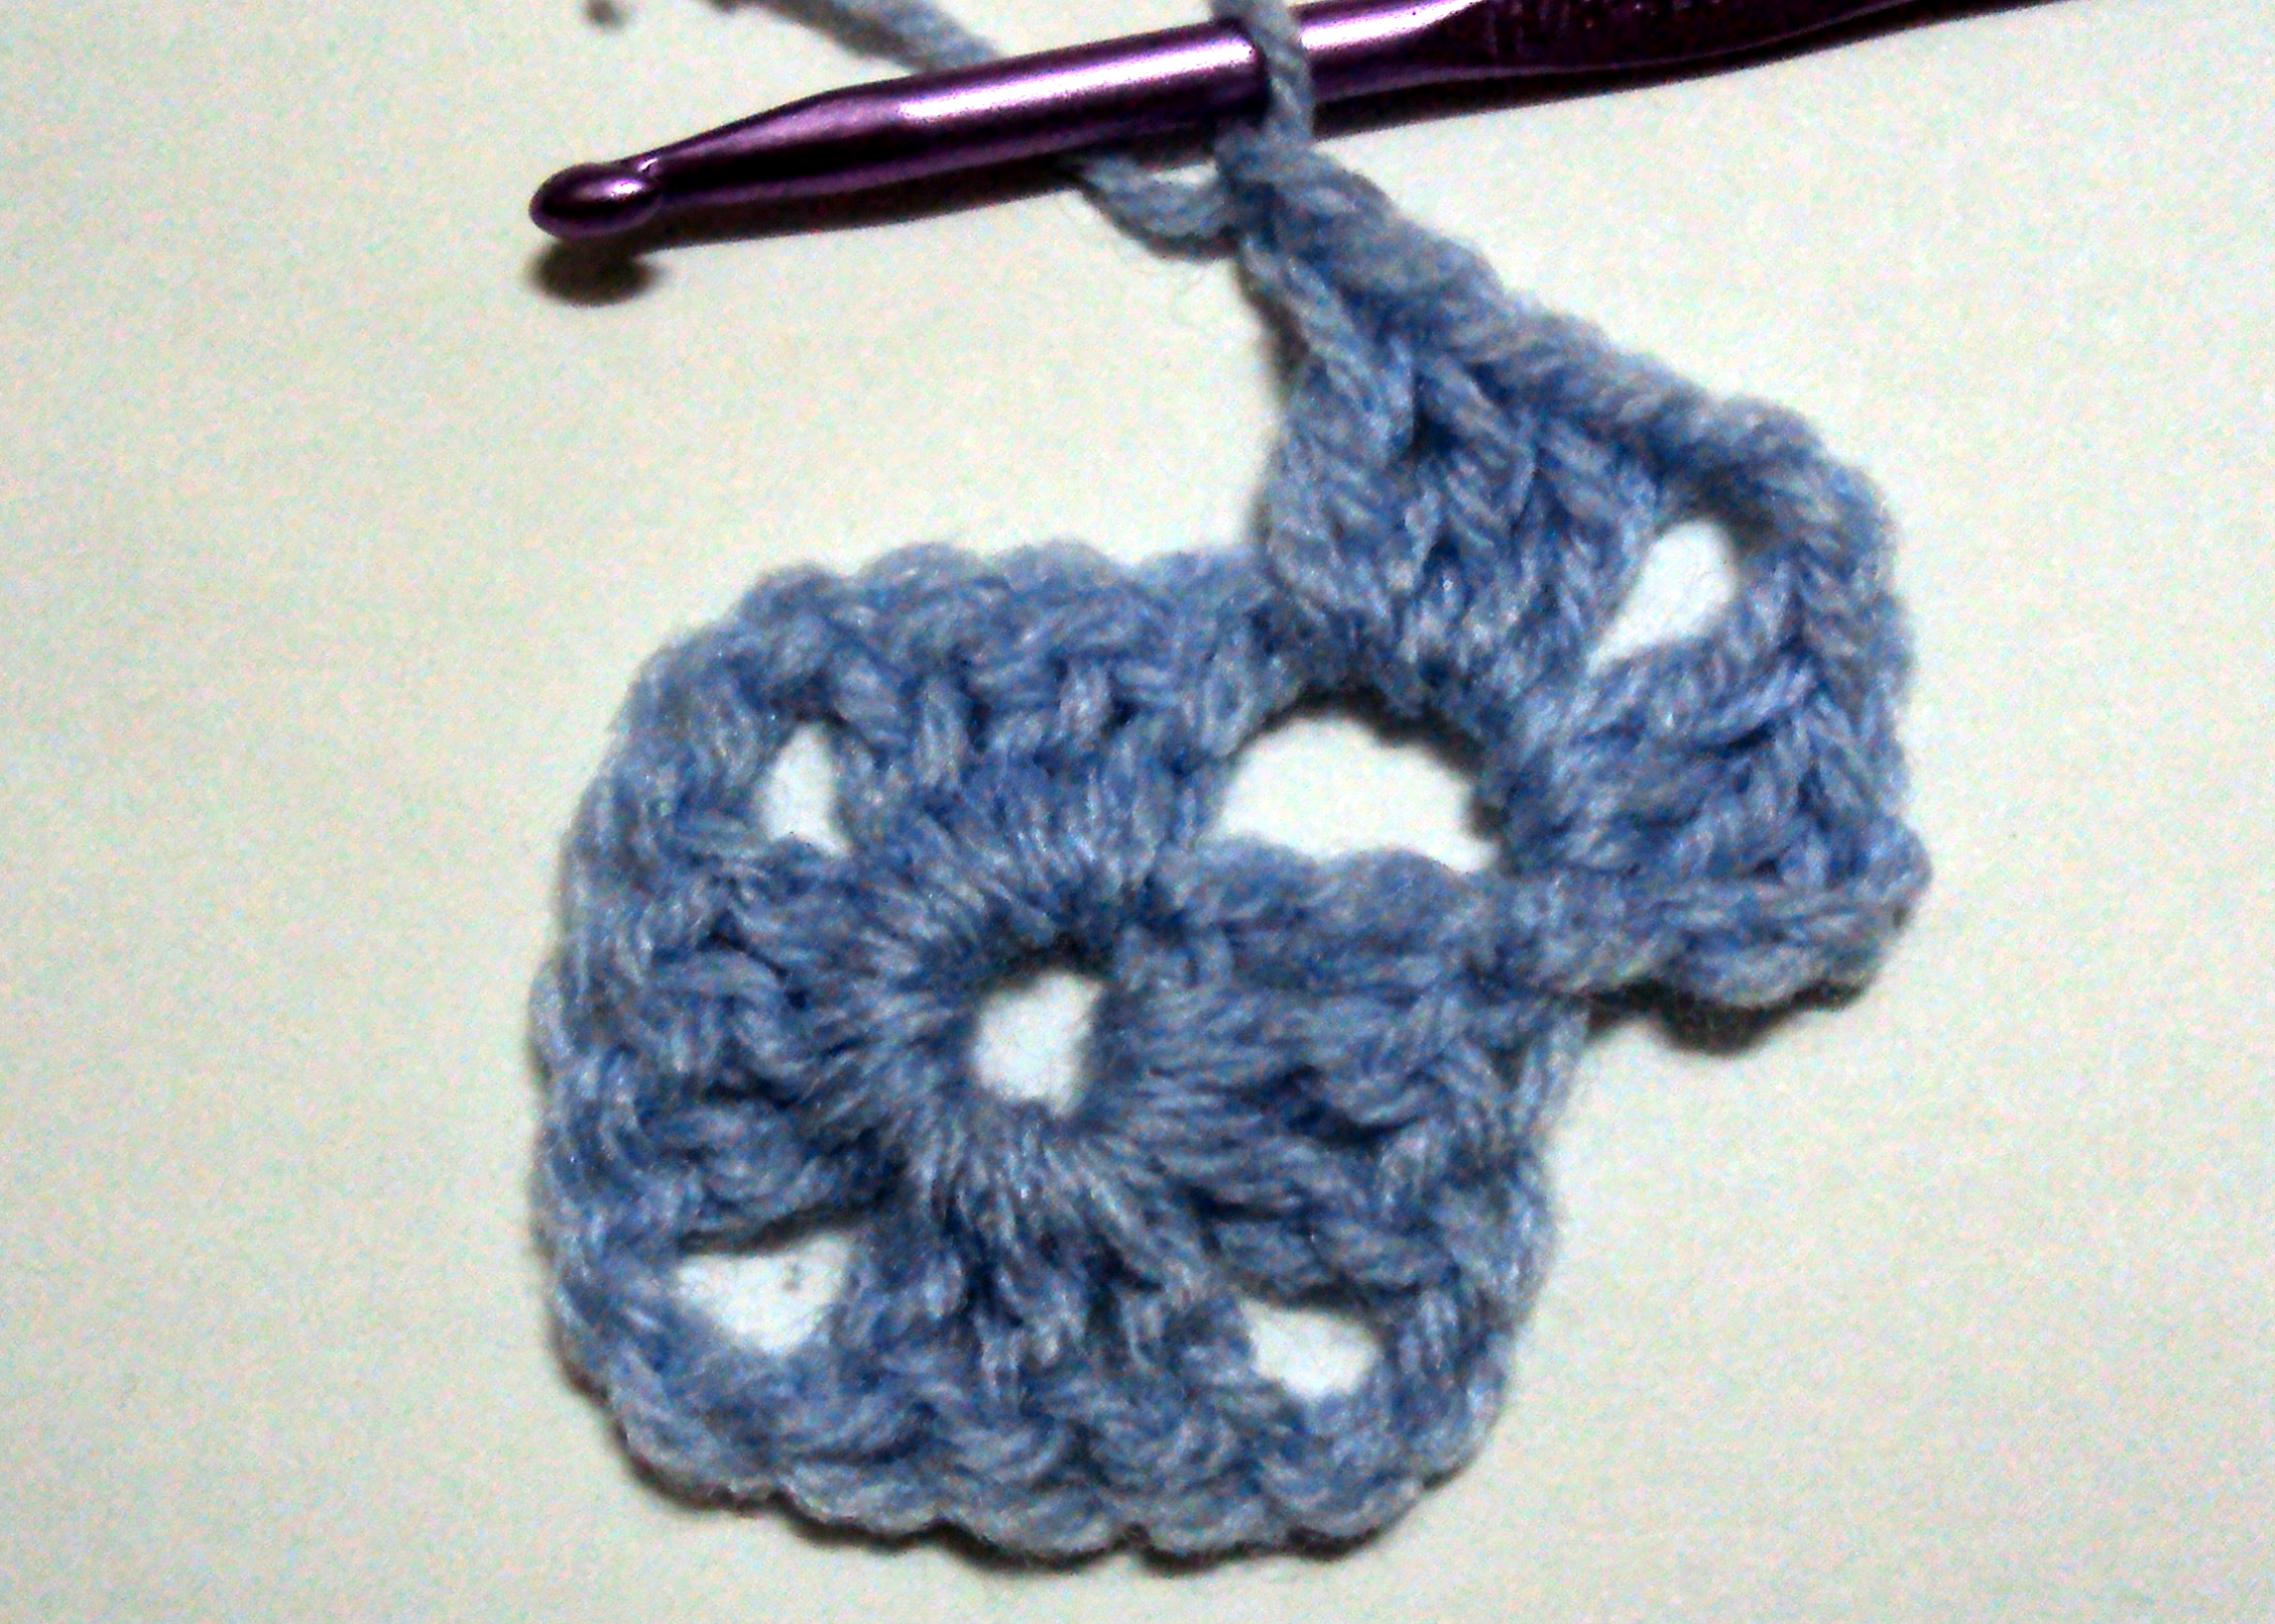
2 dc in next ch-2 space, ch 2, 3 dc in same ch-2 space, ch 2
3 dc in next ch-2 space, ch 2, 3 dc in same ch-2 space, ch 2 (we’ll be doing this twice more)
3 dc in next ch-2 space, ch 2, 3 dc in same ch-2 space, ch 2 (for the second time)
3 dc in next ch-2 space, ch 2, 3 dc in same ch-2 space, ch 2 (for the third and last time), sl st in top of beginning ch-3: 24 dc. Round 3 completed!
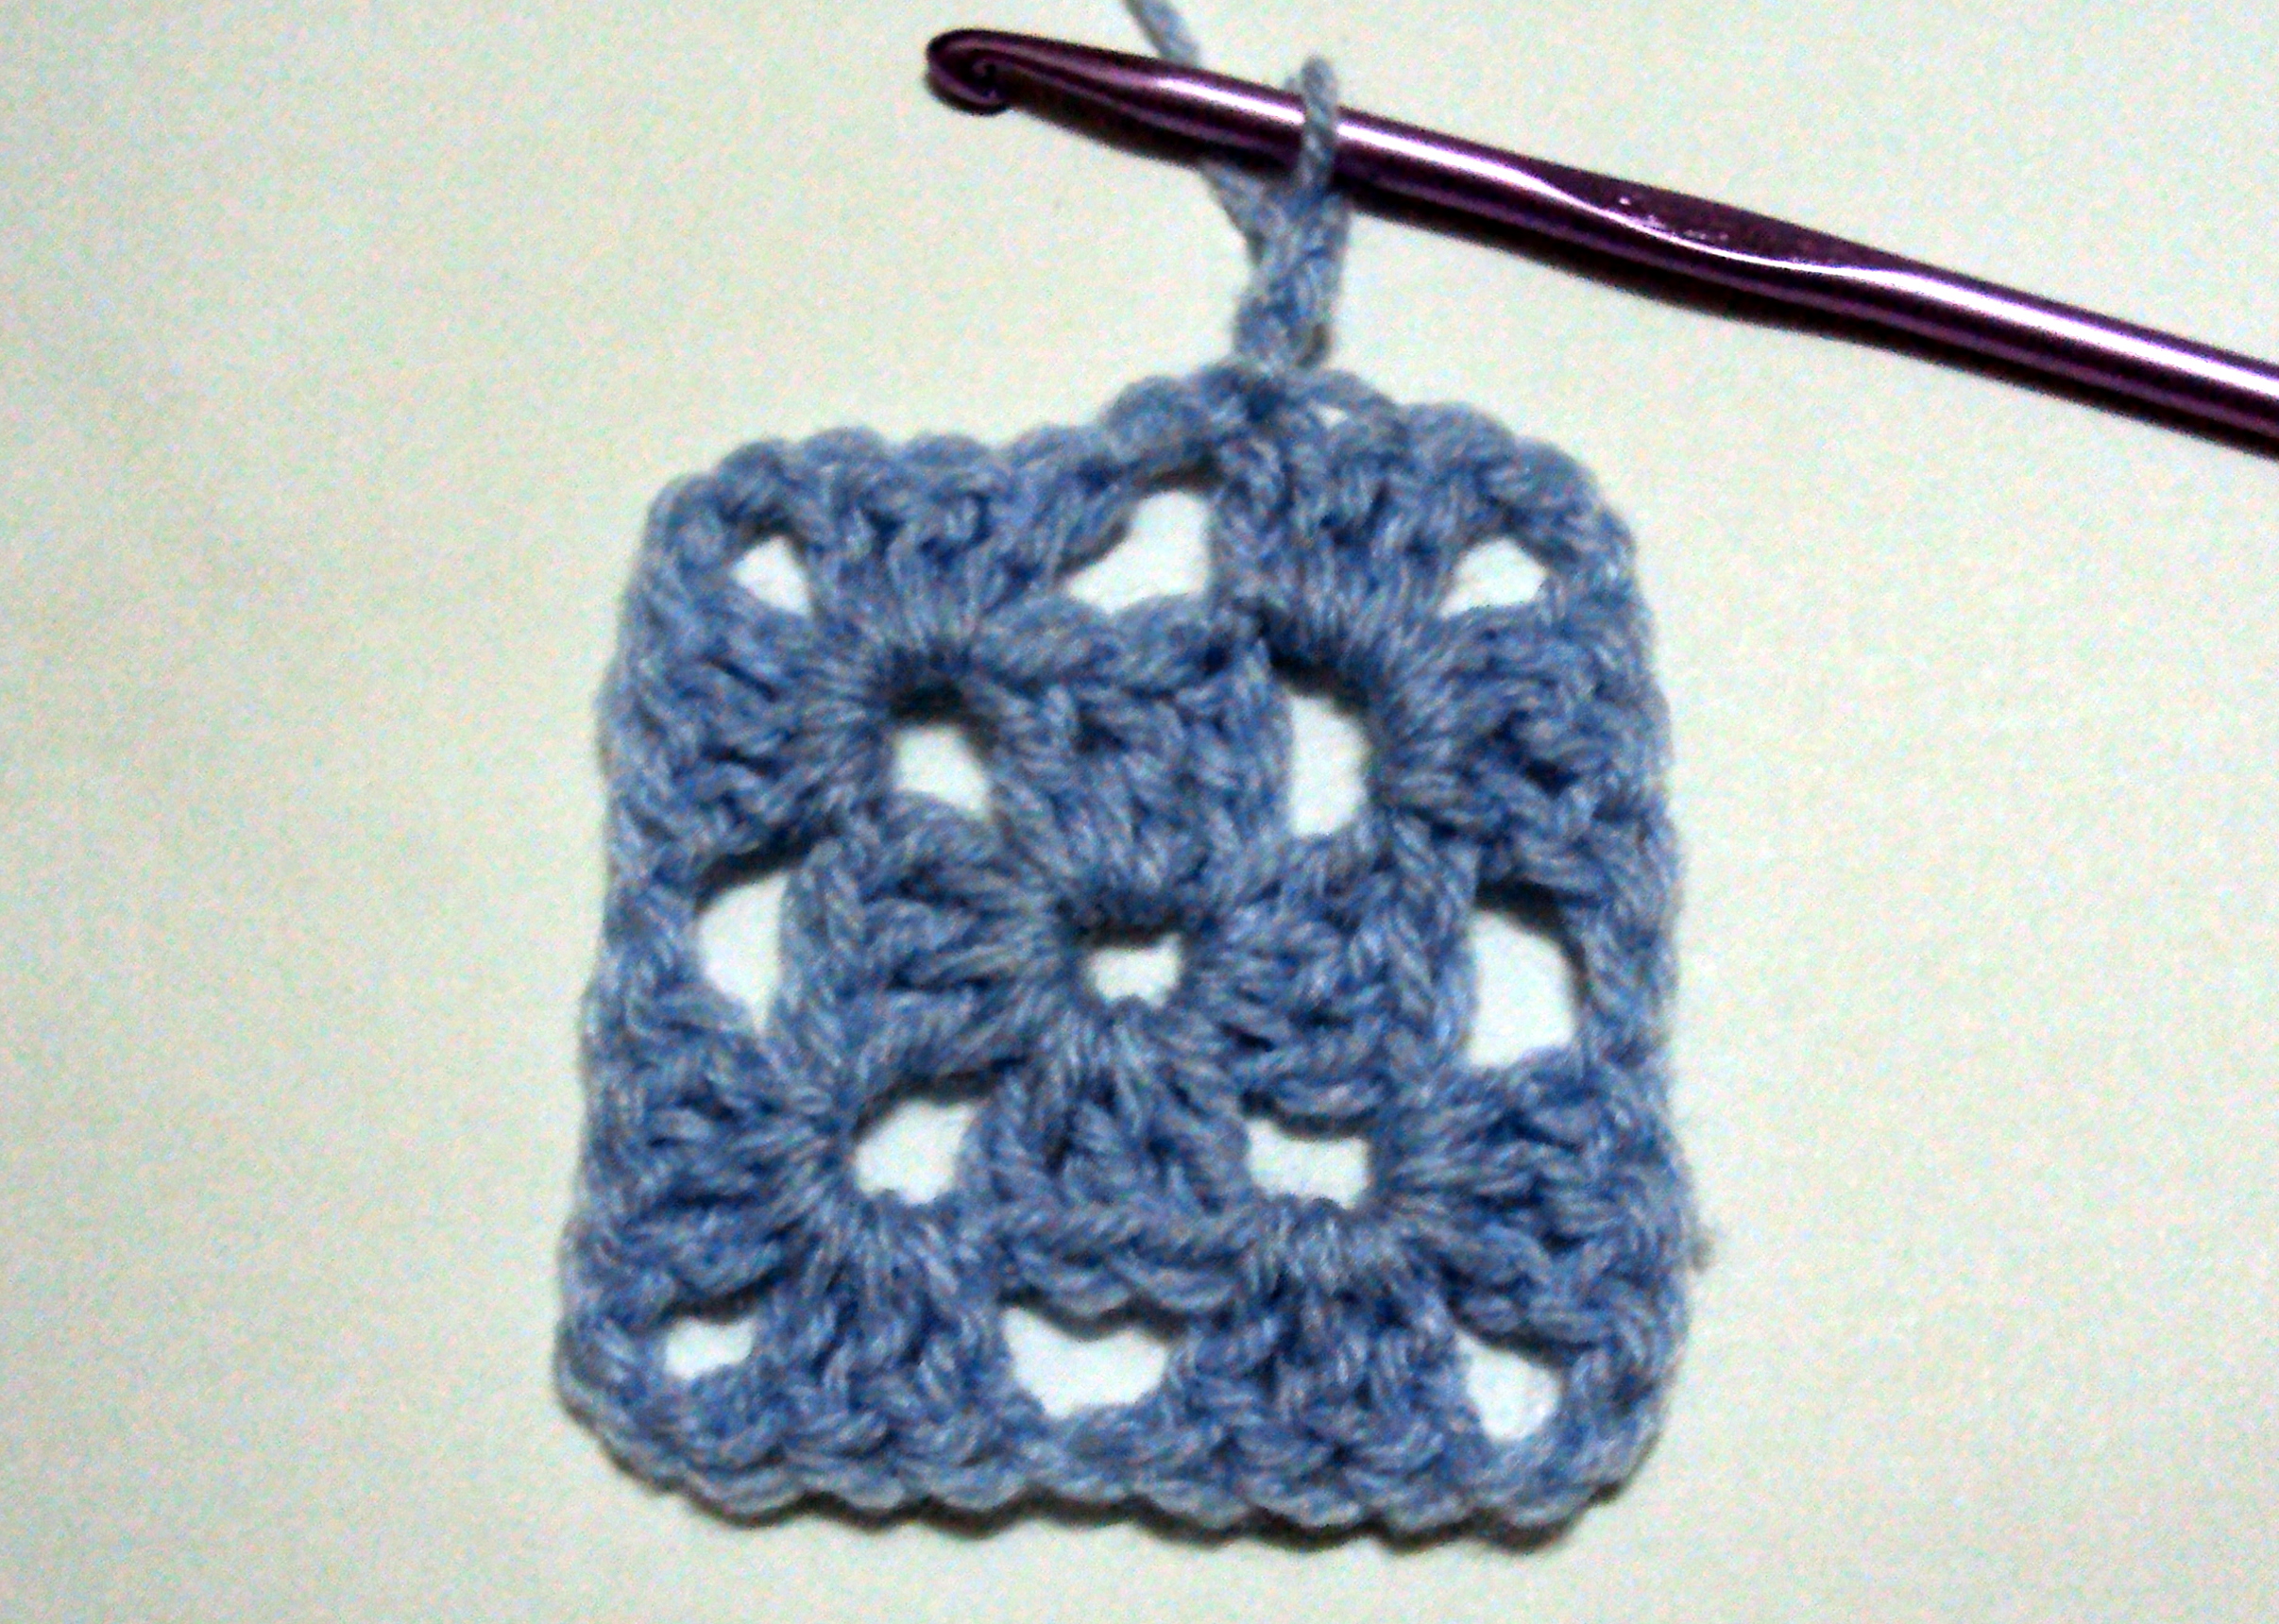
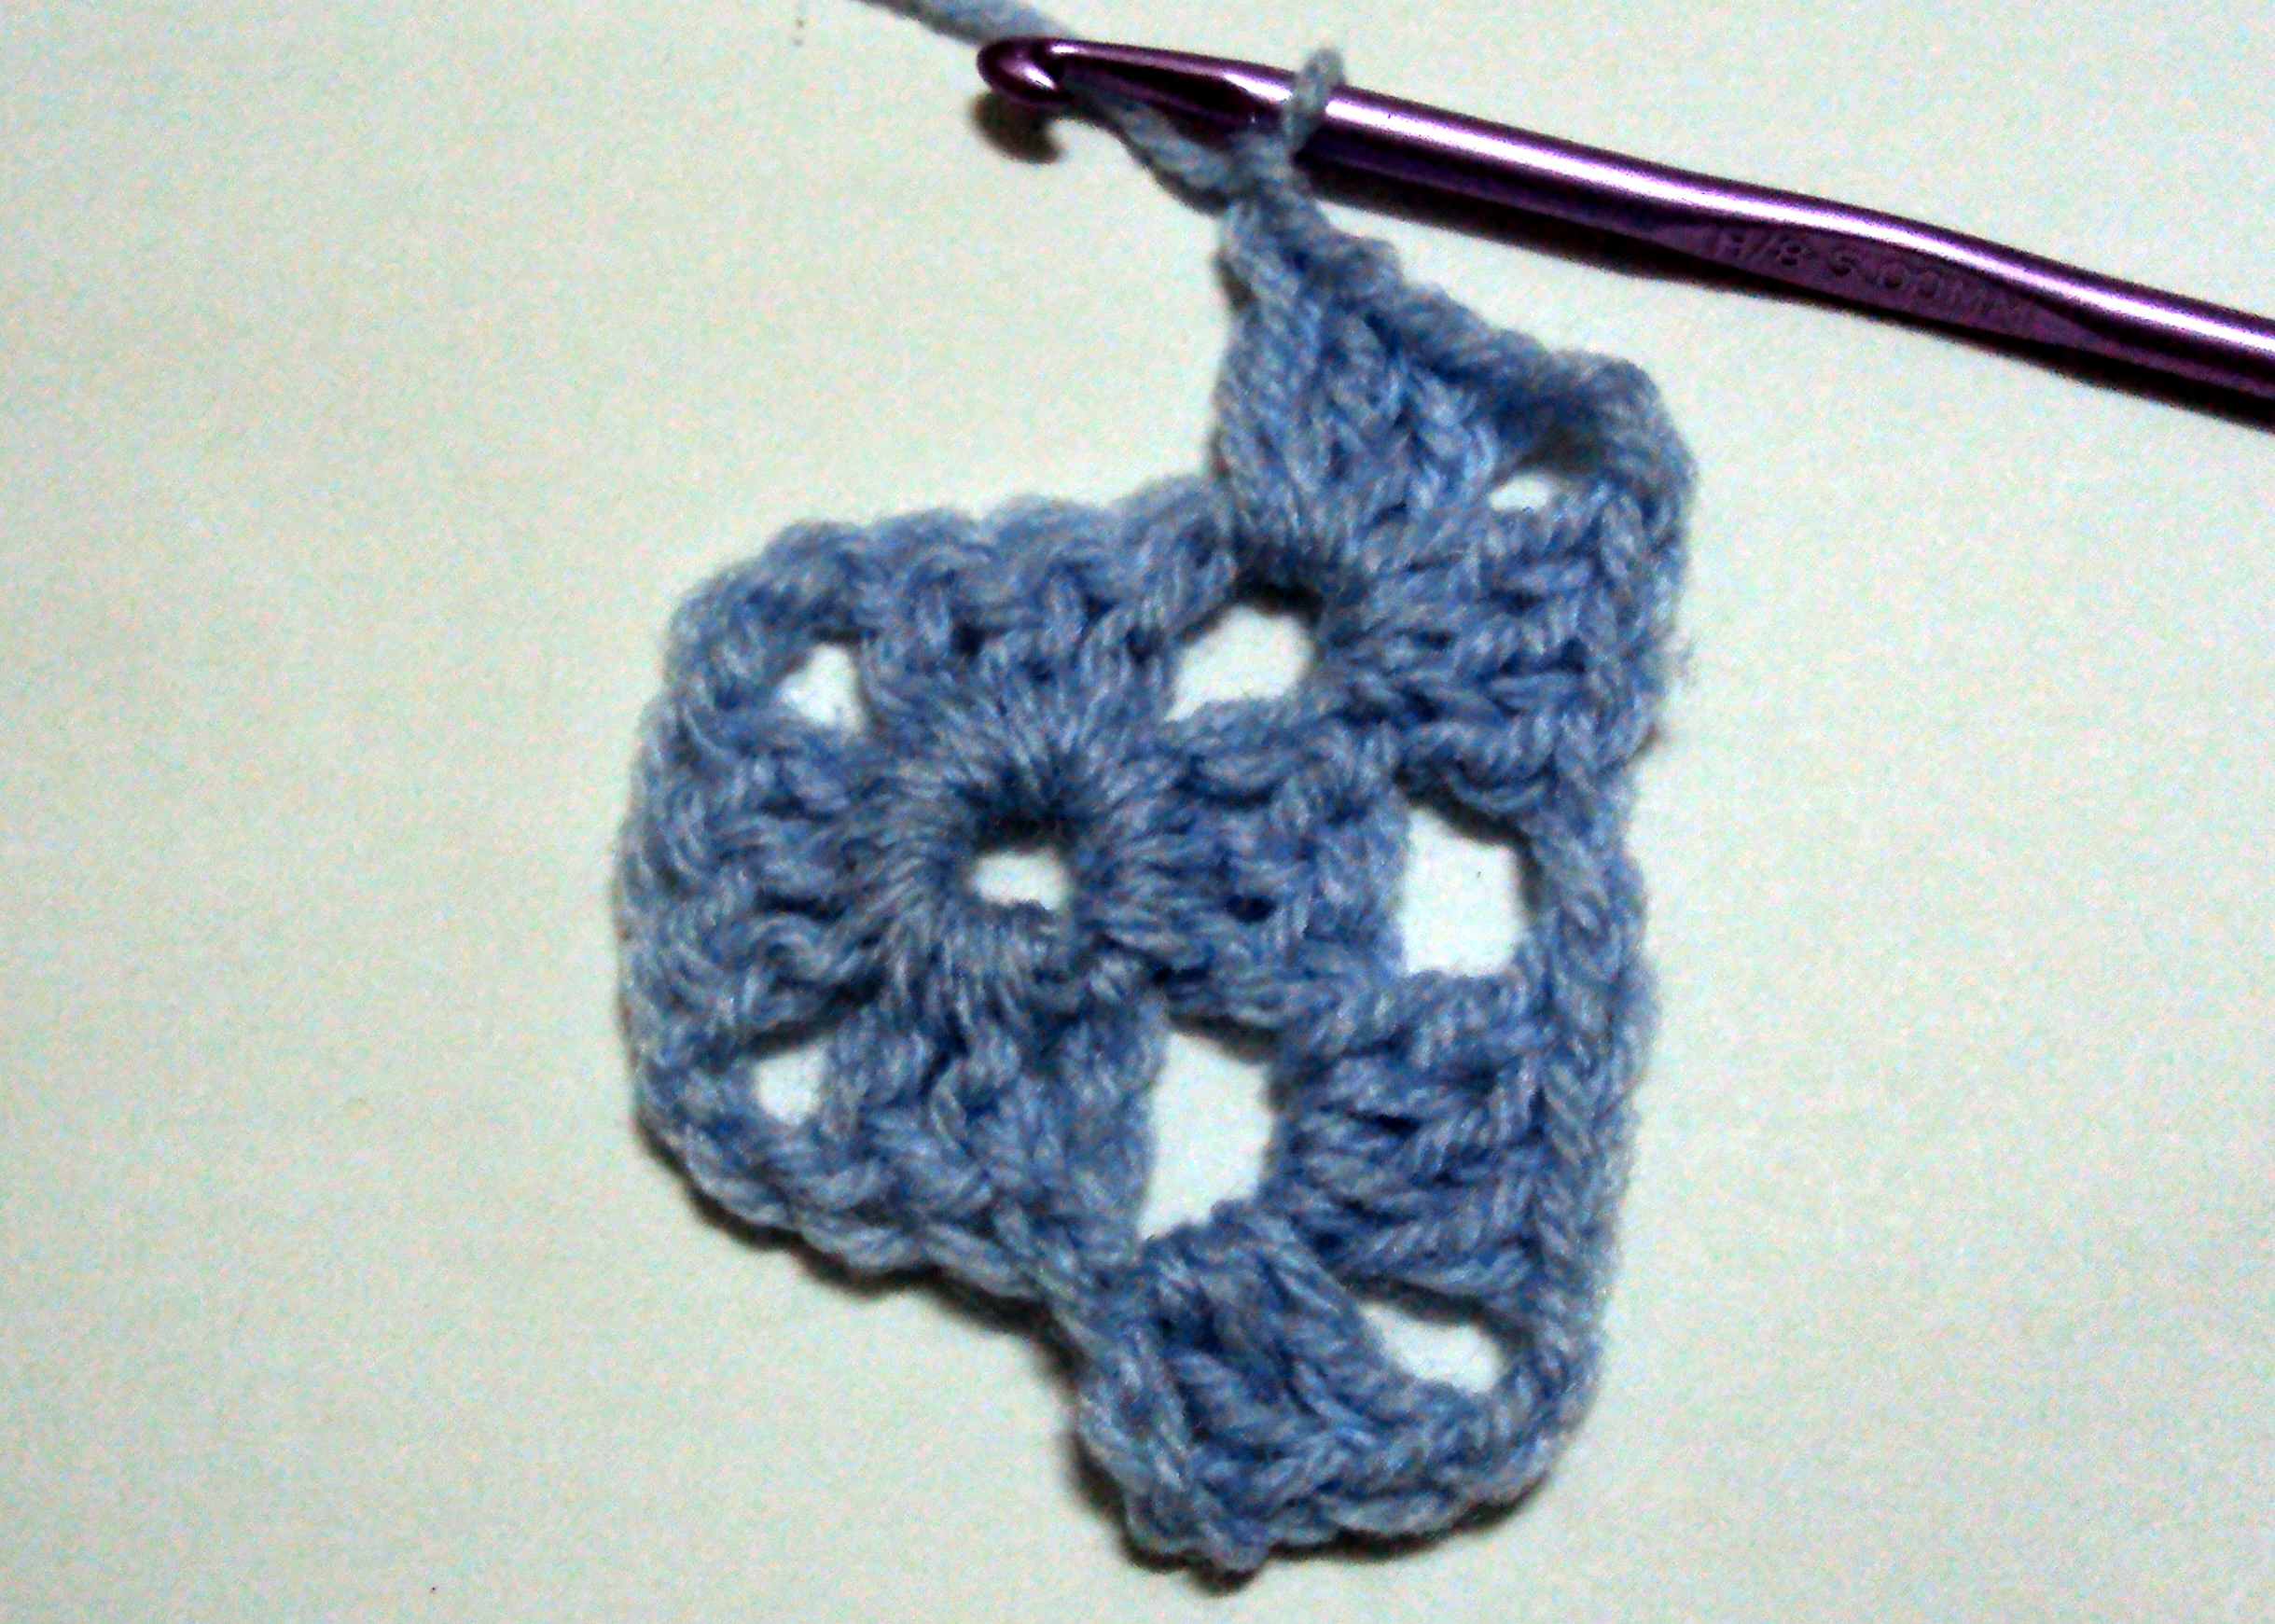
Round 4: ch 3, turn

2 dc in next ch-2 space
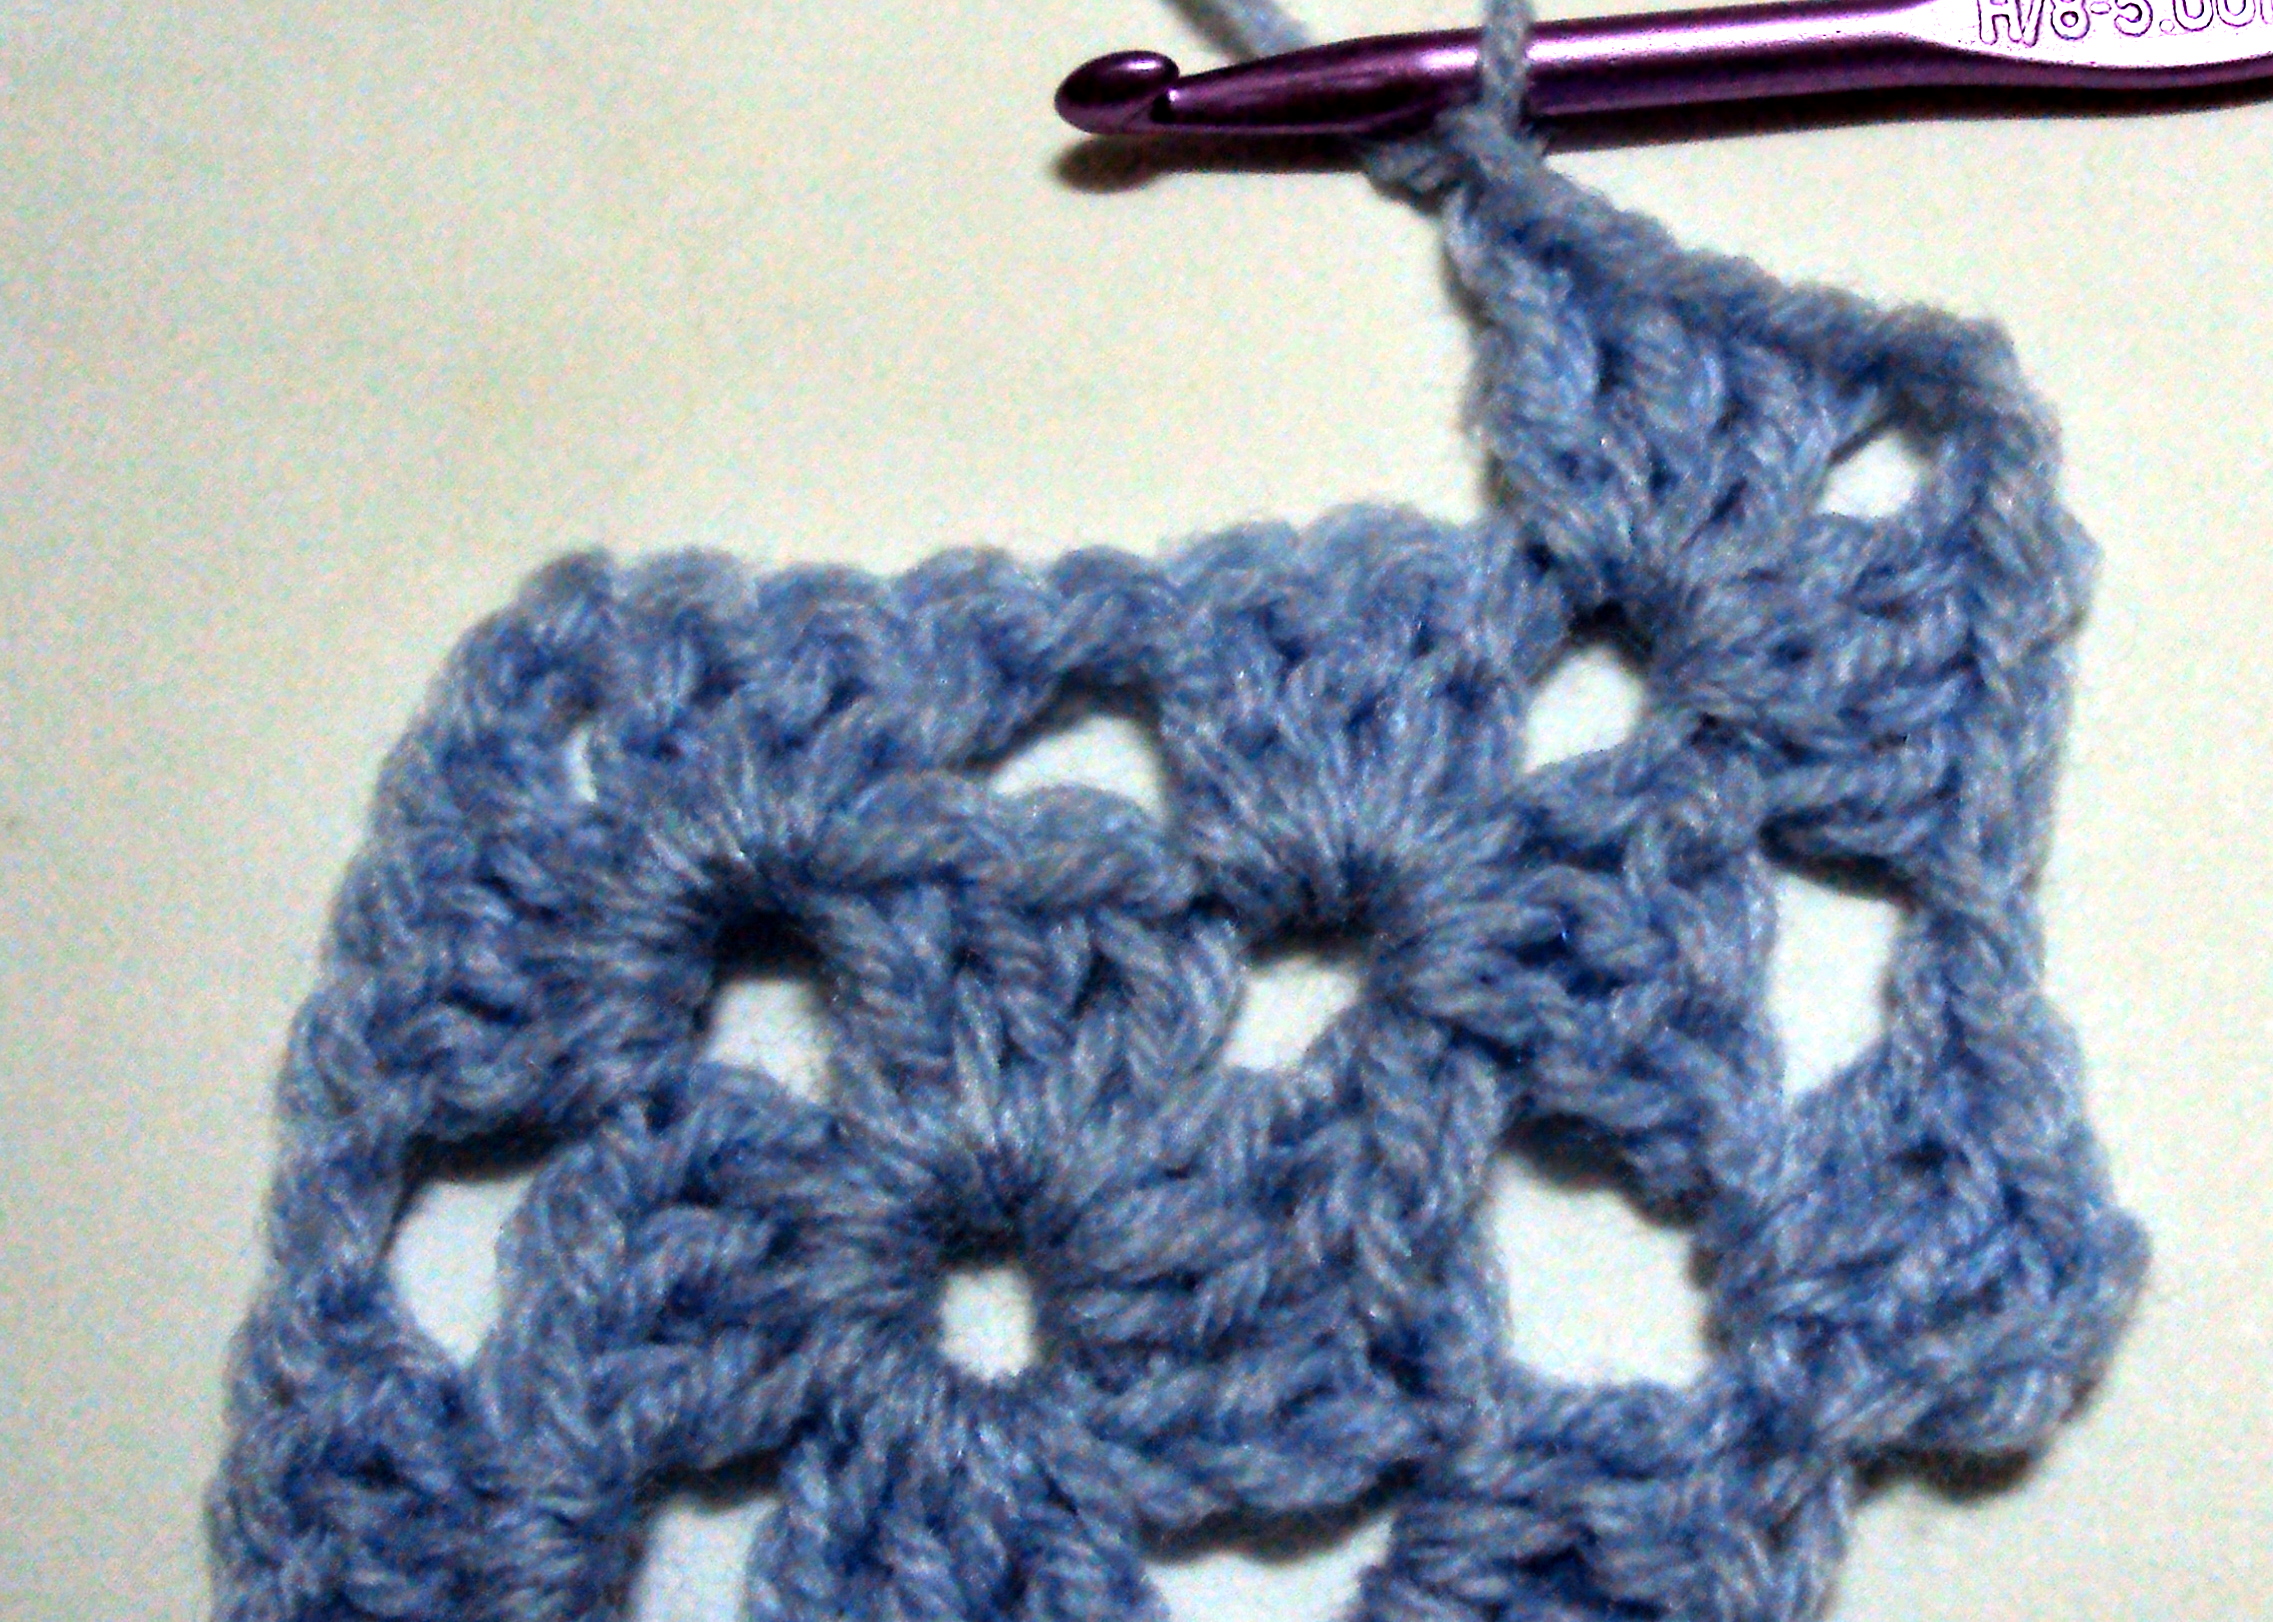
(ch 2, 3 dc in next ch-2 space, ch 2, 3 dc in same ch-2 space, ch 2, 3 dc in next ch-2 space) 3 times, ch 2, 3 dc in next ch-2 space, ch 2, 3 dc in same ch-2 space, ch 2, sl st in top of beginning ch-3: 36 dc

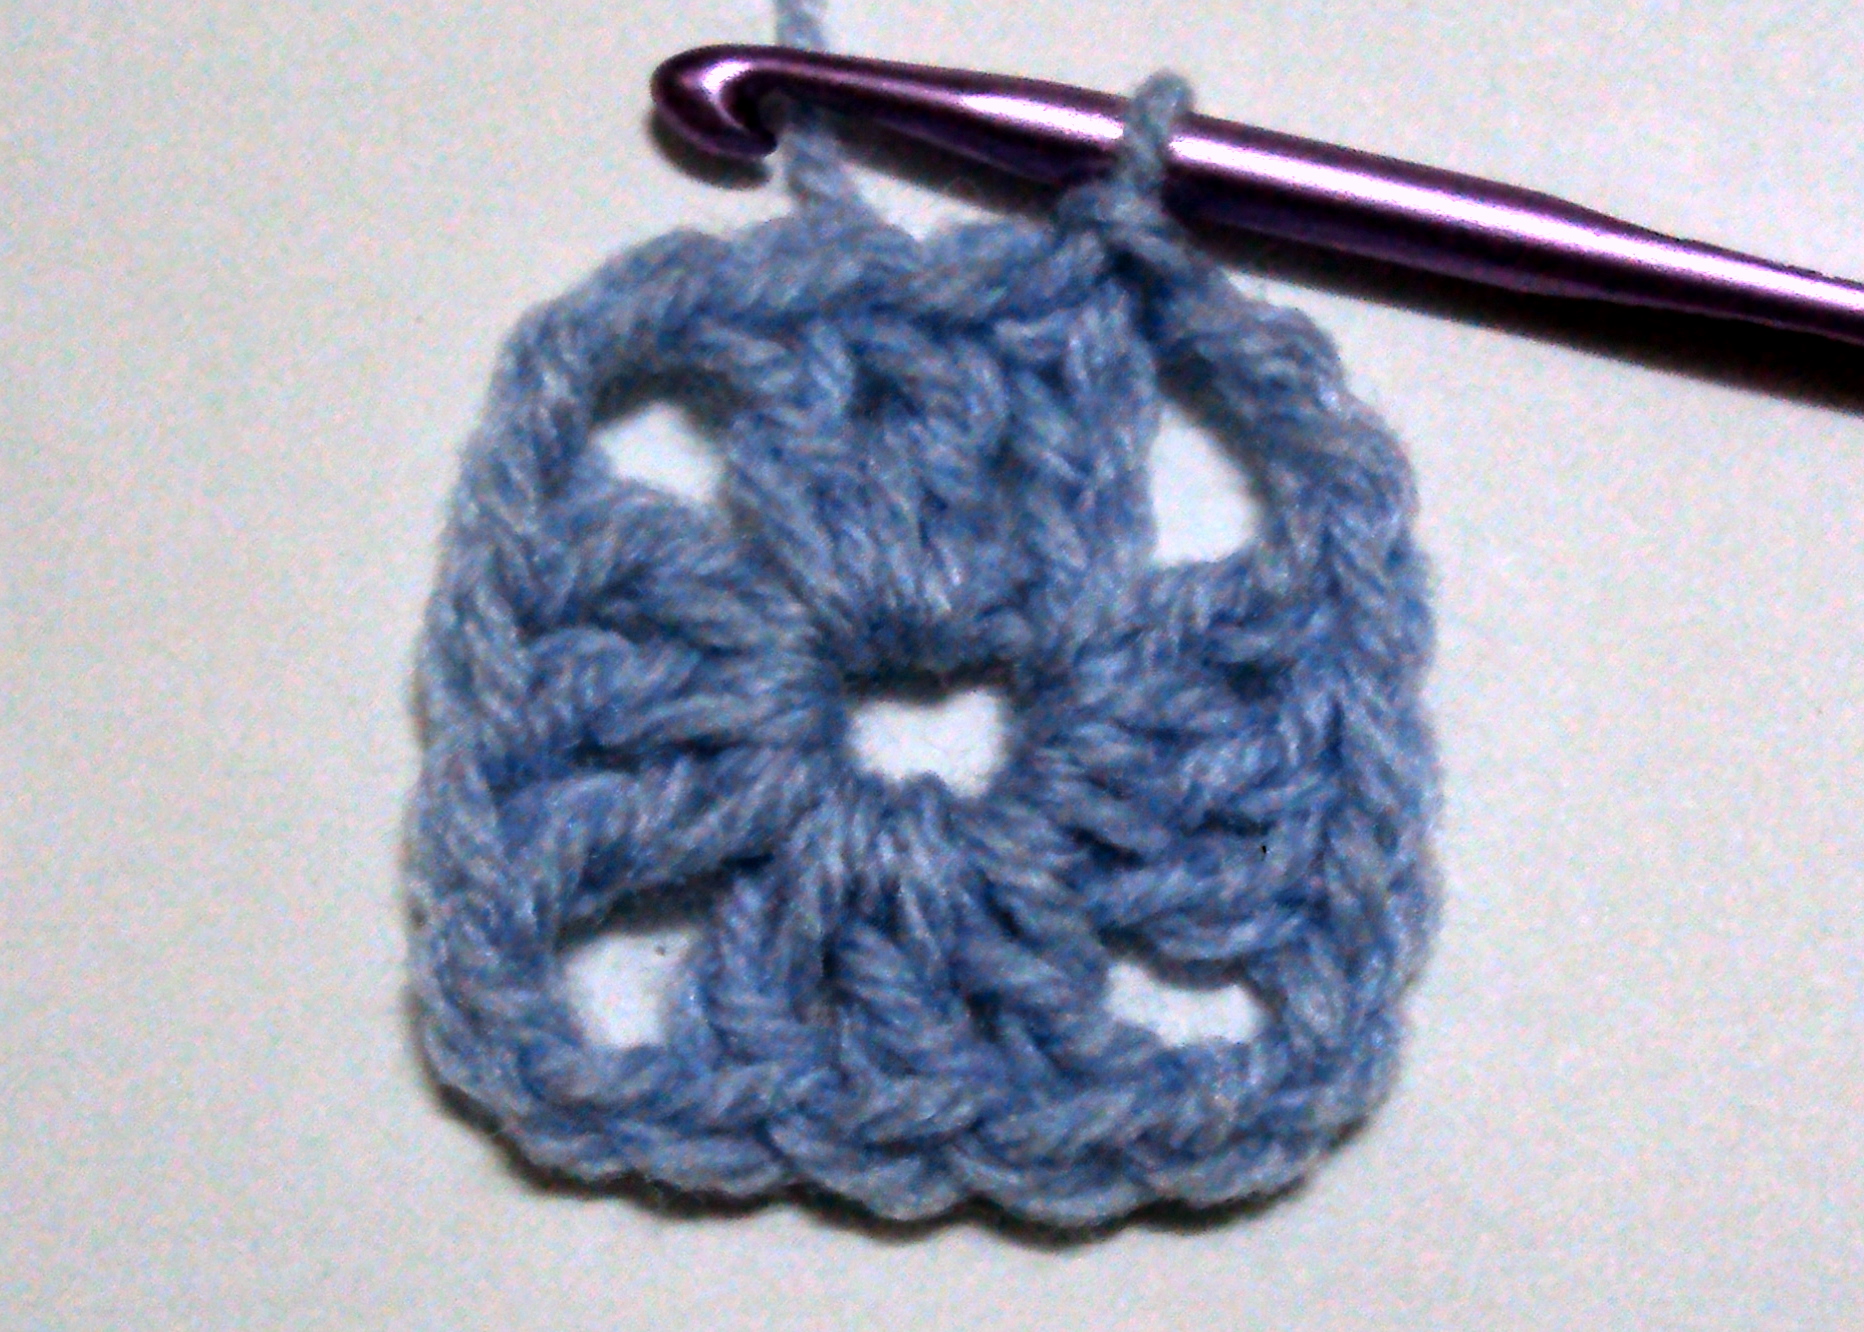
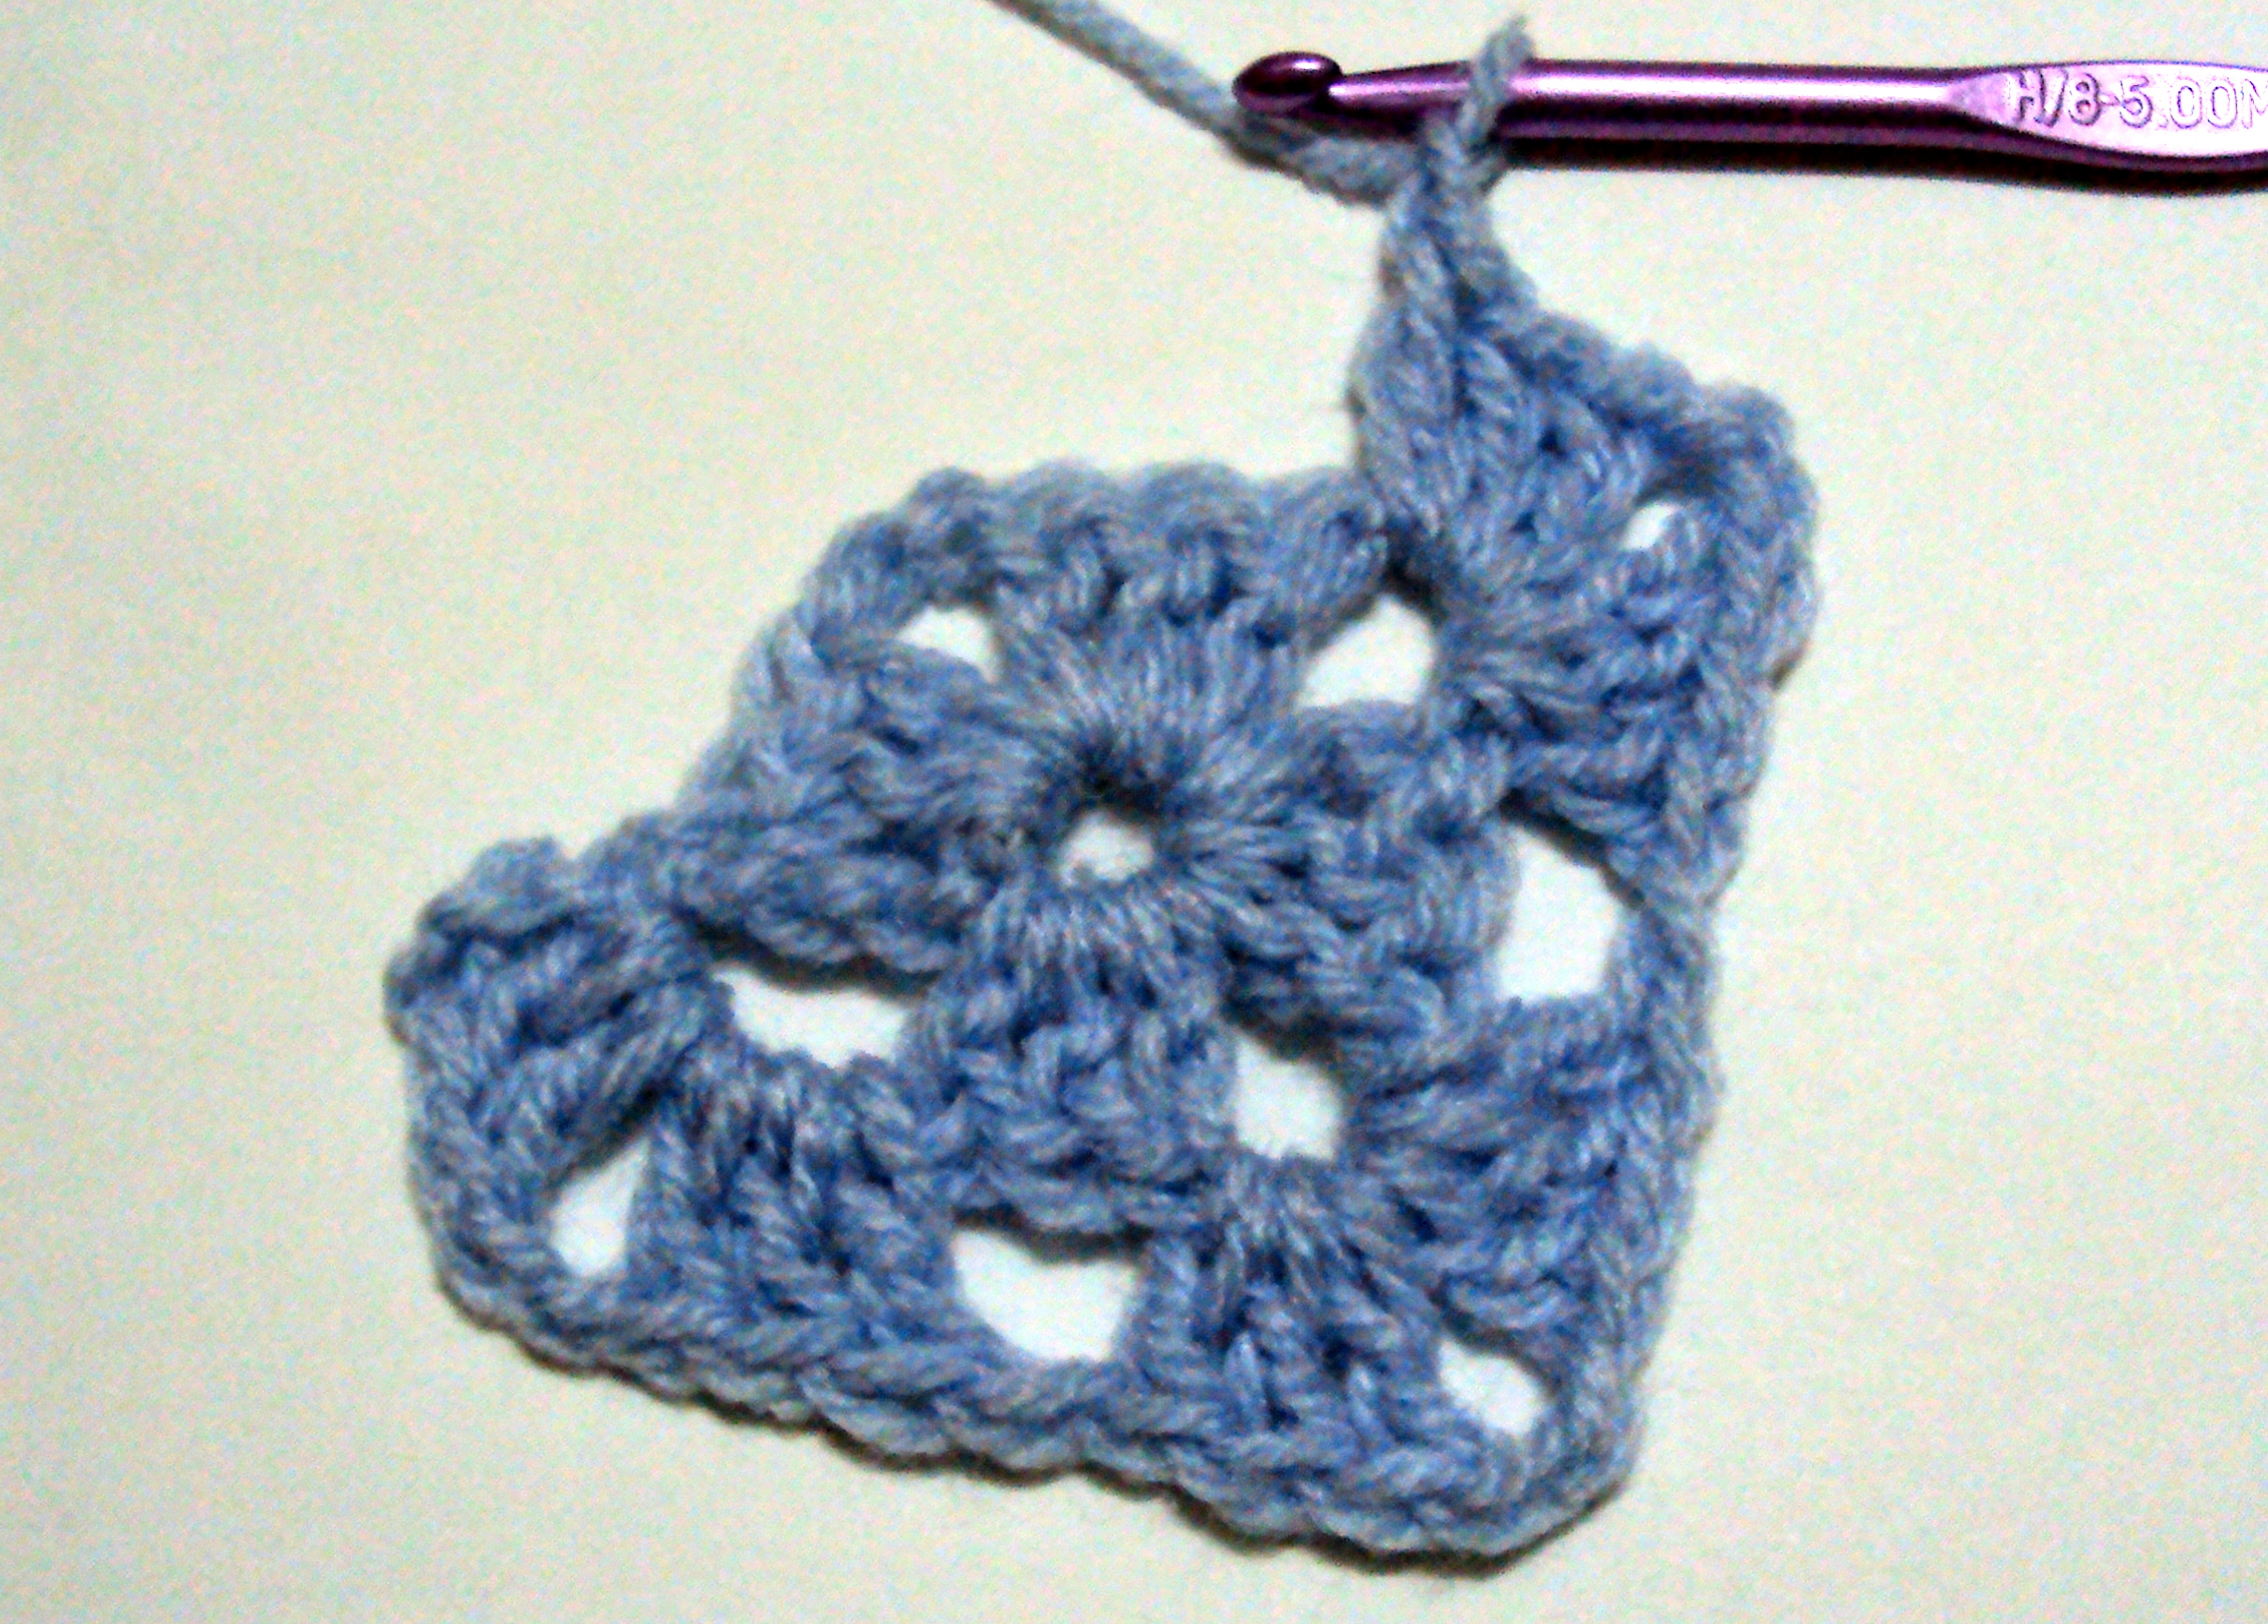
Each side should look like this, for round 4.
Continue working like so, to increase the size of your square. Just make sure of three things:
1. The corners should always be made up of (3 dc, ch 2, 3 dc) in the corner ch-2 space;
2. All the ch-2 spaces in between the corners have 3 dc; and
3. All the stitch groups are separated by ch 2.
I hope that was helpful! If you need anything, just leave a comment below.

Very clear instructions – easy to follow – even for an Australian (I read treble [tr] where you say double crochet [dc]), Generally when I have made grannies, I have used 1 ch spaces between groups of 3 dc (tr), and only use 2 ch in between the corner groupings. But I will make one soon using your method – will be interesting to compare results.
I love your blog! There are so many helpful instructions on it. Thank you!
Thank you for posting this step-by-step! It helped me a LOT!
Thanks so much for providing the instructions. I’m a beginner so I rely more on the step-to-step crochet instructions.
I needed this!
I have learned so much from you site. I am the process of doing this particular granny blanket and iy looks great.somany compliments.i am now crocheting a baby blanket.
[…] crocheted a granny square […]
Thank you so much for the help on the Granny Square. I use to make them but been a long time so i appreciate the help.
Thank You
Betty
Thank you for sharing this. I really love your website and your clear instructions! Can you tell me how you’d change colors for each new round?
Hi Yvonne, here a link to the tutorial on changing colors: How to Change Colors in Crochet
I hope it helps!
[…] made a queen size granny square […]
Years ago I made a blanket out of colourful granny squares which are joined with black double crochet (UK) (US – single crochet). Some of the squares are damaged and I have made some new ones. Any suggestions as to the best way of replacing the old ones? At the moment I am stitching them in, but I would prefer to crochet them. If I slipstitch them I get a ridge of colour between the 2 black rows. I would love to know what anyone thinks,
Thank you very much, I have finally GOT it,your pattern is the best’
Cheers Lorraine from Australia
Thank you, thank you. I need step by step instructions and none that I have told me to TURN!
I guess that is why we need to mark the right side, duh, with a different colored yarn. I have spent two frustating days trying to learn. Which is why I am so grateful for your website. I have put it in my favorite places.
Many thanks,
Sondra
Sondra, many patterns I have seen do not ask you to turn, but continue in rounds with the right side facing at all times. I guess this method gives you a more even look to both sides!
cheers
Jeanette
Australia
i need to be able to print this please
Jennifer, you can use the print function in your internet browser. For most browsers there’s a menu bar at the top, where you can click on “File†and then click “Printâ€. Each page on Crochet Spot is coded to be printer friendly so it’ll print out neatly.
Could you please tell me a neat way to join the squares with a different colour
marie
Hi Marie, here’s a fun and easy way to join the squares: Join-as-you-go Motifs
You can also ass an extra round of a new color around the squares, then sew them together with a whip stitch: How to Whip Stitch in Crochet
how do I start the granny stitch?
Hi Cindy, you’ll start with the “Ch 4, sl st in forth ch from hook forming a loop” that’s stated at the beginning of this tutorial. If you need help with certain parts, let me know and I’ll try and explain it in more detail.
Hi,Rachel ,first I can’t do it but again i try to make it and now I am so happy ,thank you
I learnt to crochet 50 years ago (omg! that long?) but haven’t touched it since and am about to become a granny for the first time so thought re-learning how to do granny square was very appropriate.
Your instructions are SO easy to follow I have practised two squares and crocheted them together.
Now for the real thing, my first crocheted baby blanket.
Thank you so much.
Finally a tutorial that I can follow. I have been trying for 12 months to learn to Crochet Granny Squares and this is the first one I have found. Thanks heaps
thank you on crochet tutorial, very helpful to me in trying new things about using crochet thread, crochet tutorial may I get that other little easier, because I have just started using a crochet hook these days, and I’m still confused, please help in make shapes other than square granny … thank you so much
I have been caught out reading one set of instructions and an entirely different meaning (ie double to me is actually treble)
but just wondering can one crochet a granny square with a us single crochet (to me that would be a double) or are they best done in double?
also it would be helpful if the version of instructions is mentioned (if not already) to avoid confusion between the US and UK names of stitches…
Hi Helen, all the patterns on this site are in U.S. terms. The traditional granny square is mostly done in double crochet, because the height of the stitches makes it easy to create the spaces that are in the square. You can create other squares with single crochet though.
WOW this site really helped me I’ve been trying to learn this for weeks and this tutorial really helped
How do you the double crochet into ring though I’ve tried but couldn’t figure it out
Are you referring to round 1? If so, you will make your stitches as you normally would, but insert your hook into the beginning loop each time. That way all the double crochets will be in the same loop.
Finally! A friend showed me the basics but when I got home I couldn’t get the math right. I did end up with a pretty ruffled flowery thing but not the granny square I was after. These are the best instructions and photos I’ve found, and they told me to turn! This is where I was inevitably going wrong. I’m an avid, self taught knitter who could not learn crochet – until now!
What do with the ends of the yarn? When you get the square to the size you want do you just slip stitch it off or do single crochet off? I am left handed and I love that the pictures show left handed ways. Easy instructions. Just wish it shows what to do with the ends.
Hi Lori, here’s a tutorial that will show how to finish your work in crochet: http://www.crochetspot.com/perfecting-your-craft-finishing-the-project/
In a nut shell, you’ll cut your yarn and weave the loose end into your work.
Thanks, I’m a beginner, as in only crocheted for the 1st time yesterday, and I found your steps so easy to follow. My granny square is almost perfect! Can’t believe it’s actually so easy 🙂 (but only with the right instructor!
Finally, clear instructions for making a granny square 🙂 Thanks a million!
Thank You! I’m not a rookie but just couldn’t get it…until I read your instructions and came upon the word “TURN”! A word that was not included in the crochet book I was using. Thank you for the great step by step tutorial!!
Thank You! My g’ma showed me how to make these when I was 10, and in the 35 years since, I’ve made many granny ovals, but never a square again. Totally makes sense now!
Thanks so much for your step by step instructions for the granny square. It is simple and easy to follow.
I am a beginner after many tutorial’s your’s isthe first that I really understood wen it came to where to put the hook starting the circle, nine was goin all big totally I cld see it went in the FIRST chain,I’m still gettin that problem doing beanie’s I still hve,nt succeeded:( ! also I’ve never known to TURN ! Wish I’d found you sooner, i’m expecting my first grandchild and wld love to make him a lovely shawl also other thing’s. As other tutorials hve reallocated confused me !!! I so wish I can subscribe to your channel !! Plz say you hve a link I can stay with you as you hve explained so clearly thx very very much xx goin to try n find a link to your page I really need it 🙂
I’m new to crocheting and been trying to learn the granny square for 2 days on different sites. I finally got it thanks to your instructions.
Hey, how bout assuming we DON’T know how to double crochet into a granny square and show that part too! If I KNEW how to double crochet I wouldn’t need to look this up! DUH!
Hi Kat, you can find the double crochet tutorial on this page: http://www.crochetspot.com/how-to-crochet/
Thanks for the great and easy instructions !! I’m gonna try making a large granny square afghan from this 😀
Thanks so much. I finally understand it.
Thank you soooo much for the granny square instruction! I’ve been watching on youtube and trying these darn things for two months and haven’t been able to get them right until I found your site!!!!!! I sat down and made six of them in about 45 minutes! Your instruction and photos are PERFECT! Didn’t think I would ever learn how to do these things. I’m a new to crocheting – and it was very frustrating constantly getting this wrong! LOL Again, thank you a million times over!
Fantastic~~ Very clear instruction and easy to follow. Thank you!!
I have made a granny square blanket before but, I forgot how to start and this will help me out because I have so many blankets that I need to make for people. I know that my family will love them after I get them all done. I love how someone can make a step by step process for crocheting a granny square blanket. This was very helpful. So thank you for taking the time to make the step by step process on how to crochet a granny square blanket.
thanks for the clear instruction!!!I just made my first granny and I am very pleased with the results.
Thank you from the bottom of my left-handed heart. I have looked at countless instructions and YouTube videos and your instructions and pictures are the first ones that actually show step by step that I understand. Thanks again!
Thank you from the bottom of my left handed heart I have looked at others this is the first one i actually understand i have yet to find other instructions for others
I’ve been looking for a way to make the granny square. I learned awhile back, but it’s been so long. Once I saw your tutorial, everything came back. Thank you for this! Much appreciated. 🙂
Hi Claire,
I found your granny square by accident – liked it – as I was not near my books. It was very helpful.
I wanted to ask I have been looking for plant hangers to make for my daughter’s home (Just married) but couldn’t find any interesting ones. I saw a granny square one but didn’t have a pattern. I will attempt to make it .
Do you have any sites or you might have crocheted plant hanger patterns?
thanks much
Sher
Hi Sher! Here’s a link to the plant hanger patterns we have: https://www.crochetspot.com/store/?pattern=149
Whenever someone posts about Granny Square help, I always refer them to your tutorial. I had been crocheting Grannies since the 70’s but now use your technique. It is so great. Thanks, Rachel
Thank you for the easy to follow instructions. I have made several attempts at granny squares before finding your blog. Simple and informative. I am well on the way to a blanket.