Free Crochet Pattern: Knot Stitch Shawl
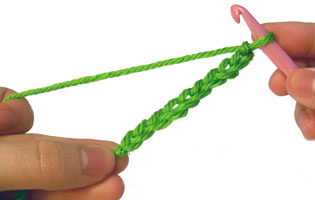
Posted in Free Crochet Patterns on April 18th, 2009 by Rachel Choi – 37 CommentsI love knot stitches! They are so easy and fast to make. This shawl is made completely with knot stitches that each measure 2 inches long. Of course you can make the knots stitches any length that you desire. To see what smaller knot stitches look like check out my knot stitch capelet that I made a while ago. The series of knots give a beautiful lacey and light look. If you don’t know how to crochet knot stitches yet, you can use the knot stitch tutorial. This shawl can be crocheted by beginners if you are just learning to do knot stitches.
Finished Size: 72†(183 cm) wide, 17†(43 cm) tall |
 |
|
Materials: Medium Weight Yarn (approximately 200 yards) Crochet Hook I (5.5 mm) |
|
Gauge: each knot stitch is 2†(5 cm) long
Crochet Pattern: Shawl
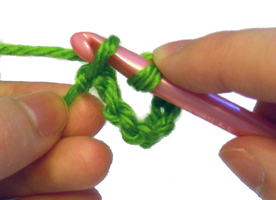
Start by making a chain of 36 knots or as many knots to form the desired width of the shawl
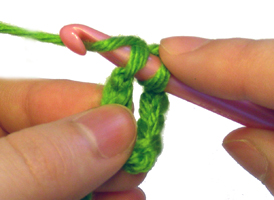
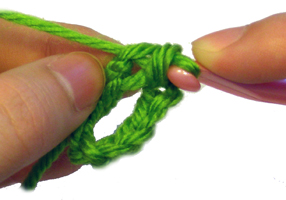
Row 1: make 2 knots, sl st in third knot from hook, (make 2 knots, sl st in next knot) across: 72 knots, 36 sl sts
Row 2: make 1 knot, turn, sl st in first knot, (make 2 knots, skip 1 knot, sl st in next knot) across: 71 knots, 35 sl sts
Repeat row 2 ten times or until shawl is the height that you want it. Note that for each row you do, there is 1 less knot and 1 less sl st than the previous row.
If you need help with crocheting this shawl, don’t worry! Just leave a comment and I would be glad to help.
This pattern was requested by a Crochet Spot Newsletter Subscriber! If you would like to receive the free newsletter too, just fill out the orange box at the top of this page.