
Free Crochet Pattern: Classic Baby Bib
By Rachel Choi – 16 Comments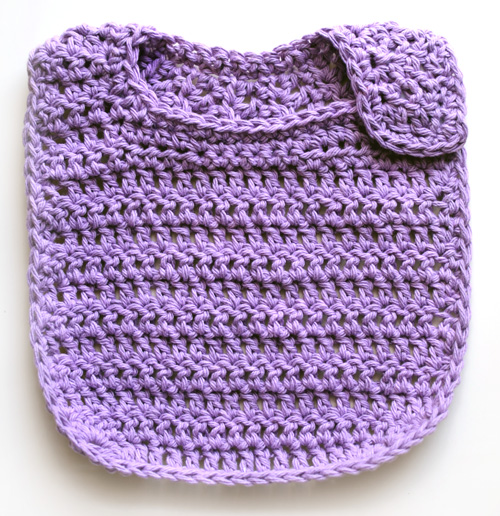
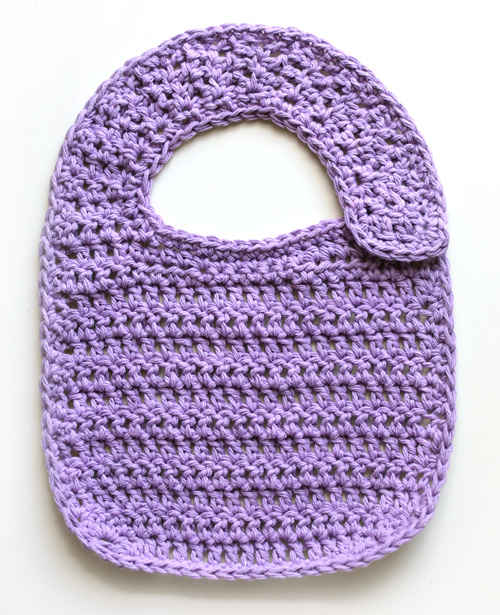
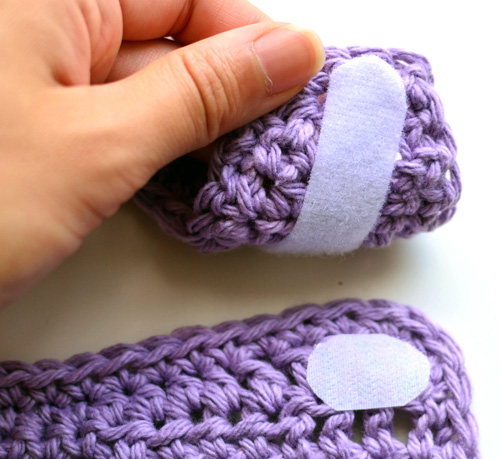
This classic style baby bib is crocheted all in one piece with no sewing required. It starts from the bottom of the bib and works its way up, ending with the curved strap. Fasten the strap with pieces of Velcro, which can be attached with fabric adhesive or sewn on with needle and thread, whichever you prefer. The bib features simple, rounded and curved edges for a classic look that’s great for boys and girls. This unisex bib can be customized by adding your own appliques or decorations to the front. Use 100% cotton or any machine washable yarn of your choice.
| Skill Level: |
Finished Size: 8″ (20.5 cm) wide, 7″ (18 cm) long not including strap
|
Materials: Medium Weight Yarn (approximately 50 yards) Crochet Hook J (6.00 mm) Velcro |
|
Gauge:
9 sc = 3″
4 rows = 2″
Gauge Swatch: 3″w x 2″h (7.5 cm x 5 cm) ch 11.
Row 1: dc in third ch from hook and in each ch across: 9 dc
Row 2 – 4: ch 2, turn, dc in each dc across: 9 dc
Finish off.
Crochet Pattern: Classic Baby Bib
Row 1: ch 16, 3 dc in third ch from hook, dc in next 12 ch, 3 dc in last ch: 18 dc
Row 2: ch 2, turn, 3 dc in first dc, dc in next 16 dc, 3 dc in last dc: 22 dc
Row 3 – 11: ch 2, turn, dc in each dc across: 22 dc
Row 12 – 13: ch 2, turn, dc in next 4 sts, hdc in next 4 sts, sc in next 6 sts, hdc in next 4 sts, dc in next 4 sts: 22 sts
Row 14: ch 2, turn, dc in next 3 dc, dc2tog: 4 dc
Row 15: ch 1, turn, sc in next st, hdc in next st, dc in next 2 sts: 4 sts
Row 16: ch 2, turn, dc in next 2 sts, hdc in next st, sc in next st: 4 sts
Repeat rows 15 – 16, 10 more times or until the strap is as long as desired.
Row 17: ch 2, turn, dc2tog 2 times: 2 dc
Do not finish off, continue with border.
Border
Single crochet evenly around the entire bib, working along the top of the strap, then down along the side of the bib, across the bottom of the bib, up along the other side of the bib, across the top of the bib, then along the bottom of the strap. Slip stitch into the first single crochet on the border to join. Finish off.
Apply Velcro to bib with fabric adhesive or sewing needle and thread.
Need help while crocheting your bib? Leave your questions below!

On rows 15-16, + 10 more times, what stitch is done in the last 4 sts?
Thank you
Phyllis uhh s
Hi Phyllis! There are 4 stitches total on each of the rows. The number after the colon is the stitch count for the row, you don’t have to work another 4 stitches. Let me know if you need more help with it.
Duh me… now I am lefty, so my work is backwards to right,,, so do I reverse rows 15 +16 instructions? Because my sc st was ending up on the outside of bib.
Thank . You for your help
Even if you are left handed you should work the instructions as they are written. On row 14, you are starting at the edge of the bib and making 4 stitches towards the inside of the bib. Then on row 15 (starts with the sc), you are working from the inside of the bib towards the edge of the bib. If you accidentally skip rows, it may result in the sc ending up on the outside, which you do not want.
This is cute and looks quick and easy. Since it wouldn’t technically protect clothes from feeding spills, i think it could be a cute “binky catcher”. You could add a simple pouch/pocket/shelf whipped up and sewn on around the bottom edge and slightly up the sides.
Nice and simple, thank you very much Rachel
So cute thank you! Can’t wait to whip up some of these for my baby girl due this November!
Thanks Renae! And congrats on your new baby girl!!!
I am a little confused on line 14 i understand you dc in the next 3 stitches, but then it says dc2tog what do you do for the rest of the row? and then it says 4 dc
Hi Joanne! You will have a total of 4 dc on row 14, that is what the 4 dc at the end of the row means. The dc2tog counts as 1 of the dc. You will leave the rest of the row unworked. Let me know if you need more help with it!
How would I enlarge enlarge this pattern to accommodate and adult.
You can make it wider by adding more chains to the 16 chains on row one. The increases on each row will still be the same, at the beginning and end of the rows.
To make the bib longer, add more rows during rows 3 – 11. Row 14 on will be the same to create the strap, unless you want a wider strap then you can dc in more than the 3 dc instructed on row 14.
I’m not sure how many rows or stitches you need to add since I haven’t made it in adult size, so you may want to try it on as you go.
I love this pattern it was nice & easy. What age do these bibs fit up to?
Hi Toni! I would recommend them for newborn up to 1 year. You can also adjust the strap length and the bib length by adding more rows if you want to make it larger for a bigger kid.
Thank you for this pattern!! I’ve tried several bib patterns by others and could not get the strap to come out right. Your instructions are clear and you’ve provided an easy means to accomplish the strap. Again, Thank you!
Hi! Lovely design, was just wondering whether this is a UK or US based pattern? Thanks