
Crochet Technique: Hairpin Lace – Part II
By Corinne Munger – 14 Comments| As promised, here is the continuation for Crochet Technique: Hairpin Lace – Part 1. In this post, I will show you, through pictures, how to achieve this fascinating lace. I’ve learned a lot this last week trying to accomplish the little sample to the right. It turns out, this is one of those crafts that takes a special kind of patience – but the only way you can get this lace. Is it worth it? Let’s find out…. | 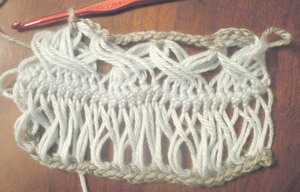 |
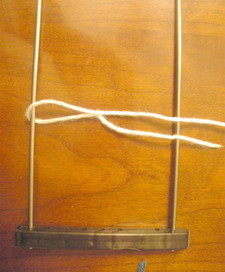
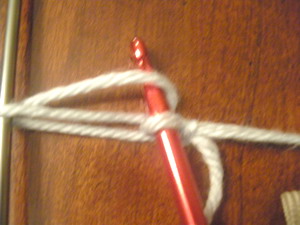
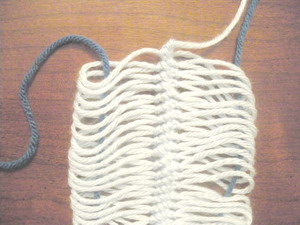
Before beginning, there is something very important you must incorporate into your piece. Since you are dealing with a large amount of “twisted” loops, you will need to keep them from tangling with each other once your item is removed from the forks. In order to do this, you will need to run a piece of yarn (preferably in a contrasting color) down the sides of each fork. I started by tying a length of yarn the approximate size of my finished piece to the top of the fork – as pictured:

A much more advanced user of this technique doesn’t necessarily need to do this, but I would recommend doing this if you’re just starting out!
As you make your lace, the side yarn will automatically be woven inside the loops, keeping them straight – should you decide to attach them later

Let’s begin!
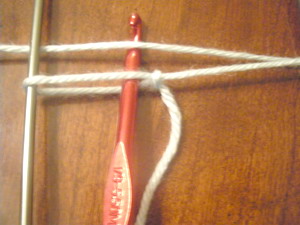
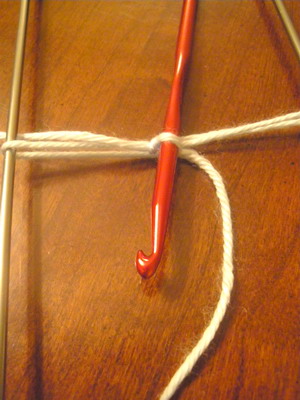
Using your loom, you begin with a simple slip knot. The loop is then placed over the left fork and placed so that the knot is in the center. This is where all the crocheting will take place, in the center. The yarn is crossed over the right fork and then brought to the back in order to make the first stitch.
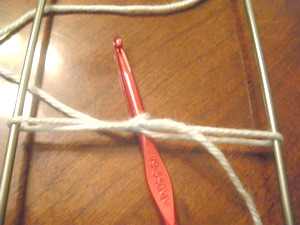
You will insert your hook into the loop ON THE LEFT SIDE ALWAYS, FROM THE BOTTOM GOING UP, you then grab the yarn that you wrapped towards the back and will make a single crochet.
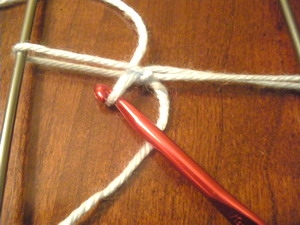
After the single crochet is made, you will turn your hook 1/2 turn counter clockwise and “flip” the hook so that it is now in the back of your work. THIS IS A CRITICAL STEP IN THE WHOLE PROCESS. If the hook is not turned, you will not be able to crochet……
See how the hook is now in the BACK of the work?
You will now turn the whole loom from left to right, holding the yarn in your hand so that it wraps around the right fork again. Now the crochet hook will be in the front of the work, your yarn will be wrapped around towards the back and you can make your second and all other subsequent stitches. It will resemble something like this:
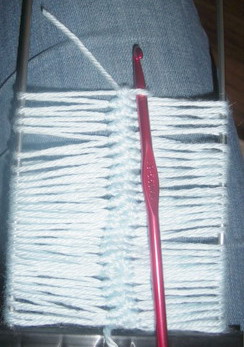
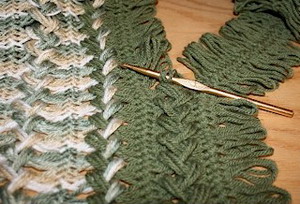
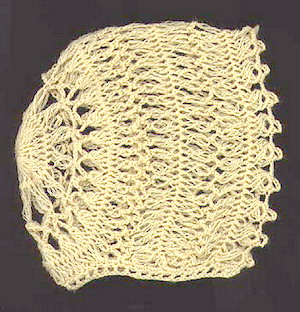
After crocheting all the loops you need for your project (I am currently making a scarf which requires 335 loops on EACH SIDE – 670 total), you will end your lace by inserting the end of the yarn through the last single crochet made (just as you normally end in crochet). Remove your work from the forks being careful not to remove the yarn running through your loops! Here is a completed sample:
I urge you to find a video online of this technique to help explain this, as just taking still pictures of this cannot capture the motion. Here’s a video from Stitch Diva Studios that I enjoyed watching:
You can then take your finished piece to complete a multitude of projects. You can finish the edges by crocheting the loops with crochet stitches of your choice. On the bottom of this sample you’ll see the edge crocheted in single crochet. On the top, I learned how to twist and pull loops to create the “X”.
The instructions to do this are long and cannot be incorporated into this tutorial but can be found with an internet search. As I am still learning this involved but rewarding technique, I’m not qualified to lead you in this endeavor but hopefully, you’ll find this technique interesting enough to explore more on your own!
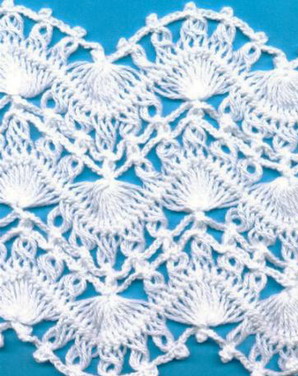
Here are a couple of examples I found on the internet of some really great work, which tells me I have a LONG way to go! Ha ha ha! ENJOY!
Do you make hairpin lace? Do you have any suggestions for our readers?

Oooh, I’ll have to go buy a loom now!!
You’re doing great, Corinne, and can’t wait to follow you on the rest of your hairpin lace jouney! 😀
I do hairpin lace periodically as one of the many techniques that I enjoy. When working with a large number of loops (such as you did with this scarf — 335 on each side) I use safety pins to gather 10 loops at a time (while still on the loom). I make sure that each group of 10 loops is directly opposite the 10 loops on the other side of the loom. This way, I can easily keep track of the number of loops completed and gauge how many more loops I will have to make. This also worked to keep the loops properly “twisted” — though I’m intrigued by the contrasting yarn idea you came up with.
Aren’t we crocheters innovative?
I love the technique with the safety pins and this also helps with counting the stitches much quicker. Thank you for your idea!
Thank you, Shellie, that is a great tip!
Golly, I can remember doing hairpin lace afghans and shawls in high school and college (just had my 40 hs reunion last year so you know it has been a long time). I made medallions for the shawls.
Thank you, Corinne, for your clear instructions! I am waiting for my loom to arrive, so I can start trying too…
Just came across my mother’s loom – complete with instructions and a book of patterns while looking for something else. This is going to be my spring project. We are going away for 3 months and no room in the suitcase to take another craft with me. Taking a piece of needlepoint I bought in the 80’s to work on. Time I got at it. Looking forward to getting back to the loom crocheting. Not sure what my first project will be.
This is great! I have a couple of friends who are very advanced knitters and crocheters and they both have shawls in this pretty lacy look.
And although I’ve been meaning to try my hand at hairpin lace I feel a little daunted. After seeing your attempts, I’ll definitely be giving it a go, soon. Thanks 🙂
I have had one of these looms for such a long time but I haven’t had much success with it yet. However, I should keep at it! 🙂
You’ve gotten me “hooked” on hair pin lace now!! I bought myself a loom the other day and just finished an impromptu scarf!! 😀
Can’t wait to see what else you come up with, Corinne!!
Thank you so much for your note! It really tickles me when I know I helped someone learn something new! I have a new post coming out soon with yet another technique that you might like. Keep watching……..
Thanks again!
I’ll be waiting with anticipation!!! 😀
I found a beautiful shawl patter and thought I’d share it with ya’ll- http://www.redheart.com/free-patterns/womans-hairpin-lace-shawl
Hopefully this will be one of my upcoming projects!
my grandma taught me to do the some 40 plus yrs ago… I love doing it… I had my dad make me a loom out of dowels and a couple blocks of wood…. worked wonderful…. wish I still had it..
Thank you for a wonderful lesson!! Now I hope I will be able to crochet hairpin lace