
How to Crochet: Tunisian Reverse Stitch (Trs)
By Caissa "Cami" McClinton – 1 CommentHooray for Tunisian Crochet! Since I gave you 3 Reasons to Try Tunisian Crochet, have you done it yet? Well, if not, grab your long crochet hooks and join me! A while back, Rachel posted a great photo tutorial of the “setup row” of Tunisian crochet, which is the standard first row in each Tunisian crochet project. The tutorial can be found as steps 1-13 of the Tunisian Simple Stitch Tutorial.
Please note: Steps 11-13 of the Tunisian Simple Stitch Tutorial could also be called, “How to Work the Reverse Pass in Tunisian Crochet”. These steps remain the same in all basic Tunisian crochet patterns.
Rachel also posted the beautiful Tunisian Knit Stitch Tutorial! Today we’re going to add a stitch to our library by learning the Tunisian Reverse Stitch, abbreviated (Trs).
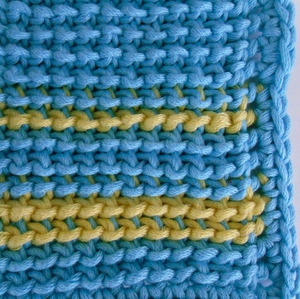
Tunisian reverse stitch swatch worked in bulky yarn with sc border.
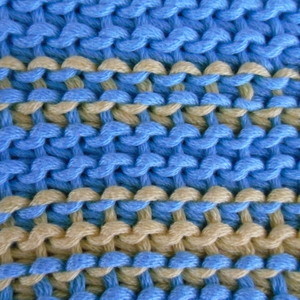
Close up of back of Tunisian Reverse Stitch Swatch
For the purpose of practicing this skill, we’ll make a small, rectangular swatch in this tutorial. Yarn and hook size don’t matter for this practice swatch.
You may mouse over images for left-handed views.
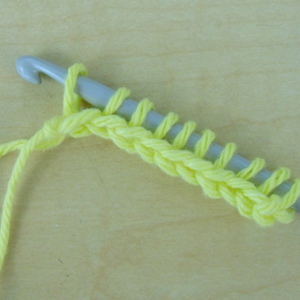
Setup Row: Ch 10 and work steps 2-8 of the Tunisian Simple Stitch Tutorial . (10 loops on hook)
The photo below shows the forward pass of the setup row completed.
Work reverse pass as shown in steps 11-13 of Tunisian Simple Stitch Tutorial.
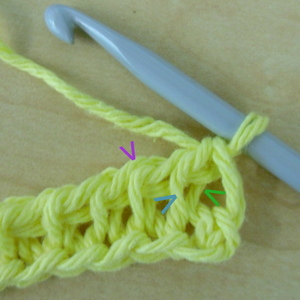
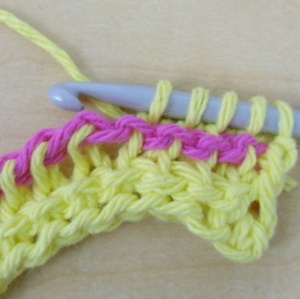
The photo below shows the reverse pass of the setup row completed. The green arrow is pointing to the back bar of the second stitch. The blue arrow is pointing to the front bar of the second stitch. the purple arrow is pointing to the chain that is created by the reverse pass.
Note: In Tunisian crochet, the first stitch of the forward pass is actually the edge, so we won’t work there, or else we’ll be making an increase.
Rows 1-10: To work forward pass, making sure the working yarn is between the hook and the work, insert your hook into the back bar (green arrow points to it in the diagram above) of the second stitch. Yarn over. Pull up a loop. Repeat down the row. Notice how the chain flips to the front of the work. (10 loops on hook)
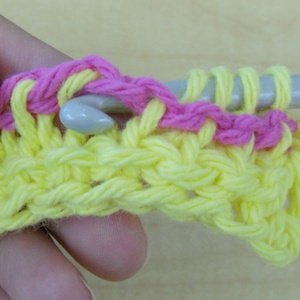
The photo below shows the forward pass of the third row. Since the previous reverse pass was worked in pink, you can see how the chain is flipping to the front. It is this chain that gives Tunisian revers stitch its richly textured look.
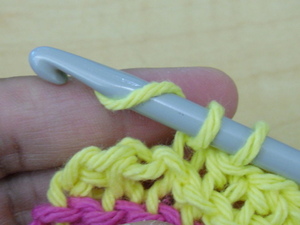
The photo below shows the hook working from behind under the chain.
Work reverse pass as shown in steps 11-13 of Tunisian Simple Stitch Tutorial.
Finishing Row: To finish off your Trs swatch, after the final reverse pass, insert your hook and pull up a loop as if to make a Trs. Yarn over and pull through as though you are making a regular sc. Repeat down the row. Tie off, break yarn, and weave in ends. (10 sc)
The photo below shows this is progress.
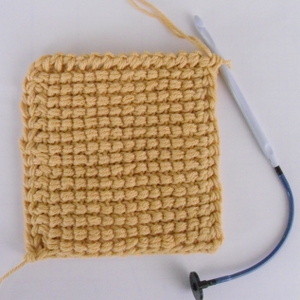
Front of 14-stitch Tunisian Reverse Stitch swatch using double-stranded yarn

Back of 14-stitch Tunisian Reverse Stitch swatch.
Tunisian reverse stitch is unique, and I think you’ll find some great ideas if you give this tutorial a try. I think it would make a luxurious washcloth because of its shape and deep ridges. What will you use Trs for? If you have any questions or need any help, please leave a comment below!

I learned this as Tricot purl stitch/garter stitch.